


bikerbiker Aliwheels is a leading motorcycle parts supplier offering free shipping anywhere in the world on orders above $300. Please note that all of our motorcycle parts and accessories are certified and tested. With more than 10,000* products to choose from this is your one place to get the motorcycle part you need. Browse our vast inventory of motorcycle radiators, fairings, clutch plates, headlights, chains, and sprockets. biker

Free Shipping over $300

Support 24/7

Secure Payments

Hot Offers

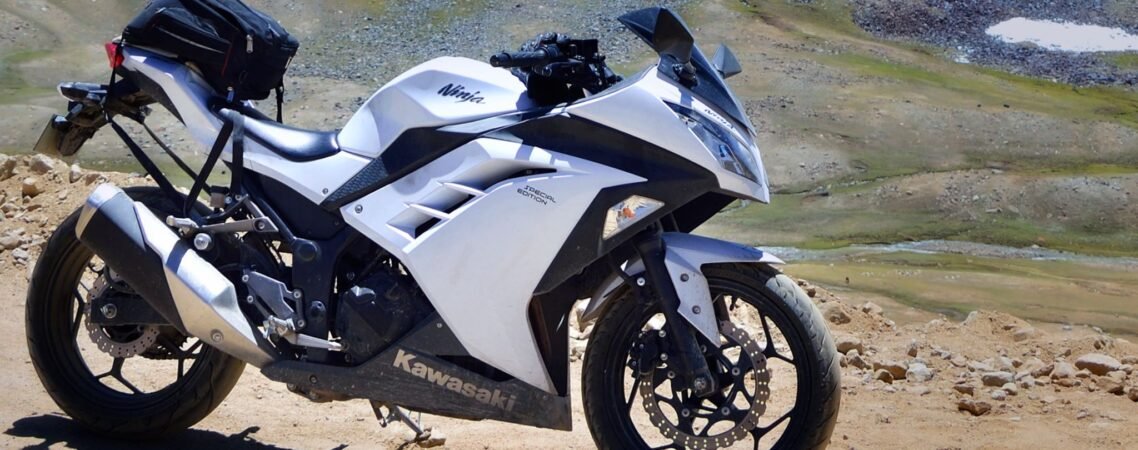
Kawasaki is known for tough builds and capable motorcycles. The Ninja series, the Z lineup, the Versys adventure bikes, and the brutally powerful H2 all share a reputation for performance and durability.

But durability is not a maintenance alternative. Even the most well-designed motorcycle degrades without proper care. Riders who maintain their Kawasakis get exceptional durability. Those who do not maintain experience preventable failures.

Here is a practical, experience-based guide on how to maintain your Kawasaki for the long run.

Know Your Specific Model’s Requirements

Kawasaki’s lineup spans everything from 125cc learner bikes to turbocharged superbikes. Each motorcycle has specific maintenance requirements, service intervals, and known wear areas.

A Ninja 400 has very different service demands from a Z900 or a Versys 1000. The engine architecture, cooling system, lubrication volumes, and component specifications all differ.

Start with the service manual for your specific model and year. Kawasaki service manuals are detailed and accurate. Every torque specification, fluid type, service interval, and procedure is documented. Generic advice from forums is useful context. The service manual is the actual authority.

If you do not have your manual, Kawasaki dealer parts departments can supply it. Digital versions are also available for most models.

Engine Oil is the foundation of everything

Kawasaki engines are engineered to tight tolerances. They need clean oil of the correct specification to function as designed.

Kawasaki recommends 10W-40 or 10W-30 mineral or synthetic oil, depending on the model and climate. Higher-performance engines in the Z series and Ninja range often benefit from full synthetic oil. Check your manual for the correct specifications.

Service intervals for most Kawasaki street bikes are 6,000 km or six months under normal conditions. For high-performance models like the Ninja ZX-10R or H2, shorter intervals of 3,000 to 4,000 km under hard use are more appropriate.

Change the oil filter with every oil change. This is non-negotiable. A filter holding contaminated oil from the previous service compromises the fresh oil immediately.

When draining, allow full drain time. Three to five minutes minimum. A hurried drain leaves a significant volume of contaminated oil in the engine.

Inspect the drain plug magnet when changing oil. Some Kawasaki engines use a magnetic drain plug that captures ferrous wear particles. Minimal fine residue is normal. Any fragments larger than fine powder warrant closer investigation.

Cooling System Maintenance on Liquid-Cooled Models

Most modern Kawasaki street bikes are liquid-cooled. The cooling system is often maintained poorly or ignored until it fails.

Coolant degrades over time. The corrosion inhibitors that protect aluminum components in the engine and radiator deplete with use and age. Old coolant with depleted inhibitors allows electrochemical corrosion inside the cooling passages.

Kawasaki recommends coolant replacement every two years regardless of appearance. Coolant can look normal while its protective properties are exhausted.

Use only Kawasaki-recommended coolant or a compatible premixed coolant that meets the specifications for aluminum engine cooling systems. Never use automotive coolant unless it specifically states compatibility with aluminum engines and motorcycle cooling systems.

Inspect the coolant hoses annually. Look for surface cracking, hardening, or soft spots that indicate internal degradation. Hoses that feel stiff or show surface cracks are close to failure. A coolant hose failure during a ride causes rapid engine overheating.

Check the radiator fins for debris blockage. Road insects, leaf debris, and road grime accumulate between the fins and reduce cooling efficiency. Clean carefully with low-pressure water or compressed air directed from behind the radiator.

Chain Drive Maintenance

Most Kawasaki motorcycles use chain final drive. The chain system requires more attention than any other drivetrain component on your bike.

Clean and lubricate the chain every 500 to 800 km under normal conditions. After rain, immediately. After every wash.

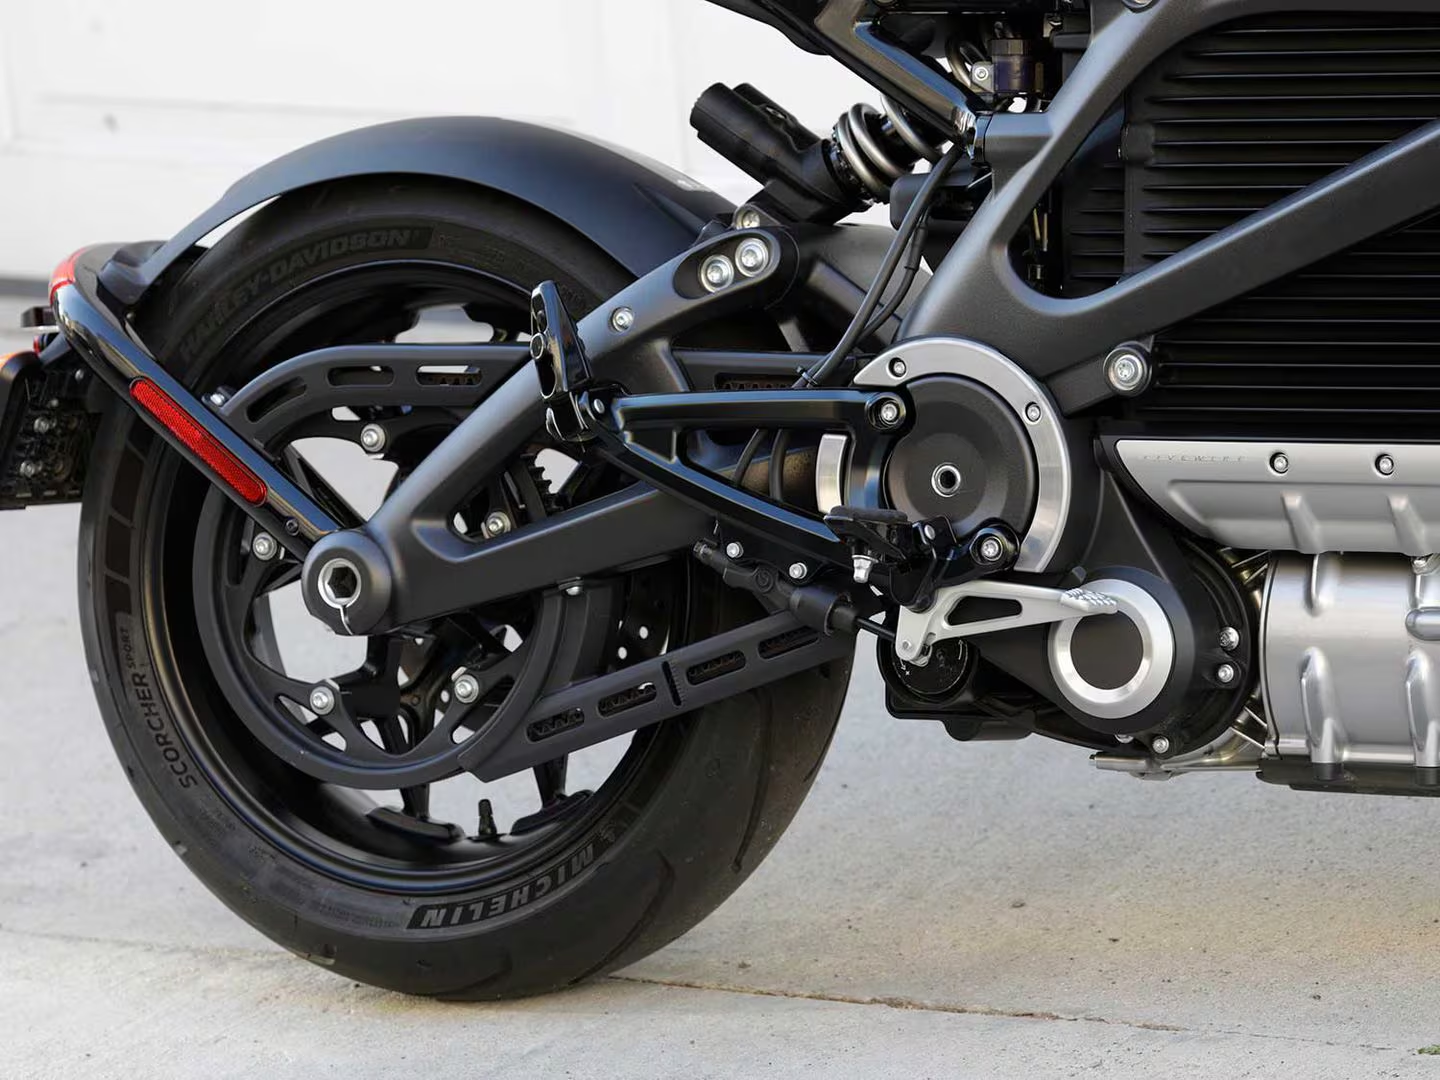
Check chain tension every 1,000 km. The correct slack specification is in your service manual and varies by model. Incorrect tension accelerates wear on the chain, sprockets, and rear wheel bearing.

Inspect the sprocket teeth during chain checks. Worn teeth have a hooked or pointed profile rather than the correct symmetric shape. Worn sprockets must be replaced with the chain, never separately.

Replace the chain when it reaches the wear limit measured by the 20-link method. For 520-pitch chains used on most Kawasaki middleweights, this is approximately 323mm across 20 links. For 525 or 530 chains on larger models, check the specific limit.

Replace the chain and both sprockets together every time. Installing a new chain on worn sprockets produces rapid wear and skipping from the first kilometer.
Chain Drive Maintenance


Brake System Service

Kawasaki brakes across the lineup are excellent. Radial-mount calipers on performance models, linked braking systems on some adventure models, and standard sliding caliper setups on entry-level bikes all require regular maintenance.

Replace brake fluid every two years. Brake fluid absorbs moisture from the atmosphere over time. Contaminated fluid has a lower boiling point. Under hard braking, contaminated fluid can vaporize and cause brake fade.

Check brake pad thickness every 5,000 km. The minimum thickness before replacement is 1mm on most Kawasaki calipers, but replace at 2mm to maintain consistent performance. Never allow pads to wear to the metal backing plate.

Inspect brake rotors for scoring, deep grooves, and minimum thickness. Each rotor has the minimum thickness stamped on it or listed in the service manual. A rotor below minimum spec must be replaced. A thin rotor flexes, warps, and loses heat dissipation capacity.

If your Kawasaki is equipped with ABS, have the system tested if the ABS warning light illuminates or the system behaves unexpectedly. ABS sensor wheels can accumulate debris. ABS pump seals can develop leaks over time. These are not DIY repairs but they require prompt attention.


Air Filtration

Replace the air filter every 15,000 km under normal conditions. In dusty environments, inspect every 5,000 km.

A clogged air filter restricts airflow and forces the engine to run rich. On fuel-injected Kawasakis, this throws the fuel mapping off. Throttle response dulls. Fuel consumption increases. Power drops noticeably in the mid-range.

The air filter on most Kawasaki models is accessible without major disassembly. It is one of the quickest and most cost-effective service items you can perform.

Check the airbox seal where it mates with the filter element. A damaged seal allows unfiltered air to bypass the element. The engine breathes unfiltered air while the filter reads as clean.


Valve Clearance Checks

This is the maintenance item most commonly skipped by Kawasaki owners who service their own bikes.

Modern Kawasaki four-stroke engines use shim-over-bucket valve actuation on performance models or rocker arm systems on lower-displacement models. Both require periodic valve clearance inspection.

Out-of-specification valve clearance causes multiple problems. Tight valves on the exhaust side can burn valve seats over time. Loose valves cause excessive noise and reduce efficiency.

Kawasaki specifies valve clearance checks every 15,000 to 25,000 km depending on the model. Check your manual for the specific interval.

This job requires removing the fuel tank and valve cover at minimum. It is within the capability of a competent home mechanic with the correct tools. If clearances are out of specification, adjusting shim-type valves requires removing the camshafts to access the shims.

Skipping this service does not save time. It creates expensive repair work later.


Electrical System Health

Kawasaki’s electrical systems on modern models are robust. Regular attention prevents the intermittent faults that are difficult and time-consuming to diagnose.

Inspect battery terminals annually. Clean any oxidation with a wire brush and apply terminal protector spray. A corroded terminal creates resistance that affects starting performance and charging system behavior.

Check the charging voltage with a multimeter at 3,000 to 4,000 RPM. Correct output is 13.5 to 14.8V at the battery terminals. Below this range indicates a charging system fault. Above 15V indicates a failed regulator-rectifier.

Kawasaki regulator-rectifier units on some older models have a history of heat-related failure. If your bike is an older Kawasaki that has not had the regulator replaced, check its condition and mounting. Ensure it is securely mounted to a metal surface for heat dissipation.

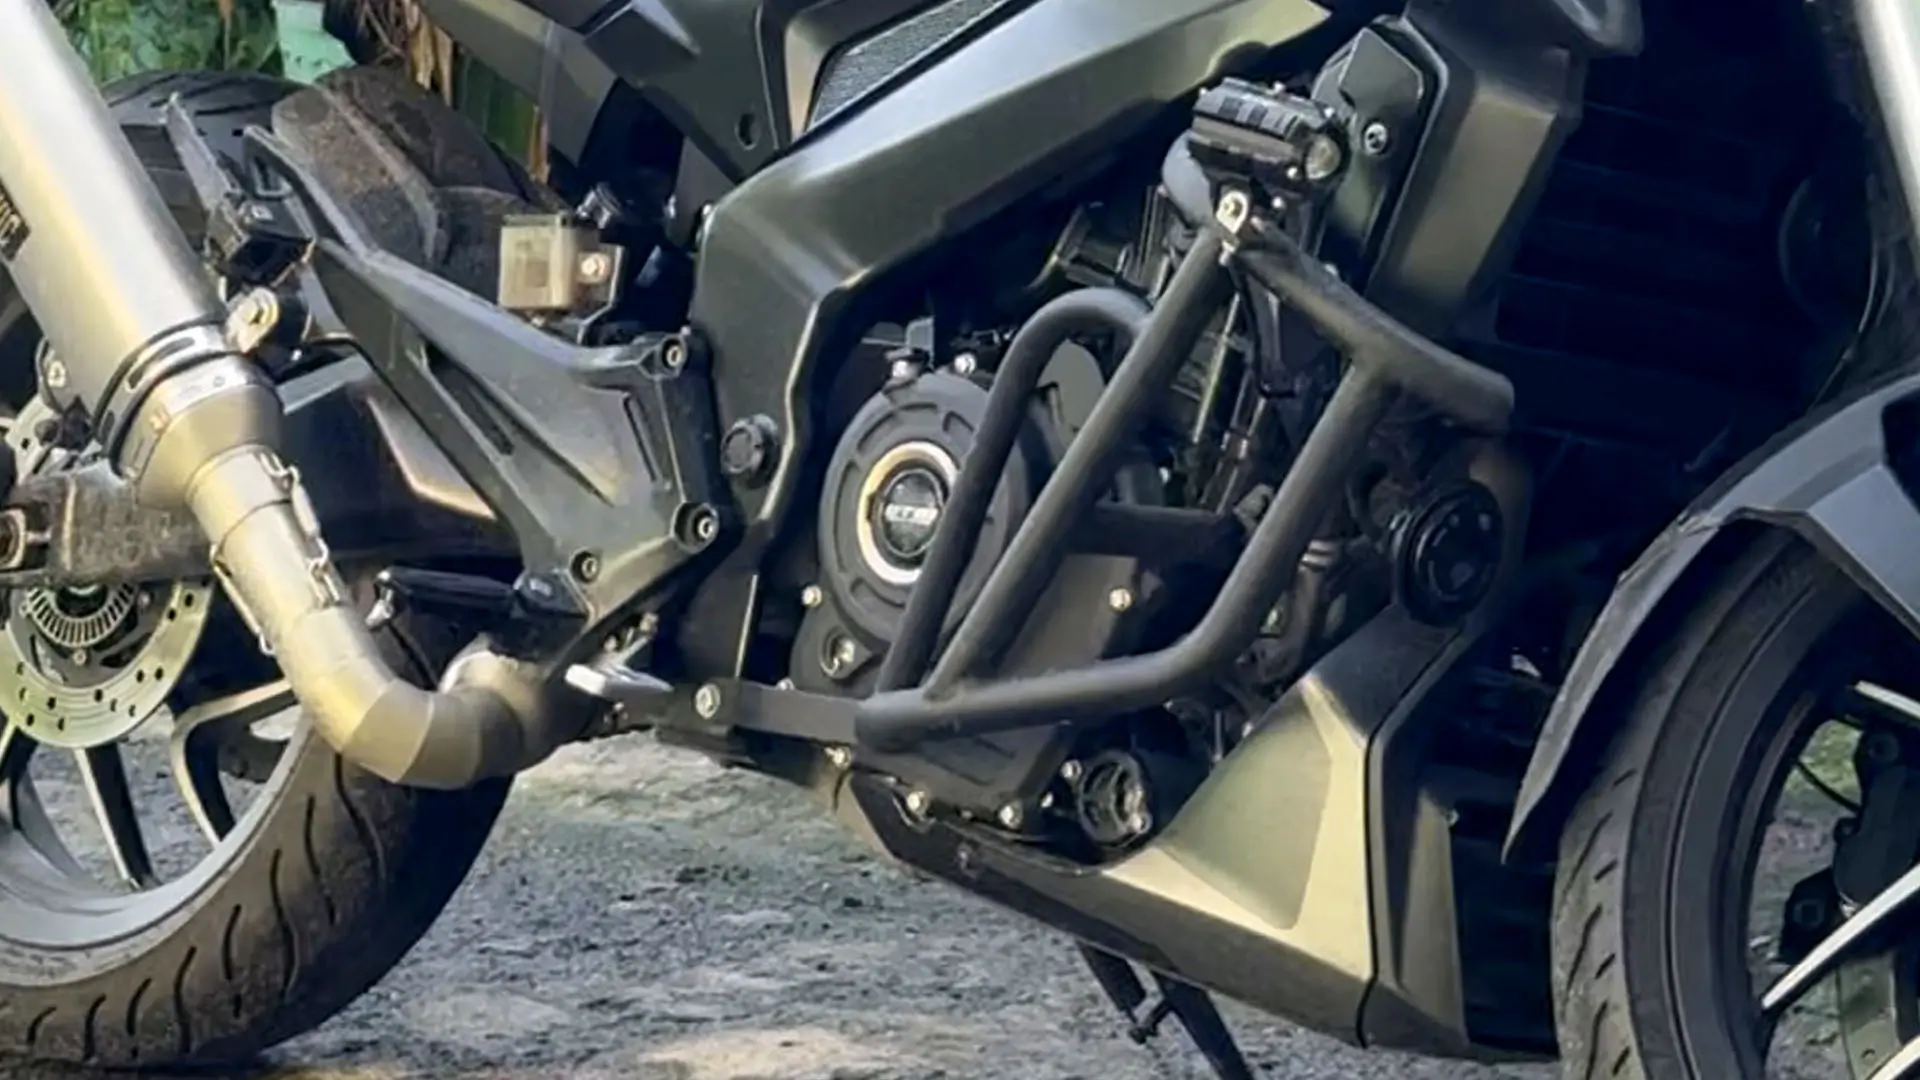
Inspect wiring harness routing annually. Look for chafing against frame edges or heat damage near exhaust components. Replace any wiring showing damaged insulation before it causes shorts.
Electrical System Health


Fork and Suspension Service

Front forks need periodic oil changes. Over time, fork oil loses viscosity and its damping properties degrade. The bike starts feeling vague over bumps and the suspension sits lower in its travel.

Kawasaki recommends fork oil changes every 20,000 to 30,000 km on most models. If you have never had this done on a high-mileage bike, schedule it.

Inspect fork seals whenever you clean the front wheel area. A leaking fork seal leaves a visible oil film on the fork leg below the seal. Replace leaking seals promptly. Fork oil on the front brake rotor is a serious safety issue.

Rear shock linkage bearings require greasing or replacement on high-mileage bikes. Neglected bearings corrode and seize. A seized linkage prevents the suspension from moving through its full travel and creates dangerous handling characteristics.


Sourcing the Right Parts

The quality of parts you use directly affects how long your maintenance efforts last.

Incorrect specifications, inferior materials, and poor manufacturing tolerances all create problems that show up during the next service cycle or sooner.

Quality Kawasaki motorcycle parts sourced from a reliable supplier provide accurate fitment, correct specifications, and consistent performance over their service life.

Verify part compatibility with your specific model year before ordering. Kawasaki updates part numbers and specifications across model years even on visually similar components. Using the correct part for your specific year matters.


Build and Follow a Service Schedule

The single most impactful habit a Kawasaki owner can develop is a written service schedule.

List every service item from your manual with its interval. Record each service with the date and odometer reading when completed. Review upcoming services before each riding season and budget for them accordingly.

Predictive maintenance is always cheaper than reactive repair. A Kawasaki that is maintained consistently and correctly will cover enormous distances without unexpected failures.

The bike rewards the effort. Keep up your end of the relationship.Find quality Kawasaki motorcycle parts for every service interval at AliWheels.
(Commenting: OFF)

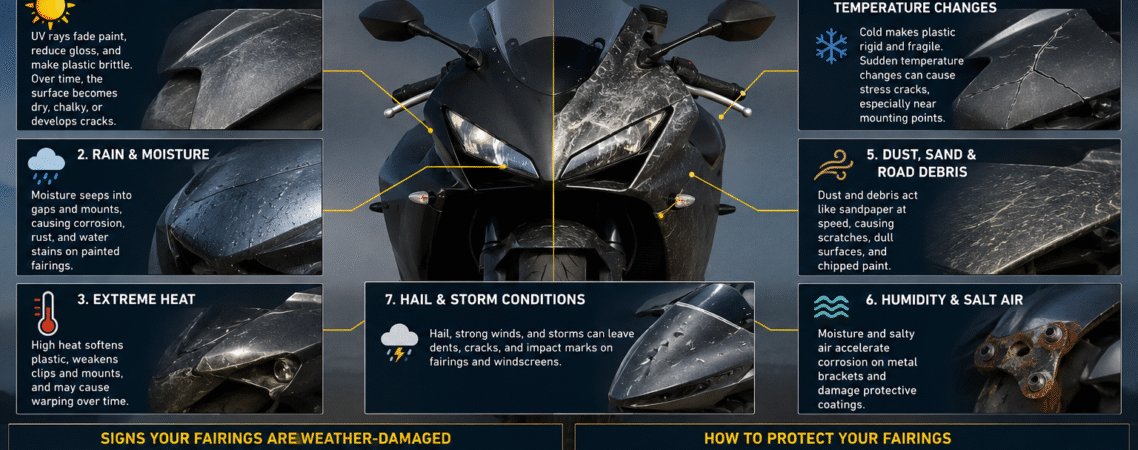
Your motorcycle’s fairings take the impact of every weather condition your bike experiences. Rain, UV radiation, heat, cold, road salt, humidity, and so on. All work against the material continuously.

Most riders notice motorcycle fairing damage after it becomes visible. By that point, significant damage has already occurred. Understanding how each weather condition attacks your motorcycle’s fairings helps you protect them earlier.

UV Radiation is the silent destroyer

Sunlight is the most damaging factor for motorcycle fairings. The damage happens slowly until it reaches a critical point.

ABS plastic and fiberglass fairings contain pigments and protective additives that absorb UV radiation. Over the time, UV exposure breaks down the molecular structure of both the paint and the base material under it.

The first sign is color fading. A deep black or vibrant red color, gradually losing its depth and intensity. The surface begins to look hazy or chalky rather than glossy.

As your motorcycl continue toexpereince UV, the plastic becomes brittle. ABS that was once flexible and impact-resistant starts fading. A panel that could survive a minor impact will crack under the same force once it is UV-degraded.

There are certain Paints that provide significant UV protection. This is why paint maintenance matters beyond aesthetics. Wax and ceramic coatings add a protective layer over the paint. They reduce UV penetration and slow the degradation process noticeably.

Bikes parked outdoors in open exposure to high UV radiation age faster than bikes kept in shaded parking or garages. The UV exposure over several riding seasons produces visible differences in fairing condition.

Rain and Water Ingress

Water damages fairings in several ways.

Although direct rain exposure is the least damaging, modern paint systems are water-resistant. But the paint coating repels water effectively.

The real damage comes from water that gets under the fairings.

When fairings develop small cracks or loose mounting tabs, water enters the gap between the fairing and the frame. This water remains hidden without evaporating. It promotes corrosion on any metal mounting hardware it contacts. 

Furthermore, trapped water moves into micro-cracks in the fairing material itself. When temperatures drop below freezing, that water expands. The freeze-thaw cycle propagates cracks that begin too small to see. Over several winters, those micro-cracks become visible fractures.

Make sure to inspect fairing mounting points and edges after prolonged rain exposure. Moreover, ensure drainage paths are clear. Do not allow water to be stored in hidden fairing sections.

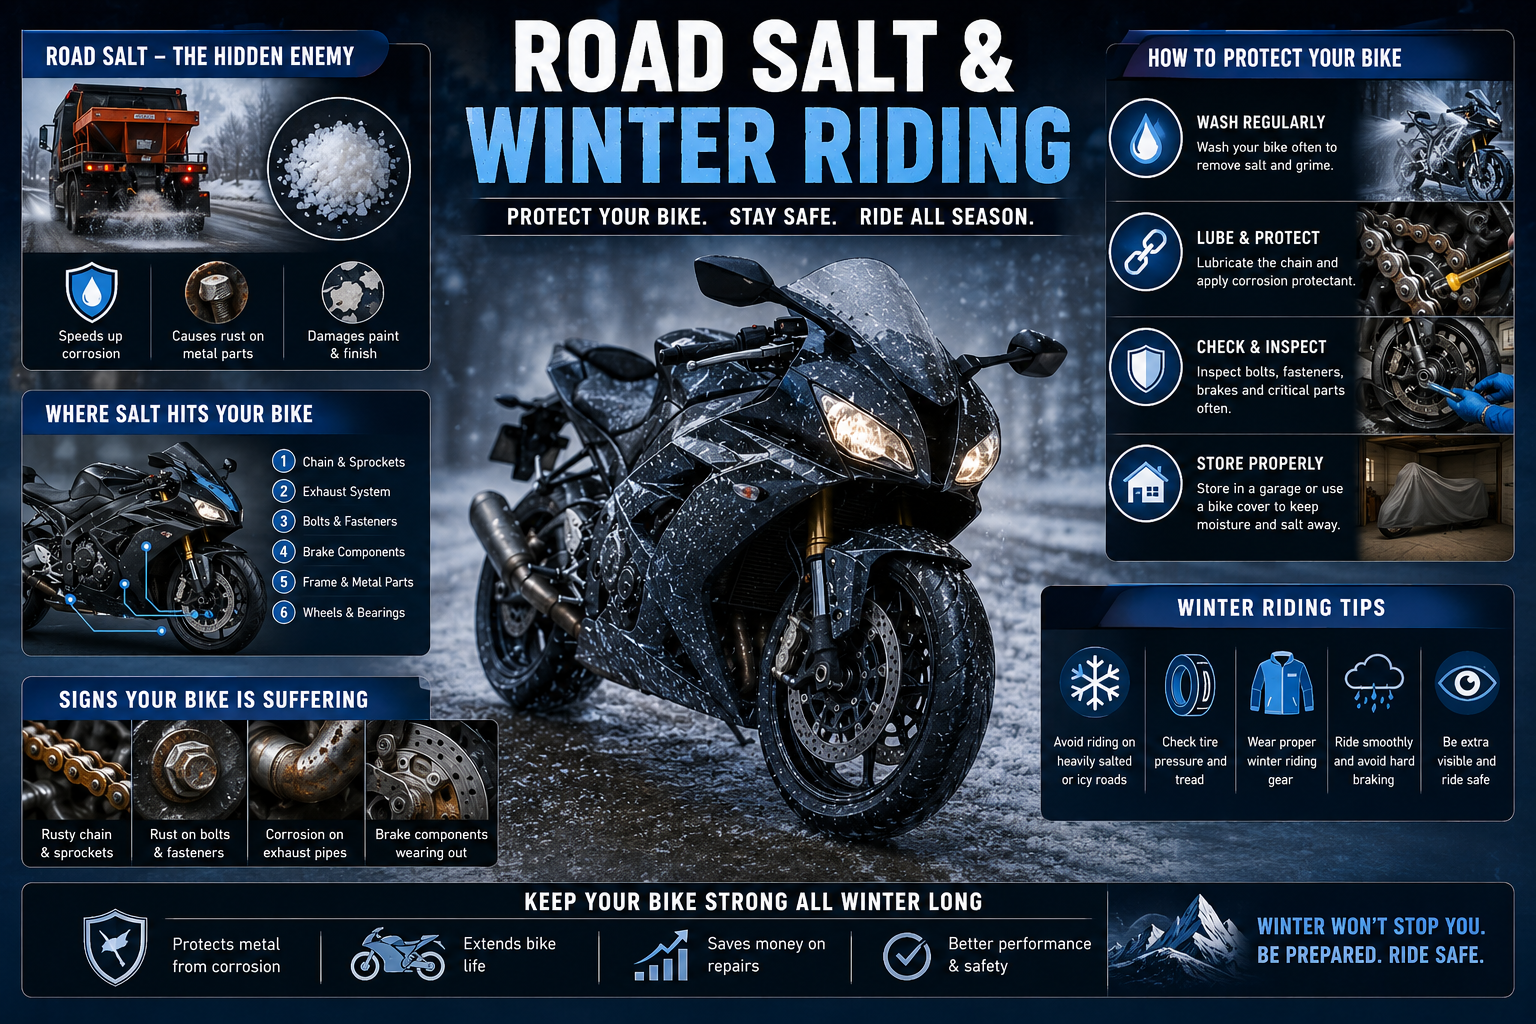
Road Salt and Winter Riding

Riders who continue riding through winter face early fairing damage.

Road salt is hygroscopic. It attracts and holds moisture against surfaces. Salt spray thrown up from the front wheel coats the lower fairing sections, the belly pan, and the inside surfaces of front fairings heavily.

The salt and moisture combination attacks paint at a microscopic level. It finds any chip, scratch, or imperfection in the paint surface and begins working underneath. Paint lifts from the substrate through a process called “delamination.” Once salt-driven delamination begins, it spreads laterally under the paint surface, even where the exterior appears intact.

Mounting hardware corrodes rapidly with repeated salt exposure. Steel fasteners used in fairing attachment points seize into their threads. Removal during future maintenance becomes difficult and risks damaging the fairing panel.

Winter riders must clean their fairings thoroughly after every salted road ride. A proper rinse that reaches inside the lower fairing sections removes salt before it has time to act. Allow the bike to dry fully before covering or storing it.

Apply a wax or sealant layer before winter riding begins. This gives salt spray a barrier to attack before it reaches the paint itself.

Heat and Thermal Cycling

Motorcycle fairings experience significant heat variation during every ride.

The engine radiates substantial heat. Fairings positioned near the engine bay, particularly the inner lower fairings, experience continuous heat exposure during riding. Exhaust routing can direct heat directly onto fairing panels if aftermarket systems are installed without heat shields.

ABS plastic has a specific temperature tolerance range. Sustained exposure above that range causes warping. Panels develop slight curves or distortions that create visible gaps between previously flush surfaces.

Paint also reacts to heat. Repeated thermal expansion and contraction cycles cause paint to develop fine surface cracking called checking or crazing over many years. This is distinct from impact cracking and creates a network of tiny surface fractures visible in direct sunlight.

The daily cycle of heating up during a ride and cooling down afterward also affects mounting hardware. Fasteners in thermally stressed locations loosen slightly over time through thermal cycling. Regular torque checks on fairing screws in high-heat zones prevent panels from working loose.

Keep fairings away from direct exhaust contact. Use heat shields where aftermarket exhaust routing brings pipes close to fairing surfaces.

Humidity and Condensation

High-humidity environments affect fairings in ways that are less obvious than rain damage but equally persistent.

Humidity promotes oxidation on any metal hardware associated with fairing mounting. Painted surfaces in humid climates tend to develop microscopic bubbling beneath the clear coat as moisture permeates the paint system over the years.

The more problematic effect is condensation. Fairings that experience rapid temperature changes, such as a cold morning ride followed by parking in a warm garage, develop condensation on their inner surfaces. This moisture has nowhere to go efficiently. It sits and slowly works on any vulnerabilities in the material or paint.

Bikes stored in spaces with high humidity variation benefit from breathable covers that allow moisture to escape rather than sealing it against the fairing surfaces.

Wind-Driven Debris

Wind does not damage fairings directly. But wind-carried debris does.

Sand particles, fine grit, road dust, and small stones carried by wind and forward momentum create continuous abrasion on fairing surfaces. This is most visible on the leading edges of fairings, the front of the headlight fairing, and the lower sections of side panels.

The clear coat layer erodes first. Once it thins past a critical point, the underlying color coat becomes directly exposed. Fading and staining accelerate rapidly without clear coat protection.

Stone chips are the visible acute version of this process. A chip that penetrates to bare plastic or substrate creates a corrosion initiation point. Paint edges around the chip lift if not promptly sealed.

Touch-up paint applied promptly to chips prevents the undermining that turns a small chip into a large paint failure.

Ozone and Atmospheric Degradation

This is one of the least discussed factors in fare deterioration.

Atmospheric ozone reacts with rubber and certain plastics. Rubber trim pieces, gaskets around fairing edges, and elastomeric mounting grommets degrade through ozone exposure over time.

The rubber becomes hard, loses flexibility, and develops surface cracking. Rubber gaskets that have ozone-hardened no longer seal effectively. Water and debris enter gaps that the gaskets were designed to prevent.

Rubber components in fairing mounting systems should be inspected annually. Hardened or cracked rubber grommets and gaskets replace the sealing function they were providing. Replacement parts are inexpensive, and their condition directly affects how well the fairing system resists other forms of weather damage.

Protecting Your Fairings Against Weather Damage

Wash regularly and correctly. Rinse thoroughly after rain, salt exposure, or dusty riding. Use a pH-neutral motorcycle wash. Avoid high-pressure water directed into fairing gaps or mounting points.

Protecting Your Fairings Against Weather Damage

Apply wax or ceramic coating twice yearly. Modern ceramic coatings applied over clean paint provide significant UV protection and hydrophobic properties. They reduce the adhesion of road grime and salt.

Store with protection in mind. A breathable cover protects against UV, dust, and rain while allowing moisture to escape. An airtight cover in a humid environment traps moisture against the fairing surfaces.

Inspect mounting points and seals seasonally. Catch developing cracks, loosening hardware, and degraded rubber before they allow water ingress.

Touch up paint chips promptly. Every unprotected chip is a point where weather damage accelerates into the surrounding paint system.

Park in shade where possible. Reducing cumulative UV exposure has a measurable effect on long-term fairing condition. A shade structure or garage extends fairing life significantly compared to permanent outdoor parking in direct sunlight.

When Weather Damage Requires Replacement

Some fairing damage from weather exposure reaches a point where restoration is not practical.

UV-degraded plastic that has become brittle throughout its thickness cannot be restored by surface treatments. The molecular degradation is structural. A brittle panel that cracks at minor impacts is a safety concern. Debris ejected from a shattering fairing panel creates hazards for other road users.

Paint delamination that has progressed across large panel areas requires a complete respray. For older bikes, replacement with quality aftermarket panels can be more cost-effective than refinishing panels in poor condition.

Warped panels that no longer fit correctly against adjacent panels allow water and debris ingress regardless of how carefully the rest of the fairing system is maintained.

Quality motorcycle fairings from Aliwheels are manufactured to correct OEM dimensions. They are made using appropriate material thickness to provide the best long-term weather resistance when combined with consistent maintenance.

Conclusion

Weather damage to fairings is cumulative and largely invisible in its early stages. By the time the damage is obvious, the underlying deterioration is well advanced.

Regular maintenance, protective coatings, proper storage, and prompt attention to damage stop that progression before it becomes expensive.

Your fairings are both functional and aesthetic. They protect the mechanical components they enclose, reduce wind fatigue during riding, and define how the motorcycle presents itself. Protecting them from the weather protects the whole bike.

Shop quality motorcycle fairings built for lasting weather resistance at AliWheels.

(Commenting: OFF)

A Harley is more than a bike. It is a commitment. Experienced riders reap decades of solid performance from their bikes. When riders fail to maintain their bikes, they end up with costly repairs. The upside to this is that Harleys are sturdy. By adopting proper maintenance practices, quality Harley Davidson Parts and using high-quality Harley-Davidson parts , you can ensure long-term reliability.

Here are the things that all the veteran Harley Davidson fans do to keep their bikes in good condition.

Harleys Have Special Needs

A Harley V-twin is not an inline-four or a European parallel twin. All the above features contribute to the engine architecture, which, combined with the air-cooled construction and higher power, results in many special maintenance requirements.

More work is done by oil in an HD engine. The oil for the gearbox is combined or distinct from the oil for the primary chaincase (depending on the model). Knowing the lubrication system of your particular model is very important.

Each of the Twin Cam, Milwaukee-Eight, Evolution, and Sportster engines has its own wear and service intervals. Know your particular engine. Read the service manuel. This is the most helpful document you will ever have for your bike.

The oil engine is important

Engines with air cooling tend to be running hotter than those with liquid cooling. Oil deteriorates more quickly when heated.

Harley recommends their own Screamin’ Eagle or Syn3 oils. They are designed with the high temperatures and wet-clutch operating modes in mind. Automotive oils that are non-generic are not the best choice.

Service intervals are depending upon the model and riding circumstances. In normal use, experienced HD riders will change oil every 3,000 to 5,000 miles. The lower end of that range is safer when you’re riding in hot summer temperatures or if you’re riding a lot in urban areas.

Change the oil filter at the time of oil change. Every time. Harley oil filters pick up a lot of dirt. The cost of a new filter is a few dollars. A rebuild engine can be very expensive.

Also, check the drain plug for metal particles. A little of the fine metal residue may be normal. Not chunks or shavings.

Maintaining Primary Chain and Tensioners

This is one of the least known parts of older Harleys.

Clutha basket is operated by the primary chain. Operates in a separate oil bath in the main chain case. With time the chain stretches and the tensioner wears.

A loose primary chain will make a distinct ‘clunk’ noise on light deceleration, especially when idling. This is often confused by the transmission noise.

Check primary chain tension on a regular basis. The manufacturer’s service manual gives guidelines on acceptable freeplay. If it’s too loose, it will wear the tensioner shoe. If it’s too tight, it stresses the bearings.

At each service check the main chaincase oil level. This is in addition to the engine oil used on most Big Twin models. Must use its own fluid, usually HD Primary Chaincase Lubricant or other equivalent.

Failure of the main causes the tensioner to fail, which results in chain damage, and then in the loss of the inner cover of the main. This is the costly result of the low cost of a fluid change.

Transmission Fluid Changes

Most Harley-Davidsons have separate engine oil systems for the five-speed and six-speed transmissions.

Transmission fluid deteriorates with age. Worn fluid is no longer effective at lubricating gear surfaces. Shifting becomes notchy. In severe situations, gear wear occurs prematurely.

Replace the transmission fluid every 10,000 to 15,000 miles or once a year. Obtain the proper specification fluid for the model year.

Check the magnetic drain plug when draining. It collects ferrous wear particles from the gears. It is okay to have some traces of leftover. The gears are wearing out at a rate that exceeds normal wear when they are heavily built up.

Ensuring proper belt drive inspection and tension.Proper belt drive inspection and tension.

Most modern Harleys have a final drive belt instead of chain. This is a real plus. Belts do not need any lubrication, are clean and last long when well-maintained.

They’re not low-maintenance, however.

Check the belt for cracks, fraying or broken teeth. Use a finger to rub both sides and look around the perimeter at each service.

Use a belt tension gauge or deflection method outlined in the service manual to verify belt tension. A belt that is not the right tension will cause both the belt and pulleys to wear more quickly.

Maintain cleanliness of the belt and insure that it is not contaminated with oil. If oil gets into the belt, it will cause deterioration of rubber material and belt slip under load.

The replacement of belts is an anticipated maintenance task. Budget for it. A snipped belt on the highway is a lot worse than a scheduled belt change in the garage.

Brake System Service

HD brake systems are hydraulic, and generally require little day to day maintenance. Reliability, however, needs to be maintained over time and involves regular attention.

As time goes on, brake fluid absorbs water. In a high mileage Harley, old fluid can rust in the bores of the calipers and in the master cylinder. Seals fail. Pistons stick.

Change the brake fluid every 2 years. If not otherwise specified for your particular model, use DOT 4. Never combine different types of fluids.

Check brake pad wear every oil change. HD bikes are heavy. Wear on pads higher than lighter motorcycles. Change pads before they get to the minimum thickness.

Look for scoring, deep grooves or minimum thickness marks on the rotor surface. Heavy cruisers suffer substantial thermal stress over time from rotors.

Air Filter and Breathing

Keep a clean air filter and it’s inexpensive insurance. A dirty filter costs power, uses more fuel and may cause running problems.

Stock HD air filters are paper based. Change every 10,000 miles or once a year, or more frequently in dusty environments.

For aftermarket air cleaner, see manufacturer’s service instructions. Some employ oiled gauze filters which require cleaning and re-oiling instead of replacement.

Check the air box or cleaner housing for cracks, loose bolts or broken gaskets. If there is an air leak between the filter and throttle body, it will result in lean running and possible fault codes.

Electrical System Health

Electrical System Health

Harleys have had a mixed reputation for electrics over the decades. Newer models are significantly better. But attention to the electrical system prevents most issues.

Keep battery terminals clean and tight. Corroded terminals cause starting problems and voltage drops throughout the system.

Check the charging voltage regularly with a multimeter. At 3,000 RPM, you should see 13.5 to 14.8V at the battery. Harleys use a regulator-rectifier just like other bikes. They fail. Watch for early warning signs like flickering lights or a battery that drains faster than usual.

Inspect wiring connectors annually. Vibration is significant on a V-twin. Connectors can loosen over time. Look for chafed insulation where wires route near frame edges or exhaust components.

Genuine vs Aftermarket Parts

This debate is ongoing in the Harley community. Here is the honest answer.

For safety-critical components, quality matters more than brand loyalty. A brake pad that meets the correct friction specifications will stop your bike reliably. One that does not will not.

For components that affect engine performance and longevity, using parts that match OEM specifications protects your engine’s warranty and performance.

Sourcing Harley-Davidson parts from a reputable supplier ensures correct fitment and accurate specifications. Cheap parts from unknown sources may list correct part numbers but fail quality checks on material and manufacturing tolerance.

Buy smart. Not necessarily OEM every time. But never just cheap.

Build a Service Log

This sounds basic. Most riders still do not do it.

Write down every service item with the date and mileage. Oil changes, filter changes, fluid flushes, brake work, belt replacements, tire changes. Everything.

A service log helps you predict upcoming maintenance. It also adds real value when selling the bike. A documented, well-maintained Harley commands a higher price and sells faster.

Use a notebook, a phone app, or a spreadsheet. The format does not matter. Consistency does.

Conclusion

Harleys that last 100,000 miles or more are not rare. They are the result of consistent, attentive maintenance by owners who understand their machines.

The cost of regular maintenance is always less than the cost of neglect. Every fluid change, every inspection, and every quality part replacement is an investment in the ride you paid for.

Take care of it. It will take care of you.

Find quality Harley Davidson parts at AliWheels for every service your bike needs.

(Commenting: OFF)

Motorcycle electrical problems are one of the most searched and misunderstood areas of bike ownership. Riders often describe the issue as random, intermittent, or impossible to diagnose. Searches like “motorcycle electrical problems, bike electrical issues troubleshooting,” “motorcycle won’t start electrical,” and “motorcycle wiring problems” continue to grow because electrical faults rarely fail in a clean or obvious way.

Unlike mechanical issues, electrical problems often appear suddenly, disappear temporarily, and return when conditions change. Heat, vibration, moisture, and age all play a role. This guide breaks down the top 10 motorcycle electrical problems riders ask about most, explains why they happen, and shows how experienced riders and technicians identify them early.

1. The motorcycle won’t start, but the battery is charged

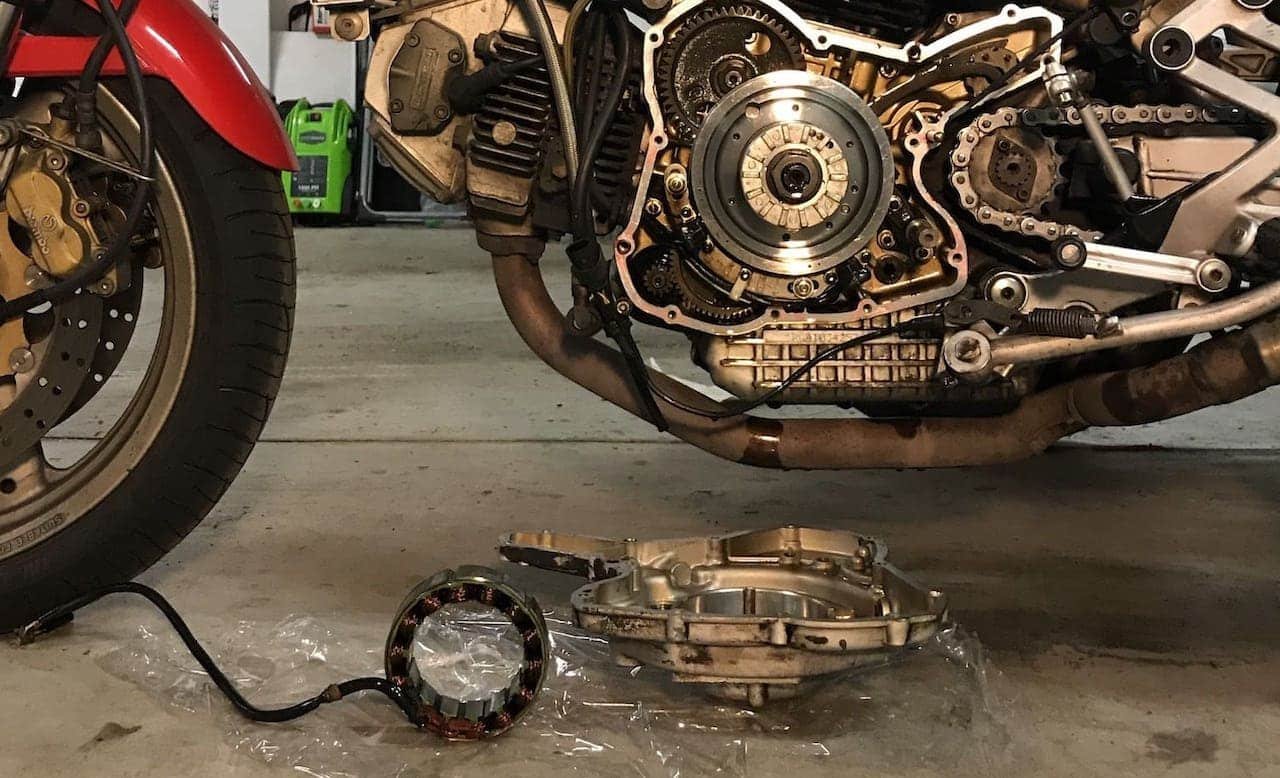
This is the most common electrical complaint worldwide. A charged battery does not guarantee proper voltage under load. Weak cells, internal resistance, or sulfation can cause the voltage to drop the moment the starter is engaged. Other frequent causes include loose battery terminals, corroded ground wires, and failing starter solenoids.

Many riders replace batteries unnecessarily when the real issue is a poor connection or voltage drop elsewhere in the system.

2. Intermittent Power Loss While Riding

Few issues create more anxiety than sudden power loss at speed. 

Intermittent power loss is often caused by loose ignition switch contacts, worn kill switches, failing side stand switches, or broken wires inside the loom. Vibration causes the connection to break momentarily, cutting ignition or fuel delivery.

Because the bike may restart immediately, riders often ignore the issue until it becomes dangerous.

3. Blown Fuses That Keep Returning

Replacing a fuse only to have it blow again is one of the most frustrating electrical problems.

Repeated fuse failure almost always indicates a short to ground. Chafed wires near the steering head, under the seat, or around aftermarket accessories are frequent culprits. Moisture intrusion can also trigger short circuits, especially after washing or rain riding.

Installing larger fuses to stop blowing is a critical mistake that can lead to wiring damage or fire.

4. Charging System Failure

Charging system issues usually involve the stator, regulator, rectifier, or wiring between them. Overheating connectors, weak grounds, and aging components reduce charging efficiency.

Symptoms include repeated dead batteries, dim lights at idle, or overcharging that boils batteries dry. Ignoring charging issues often leads to stranded riders and expensive electrical damage.

5. Flickering or Dim Lights

Lighting problems seem minor but often signal deeper electrical issues. 

Common causes include weak grounds, failing voltage regulators, corroded connectors, or worn switches. On older bikes, aging wiring insulation can also cause voltage leakage. LED conversions can worsen the problem if installed without proper resistors or relays.

6. Starter Motor Clicks but Does Not Turn

A clicking sound without engine cranking is a classic complaint. Searches like motorcycle starter clicks but won’t start” highlight this issue.

This problem is often caused by insufficient current reaching the starter motor. Weak batteries, corroded starter cables, bad solenoids, or worn starter brushes are typical sources.

Many riders replace the starter motor unnecessarily when cleaning connections would solve the issue.

7. Instrument Cluster Failure or Resetting

Modern bikes rely heavily on electronic dashboards. Searches for a motorcycle speedometer not working and instrument cluster resets while riding are increasingly common.

Voltage drops during starting, weak batteries, and failing regulators can cause clusters to reset or lose memory. Moisture ingress is another major issue, especially on bikes exposed to rain or pressure washing.

Because clusters are expensive, diagnosing the root cause early saves a high cost.

8. Kill Switch or Ignition Switch Failure

Kill switches and ignition switches endure constant use and environmental exposure. Corrosion inside the switch housing can prevent proper contact. Dust, water, and wear eventually cause intermittent or total failure. These issues often mimic more serious electrical faults, leading riders down the wrong diagnostic path.

9. Parasitic Battery Drain

Battery draining overnight is a major frustration. 

Common causes include alarms, trackers, USB chargers, and aftermarket accessories wired incorrectly. Faulty relays and damaged wiring can also create a constant draw. Parasitic drain problems often go unnoticed until the battery repeatedly fails.

10. Wiring Harness Damage from Heat or Vibration

Wiring harness issues are among the hardest to diagnose. 

Heat from engines and exhausts hardens insulation over time. Vibration causes internal wire breaks that are invisible from the outside. Steering head movement is a common stress point.

These faults often create intermittent issues that disappear during inspection.

Why Riders Struggle with Electrical Diagnosis?

Electrical systems rarely fail linearly. Multiple components share grounds, power sources, and circuits. A single weak connection can create symptoms across multiple systems.

This is why riders often replace good parts and still experience the problem. Accurate diagnosis requires understanding voltage flow, not just component replacement.

Why Riders Struggle with Electrical Diagnosis?

How Experienced Riders Prevent Electrical Problems?

Routine inspection of battery terminals, grounds, connectors, and wiring routes prevents most electrical failures. Keeping connections clean, protected from moisture, and properly secured reduces resistance and heat buildup.

Using quality motorcycle electrical parts and proper installation techniques also prevents future issues.

Conclusion 

Motorcycle electrical problems are intimidating because they feel unpredictable. In reality, most failures follow clear patterns caused by vibration, corrosion, heat, and aging components.Understanding the most common electrical issues riders ask about helps you diagnose problems faster, avoid unnecessary repairs, and ride with confidence. Electrical reliability is not about luck. It is about attention, inspection, and understanding how power moves through your motorcycle. Lastly, to prevent motorcycle electrical issues, buy reliable motorcycle parts from Aliwheels, the first choice of passionate riders.

(Commenting: OFF)

Or login with your social account