


Aliwheels is a leading motorcycle parts supplier offering free shipping anywhere in the world on orders above $300. Please note that all of our motorcycle parts and accessories are certified and tested. With more than 10,000* products to choose from this is your one place to get the motorcycle part you need. Browse our vast inventory of motorcycle radiators, fairings, clutch plates, headlights, chains, and sprockets.

Free Shipping over $300

Support 24/7

Secure Payments

Hot Offers


A no-spark KTM 690 stranded halfway through a trail ride is one of the most common failure stories owners of this platform tell. It’s not bad luck. It’s one of the most consistently reported weak points across multiple KTM forums, spanning well over a decade of reports. Here’s how to actually confirm the cause before you start replacing parts blindly.

Why This Specific Component Keeps Failing

The stator sits inside the engine case, generating the electrical charge that keeps your battery topped up and your ignition firing. On the 690 platform, owners across KTM Forum UK, Adventure Bike Rider, KTMTalk, and KTM Forums describe the same pattern repeating, sometimes on bikes with fairly modest mileage, sometimes after years of hard use.

The general consensus across these communities is blunt: the stator is a known weak spot on a lot of KTMs, and it’s been diagnosed as the cause of no-spark complaints more times than owners would like. Heat, vibration, and moisture intrusion during washing all get blamed at various points, though there’s no single universally agreed cause. What’s agreed on is frequency. This happens often enough to be an expected maintenance item on this platform, not a rare fluke.

A 300EXC Owner’s Trail Ride Ends Early

One rider’s account captures the pattern well. His bike wouldn’t start halfway through a trail ride event. Six different people at the event told him the same thing: it’s your stator. He hadn’t planned for this, and he wasn’t alone in dealing with it. Multiple owners in that same forum thread confirmed they’d heard of several 690 stators failing over the years, describing it as a recurring, expected fault rather than a fluke.

Another owner’s 2014 EXC 300 stopped sparking entirely on a hot day mid-ride, with burned stator wires found on inspection. Heat clearly plays a role here, even if it isn’t the only cause.

The Symptoms That Point Here
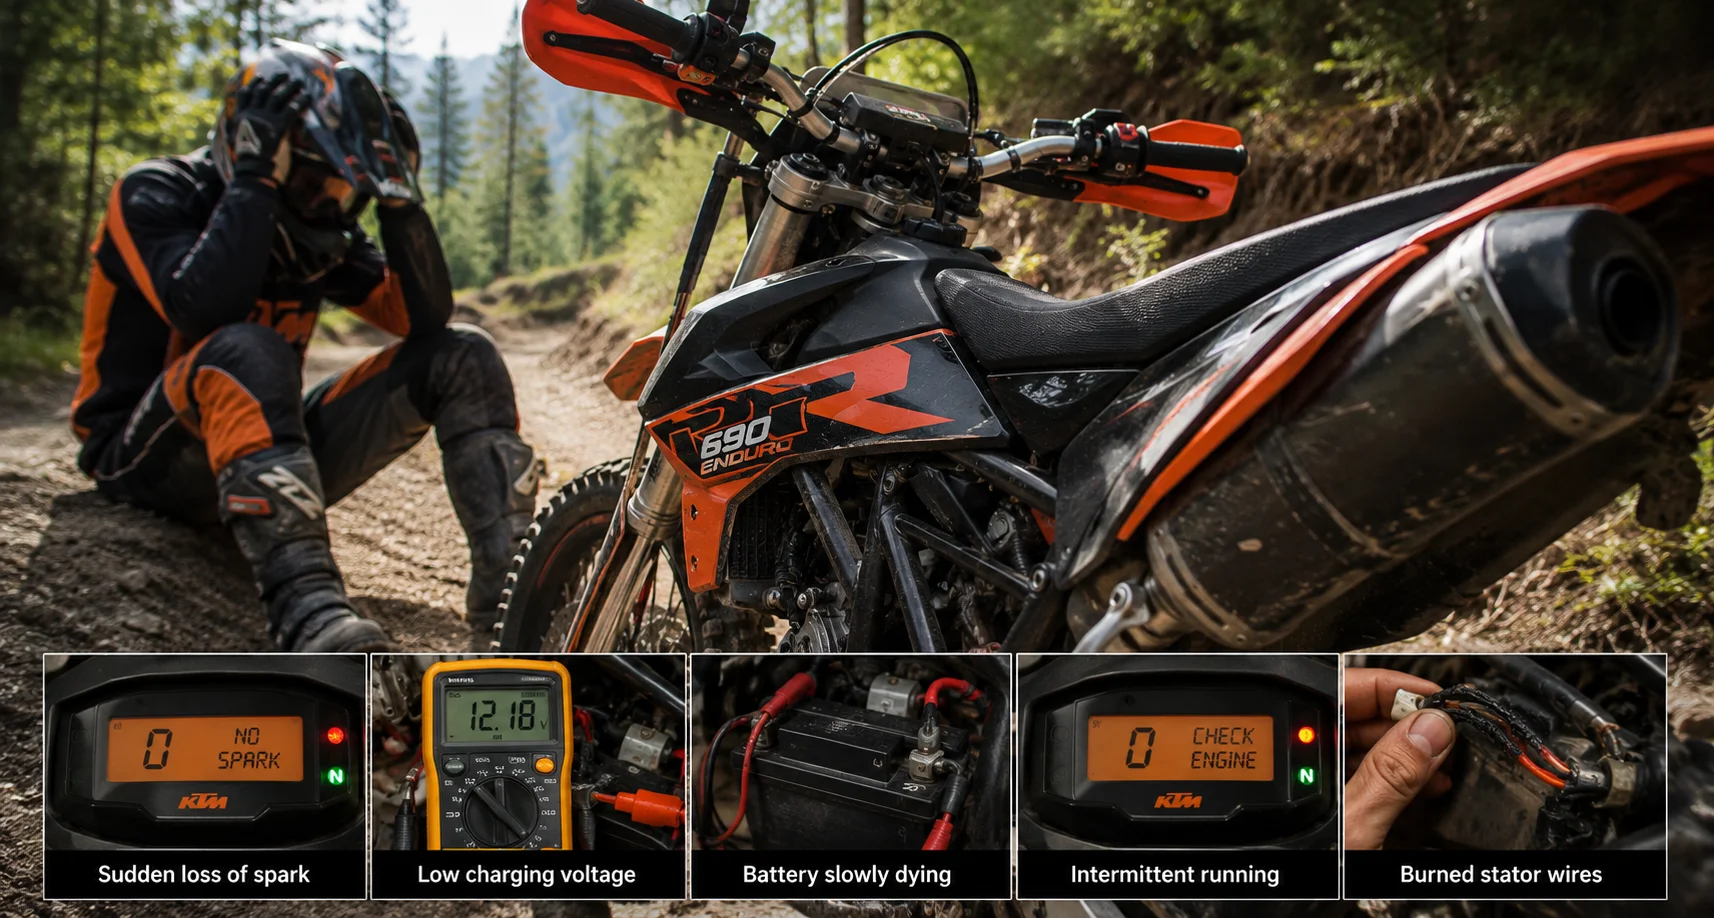
KTM 690 stator failure symptoms

A sudden loss of spark mid-ride is the classic presentation. No warning, no gradual decline, just gone. Another common pattern is a slowly dying battery with the engine running normally otherwise. If your charging voltage won’t climb properly above idle, and you’ve already ruled out a simply worn battery, the stator or its companion regulator/rectifier are the next logical suspects.

Some owners report a subtler pattern still: intermittent running, fine for a while, then rough, then fine again, with no clear trigger. This kind of fault is harder to pin down and often takes more patience to diagnose than a clean, total failure.

Don’t Skip the Other Usual Suspects First

A crank position sensor failure can produce symptoms nearly identical to a dead stator. The ECU simply doesn’t know the engine is turning over, so it won’t fire spark or fuel the injector. This kind of sensor failure doesn’t always throw a fault code either, which means you often need live diagnostic data to catch it rather than a quick code scan alone.

A useful trick that comes up repeatedly among owners chasing intermittent faults involves heat. If your bike runs fine cold but develops the fault once warmed up, try warming the suspect component directly with a hair dryer to reproduce the failure on demand, rather than waiting around for a ride to heat things up naturally. One owner specifically used this method to isolate a fault that only appeared once the bike reached operating temperature.

How Owners Actually Test the Stator

The most consistent method across every forum thread involves a resistance check with a multimeter, engine off, stator disconnected. Measure resistance between the stator’s coil wires. A reading of zero ohms generally indicates a healthy winding. An open circuit, showing infinite resistance, means the stator has failed internally and needs replacing.

One detailed account documented testing the exciter coil specifically, comparing cold readings against readings taken once the stator had warmed up, since some failures only reveal themselves once heat is involved. This mirrors the same intermittent pattern reported by other owners chasing hard-to-catch faults.

If the stator itself checks out fine, don’t stop there. Test the regulator/rectifier next. A healthy stator paired with a failed regulator produces very similar charging symptoms from the rider’s seat, and skipping this second check leads plenty of owners to replace a perfectly good stator while the real problem sits untouched.

Checking the Regulator/Rectifier Properly

With the engine off, check internal resistance across the regulator’s terminals following your service manual’s specific test points. With the engine running, measure voltage at the battery terminals directly. A healthy charging system should show voltage climbing above resting battery voltage once the engine is running, typically into the 13 to 14 volt range depending on RPM. If voltage doesn’t change at all from idle, test the stator specifically next. If the stator checks out fine on its own, the regulator/rectifier is the more likely culprit.
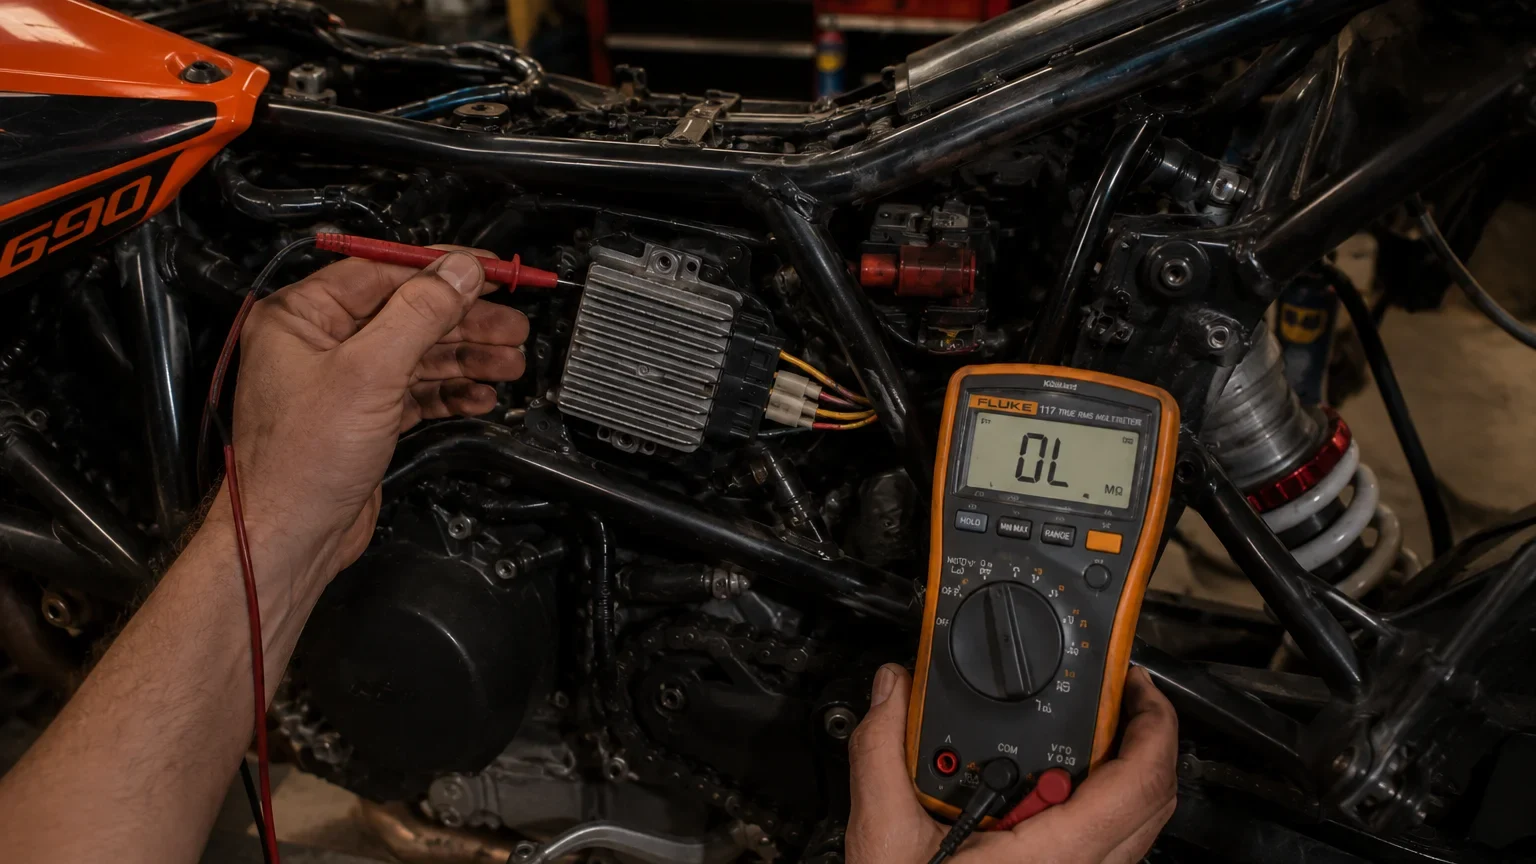
KTM 690 regulator testing

One owner documented this exact process step by step, testing the stator in isolation, confirming a clean reading, then moving on to test the regulator side once the stator was ruled out. That kind of methodical elimination, one component at a time, saves you from guessing and buying the wrong part twice.

A Real Complication: Clutch Slave Problems Happening Alongside It

Worth knowing about specifically, since it’s come up directly in owner accounts. Some 690 owners have dealt with a failing clutch slave cylinder around the same general timeframe as stator trouble. One owner noted an older clutch slave design was known for failing quickly, sometimes within 500 miles, with KTM eventually supplying a redesigned replacement part number that resolved the issue permanently once installed.

If you’re dealing with multiple seemingly unrelated issues in a short window, clutch trouble one month and stator trouble the next, it doesn’t necessarily mean your bike is cursed. It sometimes just means several original-design components are reaching the end of their service life around the same mileage, since KTM built this era of 690s with a few known weak points clustered together.

Water Intrusion: A Preventable Cause

One owner’s Beta stator, a different brand but the same failure mode, traced back to excessive power washing without properly warming the bike afterward to dry out the stator cover area. He noted the stator cover on these platforms isn’t particularly good at keeping water fully sealed out, and he made a habit of warming his KTMs up properly after any wash to avoid a repeat.

This is a genuinely useful, low-cost prevention habit. If you regularly power wash your 690, especially after muddy trail rides, take a few extra minutes afterward to let the engine run and warm through before parking it. It costs nothing and may meaningfully extend the life of a component that’s already known to be fragile.

Replacing the Regulator or Stator

Once you’ve confirmed which part actually failed, there’s no meaningful repair path for either one. A stator with an open circuit reading is done. A regulator/rectifier that’s failing internally needs swapping, not troubleshooting further. Trying to nurse either one along by keeping the battery topped up with a charger just delays the inevitable rather than fixing anything.
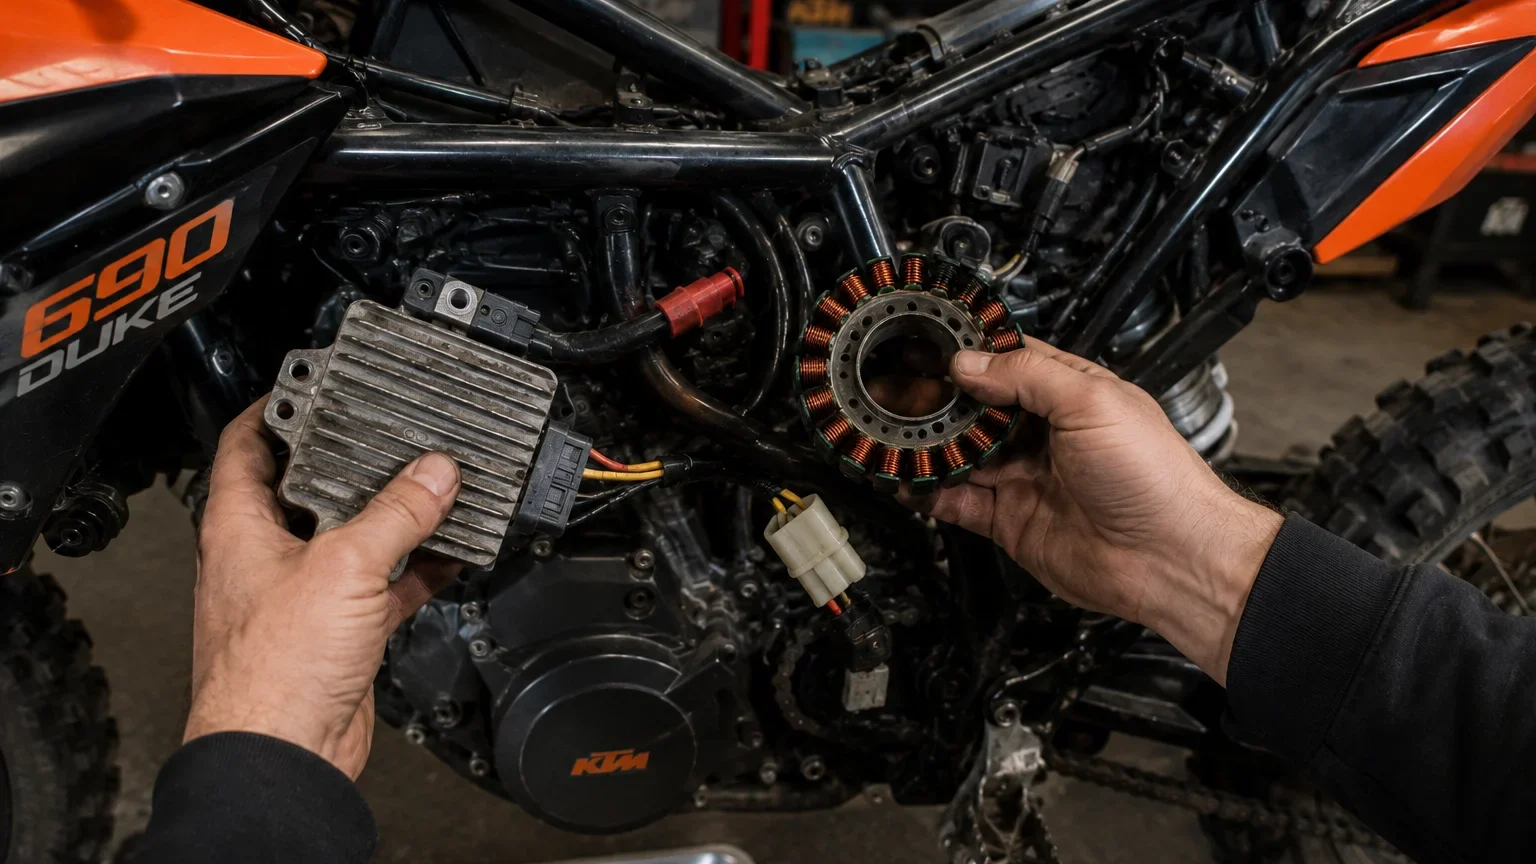
KTM 690 stator replacement

Aliwheels has a Voltage Regulator for the KTM Duke 690, covering the 690 Duke, Super Duke 990, and 690 SMC LC4 Adventure, a direct fit if your testing points to the regulator rather than the stator itself.

While You’re Already Into the Bike

If you’re pulling covers and doing electrical diagnostics anyway, it’s a reasonable time to check other maintenance items that share the same general work area. We stock a KTM 690 Duke Middle Pipe (2012-2019) for owners tackling exhaust work at the same time and a KTM 690 SMC R Radiator (2019) for anyone addressing cooling components during the same service session.

Keep a Spare If You Ride This Bike Hard

Given how often this component shows up as the culprit across such a wide range of 690 variants and years, plenty of experienced owners simply carry a spare stator or regulator on longer trips, especially anywhere far from a dealer. It’s not paranoia. It’s just what riding this platform long enough teaches you.

A Practical Testing Order

Start with the cheapest, fastest checks first. Confirm your battery itself is healthy before assuming a charging fault at all, since an old, worn battery can mimic these symptoms on its own. Test the stator’s coil resistance with the engine off. If the stator checks out, test the regulator/rectifier next rather than assuming the stator alone is guilty. Rule out a crank position sensor fault if your symptoms involve no spark at all rather than a slow charging decline. And if your fault only appears once the engine warms up, use the heat-gun trick to reproduce it on demand rather than waiting for a ride to trigger it. Browse the full KTM parts collection at Aliwheels today!

Frequently Asked Questions

How do I test a KTM 690 stator myself?

Disconnect it and measure resistance across the coil wires with a multimeter, engine off. Zero ohms generally means a healthy winding. Infinite resistance means it’s failed internally.

My bike only fails once it’s warmed up. What does that mean?

Heat-related intermittent failures are common on this platform. Try warming the suspect component directly to reproduce the fault on demand rather than waiting for a ride to trigger it.

Could this actually be a crank position sensor instead of the stator?

Yes, and it’s worth ruling out first, since the symptoms overlap heavily and a bad sensor doesn’t always throw a fault code. Live diagnostic data catches this where a basic scan won’t.

Is the stator or the regulator/rectifier more likely to fail?

Both fail often enough on this platform that you should test both once you’ve confirmed a charging problem, rather than assuming it’s automatically the stator.

Does power washing my bike make stator failure more likely?

It can contribute, since the stator cover isn’t fully sealed against water intrusion on this platform. Warming the engine up properly after washing helps dry out moisture before it causes damage.

Should I replace both the stator and regulator at the same time?

Not necessarily. Test both individually first. Replacing a healthy component alongside a failed one wastes money without fixing anything, since each part fails independently.
(Commenting: OFF)


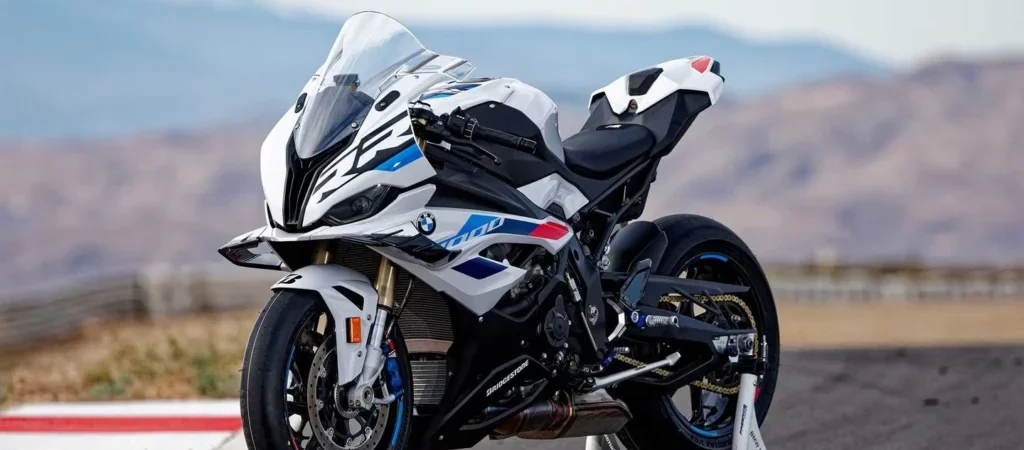
Your BMW S1000RR shifts fine most of the time. Then, without warning, it drops into neutral mid-upshift, or the quickshifter simply stops responding. BMW S1000 RR quickshifter problems have followed this bike through three distinct engine and electronics generations since 2009, and each generation develops its own version of the fault. Knowing which one you own changes where you should actually look first.

Not One Bike, Three Different Electronics Generations

BMW launched the S1000RR in 2009 as the first production superbike with a factory quickshifter option, a genuine first at the time. But the bike changed substantially in the years that followed, and its shift electronics changed right along with it.

Early models through around 2014 ran simpler electronics paired with a mechanical clutch switch. Later models moved to a more integrated ride-by-wire setup. The current K67 generation, launched around 2019, added ShiftCam technology borrowed from BMW’s boxer engines, along with a completely redesigned wiring architecture around the shift mechanism.

This history matters once something goes wrong. A fix that solves S1000RR quickshifter problems on a 2012 model can be completely irrelevant on a 2023 bike, because the hardware behind the identical symptom is different.

Early Models: A Simple Switch Causes Most of the Trouble

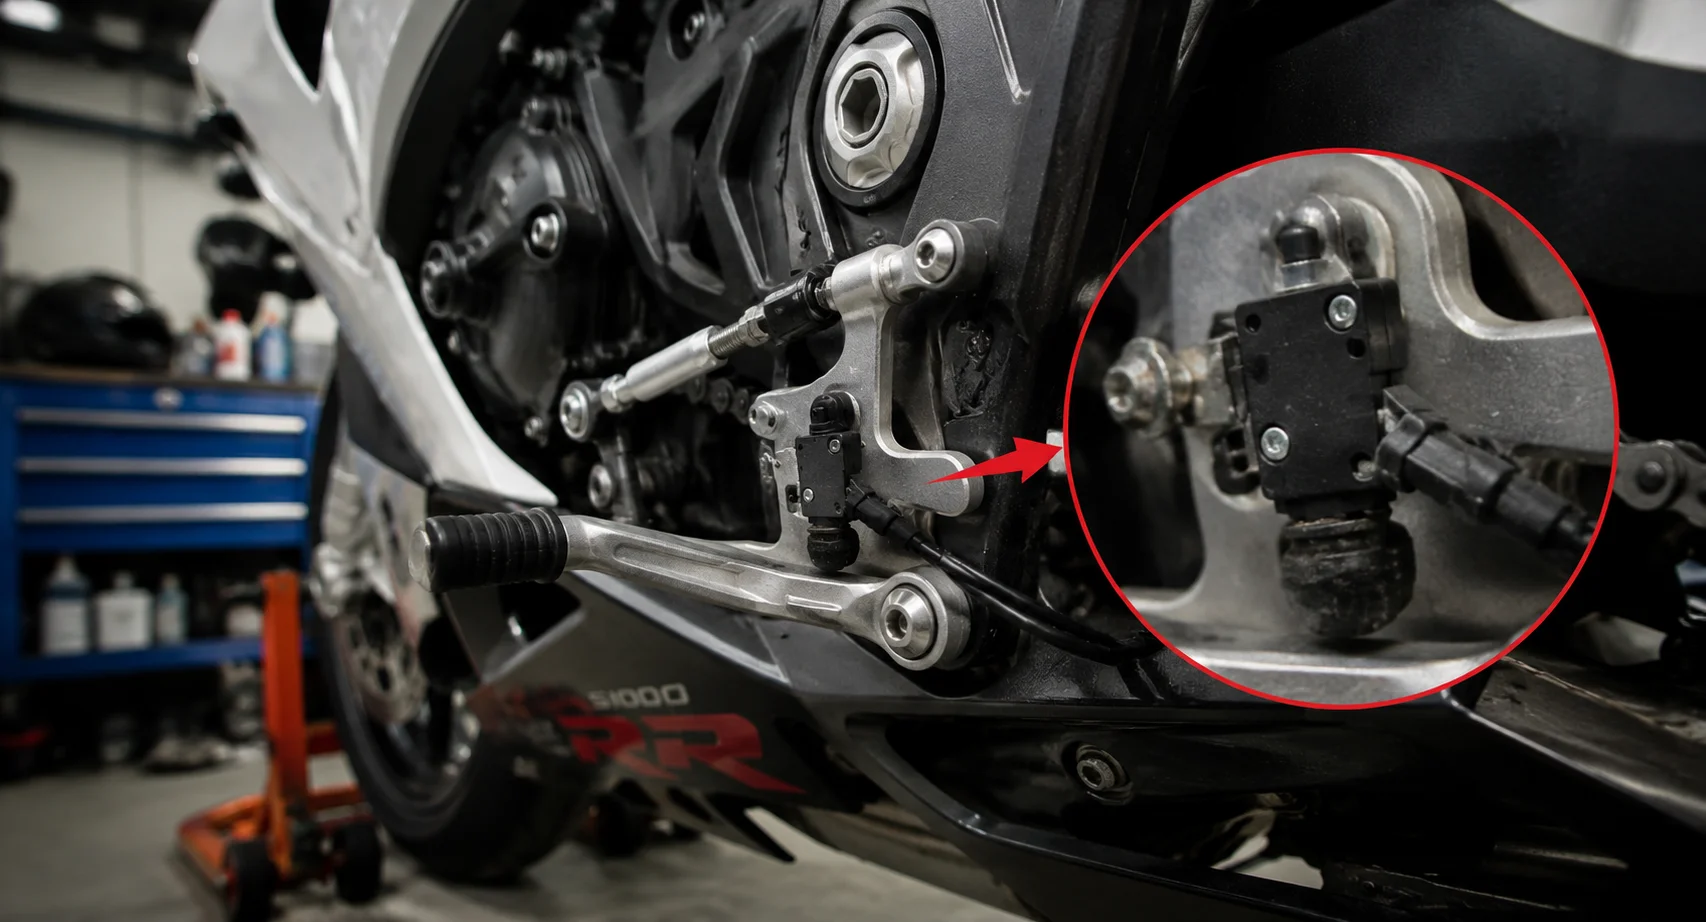
If you own an earlier BMW S1000RR and your shifter has started acting inconsistently, check the clutch-side micro switch first. This small switch tells the ECU exactly when to cut ignition briefly during a clutchless upshift.

BMW S1000RR quickshifter microswitch

One rider running a stock setup reported flawless shifting. His riding partner’s identical-year bike kept killing the engine every time he tried the quickshifter. The real difference turned out to be aftermarket rearsets installed on the second bike. Swapping components near the shift linkage had knocked the micro switch out of adjustment, even though the switch itself hadn’t failed at all.

If you’ve changed levers, rearsets, or shift linkage recently, and your quickshifter started misbehaving around the same time, that’s rarely a coincidence. Recheck the switch position before assuming you need a new part.

Riding Style Causes More BMW S1000RR Quickshifter Problems Than Owners Expect

Full throttle matters more here than most riders realize. Using the quickshifter while cruising gently, rather than genuinely accelerating, produces clunky, hesitant shifts that feel like a fault but aren’t one. BMW’s own documentation notes this directly: using the quickshifter at high revs with a neutral throttle, with no real load on the drivetrain, can stress the transmission through rapid, unnecessary load changes.

Before chasing a mechanical fault, ask yourself honestly whether you’re feathering the throttle properly during upshifts. This single habit resolves a surprising share of complaints that get blamed on the shifter itself.

Newer Models: When Adjustment Looks Fine but Isn’t

Here’s where things get tricky on 2023 and 2024 bikes. One owner dealing with clunky first-to-second shifts, occasionally dropping into neutral unexpectedly, checked his clutch lever free play and found it looked completely normal.

He called BMW technical support anyway. Their advice: adjust the clutch regardless of what the lever suggested. Once adjusted, the actual clutch engagement point turned out to be significantly out of spec, something lever free play alone couldn’t reveal.

This is the real lesson for later-generation owners chasing S1000RR quickshifter problems. Free play at the lever and correct internal clutch adjustment are two separate measurements, and checking only the first one leaves you chasing a ghost.

Resetting Transmission Adaptations the Right Way

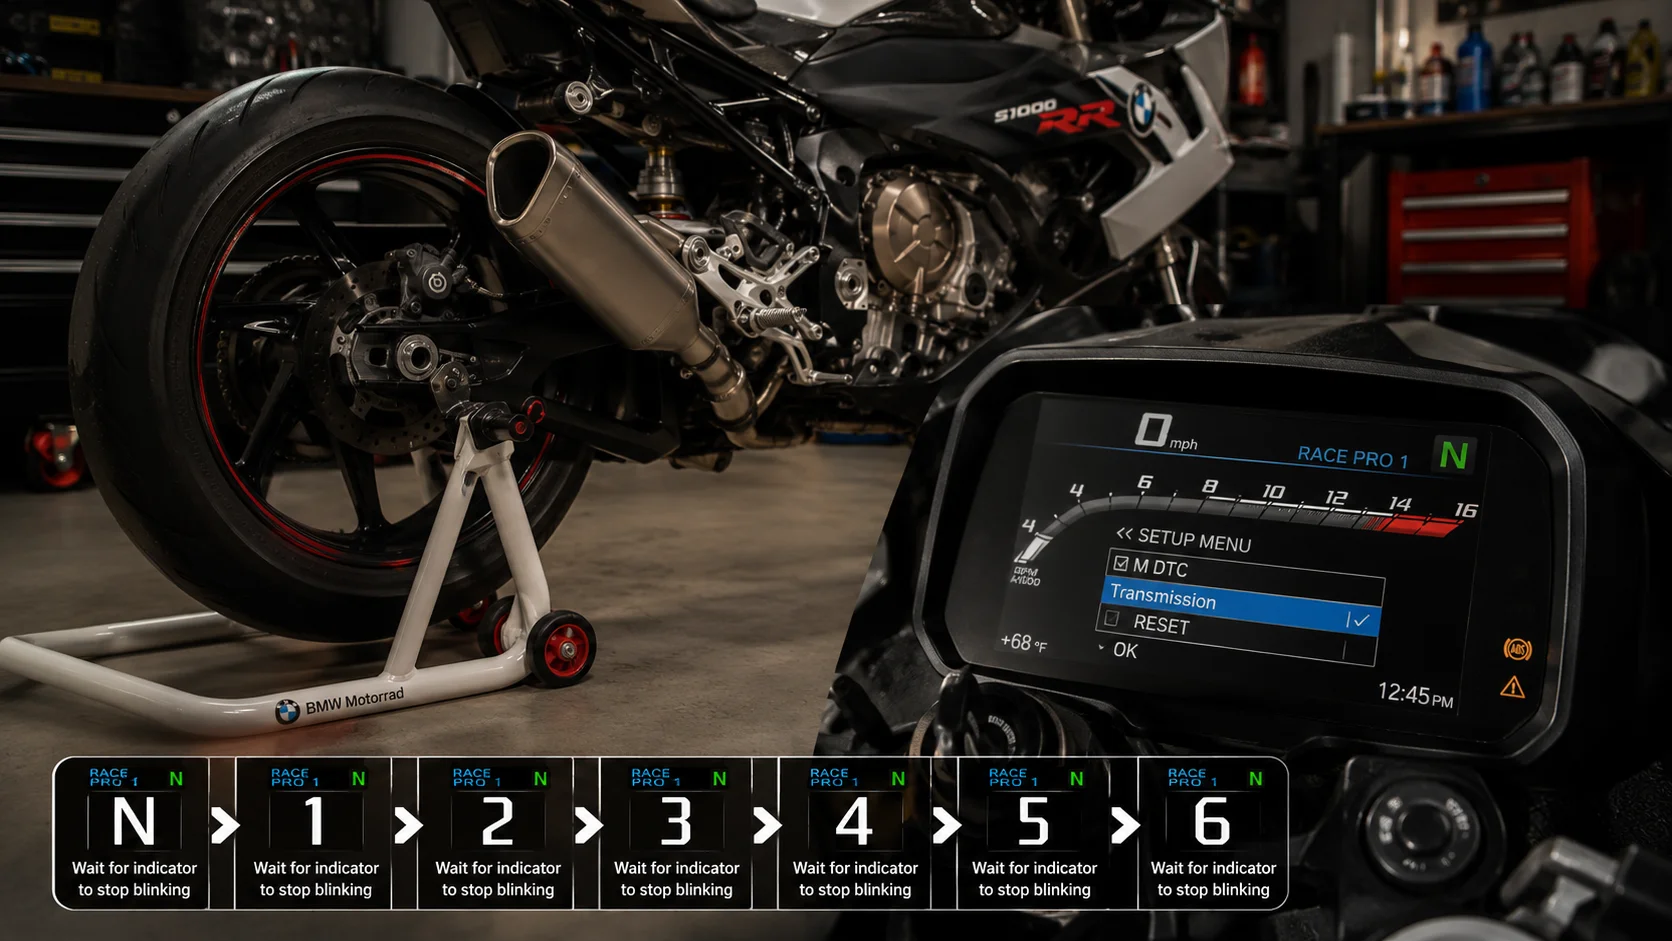
Modern S1000RR models learn and store shift patterns electronically, which means a genuine mechanical fix sometimes needs a software reset to actually take effect afterward. Put the rear wheel on a stand. Start the engine. Use the clutch to manually cycle through each gear, waiting at every gear for the dash indicator to stop blinking before moving on.

BMW S1000RR transmission reset

Skip this step after a repair, and you might still feel the old shift behavior, even though the mechanical issue underneath is already fixed. The bike is simply running on stale, previously learned data.

The K67 Generation’s Unique Failure Point

If you own a 2020 or newer S1000RR built on the K67 platform, troubleshooting looks completely different from earlier generations. This platform ties shift function directly to the ShiftCam solenoid, and the connector feeding that solenoid has a documented weak point.

BMW designed this connector as a two-piece click-together assembly. Removing it correctly requires sliding one section back first, then using a separate thumb tab to finish the disconnection. Skip that sequence, and it’s remarkably easy to damage the connection without realizing it, leaving a connector that looks fine externally but no longer makes solid contact.

The resulting symptom is unusual and worth knowing specifically: an RPM limit that behaves like limp mode, often without throwing a diagnostic trouble code at all. A bad camshaft sequence signal, caused by the damaged connector, doesn’t always register clearly enough for a GS-911 tool or BMW’s own ISTA software to flag it. You can stare at a clean diagnostic scan while the real fault sits in a connector nobody’s physically inspected yet.

If you own a K67-generation bike and you’re facing an unexplained power limit with a clean scan, inspect this connector before assuming something more serious is wrong.

When It’s Actually the Gearbox, Not the Shifter

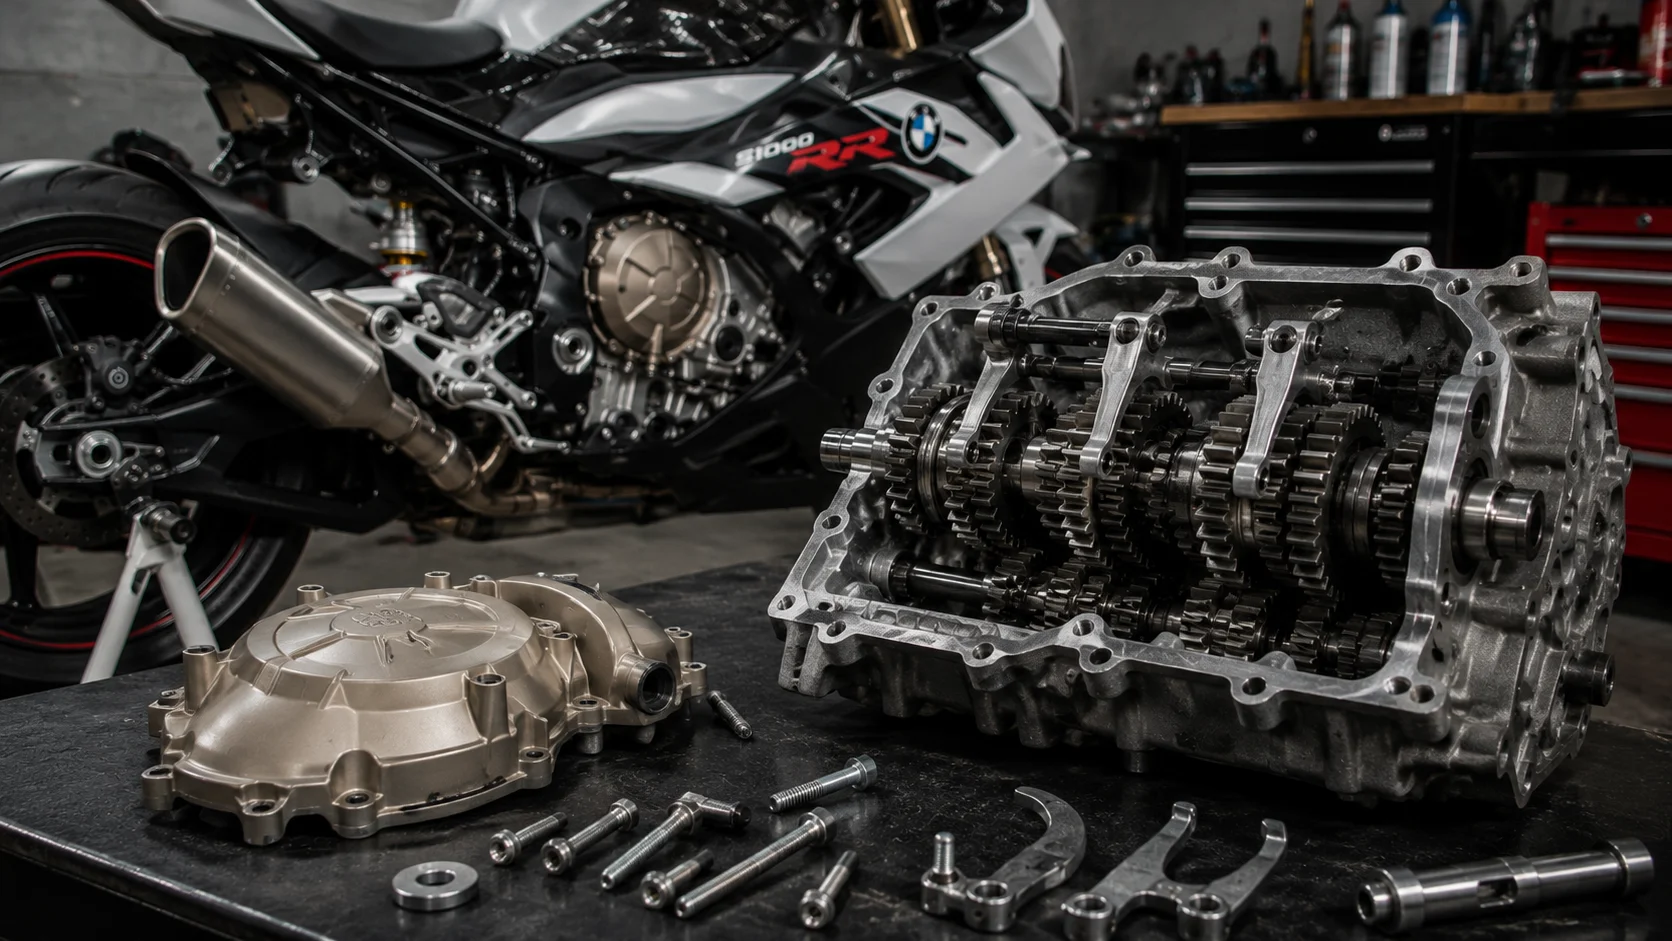
Sometimes what looks like a shift problem is really a transmission problem wearing a shifter’s costume. One owner described his bike sticking between second and third gear, with noticeably more lever travel available than the selector actually needed. Every other gear worked fine through the quickshifter. Only that one pairing kept sticking.

A local mechanic quoted roughly $1,200 just to strip the gearbox for inspection, with total repair costs estimated near $2,000 depending on findings. For a bike ridden mainly on weekends, that’s a genuinely tough number, and it pushed the owner toward considering the teardown himself.

BMW S1000RR gearbox inspection

This case also surfaced something worth knowing for anyone doing their own work: some clutch cover bolts on this platform are aluminum rather than steel, a deliberate weight-saving choice from launch. These bolts can snap if reused after removal. Once the cover’s been off, fresh hardware is the safer call rather than reinstalling the originals.

The usual suspects in gearbox-specific cases like this one are worn shift star engagement pins or damaged selector forks, both of which require actually opening the transmission to confirm. There’s no reliable way to diagnose this from the outside.

Deciding Whether to DIY the Deeper Repairs

Micro switch adjustment and transmission adaptation resets sit well within reach for most owners with basic tools and a service manual. Inspecting the K67 solenoid connector is manageable too, since it mainly demands care during disconnection rather than special equipment.

A genuine internal gearbox fault is a different category of repair entirely. Removing the gearbox on this platform sometimes requires pulling the engine first, depending on model year, and getting that wrong turns a contained problem into a much bigger one. If your symptoms point toward the transmission itself, get a second opinion before committing to a DIY teardown, and remember that even professional shops quote real money for this specific job.

A Practical Troubleshooting Order for BMW S1000RR Quickshifter Problems

Start with the cheapest checks first, regardless of which generation you ride. Confirm your throttle technique during upshifts, since timing genuinely affects shift quality across every model year. Check the microswitch position if you’ve modified anything near the clutch side recently. Verify actual clutch adjustment rather than trusting lever free play alone on newer bikes. Inspect the ShiftCam solenoid connector directly if you own a K67-generation bike showing an unexplained power limit with no fault code.

Only after ruling out all of these should you consider a genuine internal transmission fault, since that’s the most expensive and invasive item on this list.

Parts for Your S1000RR

Aliwheels stocks fitment-matched components for the BMW S1000RR platform. If troubleshooting your quickshifter leads to bodywork removal for better access, or a related component needs replacing along the way, we carry the BMW S1000RR Fairings for 2017-2018 and the BMW S1000RR Headlight for 2015-2018, both confirmed direct fitment for those model years.

A dedicated category page for the full S1000RR lineup was not confirmed live during this research, even though the BMW S1000 appears as a listed navigation category on the site. Verify the exact category URL through your backend before publishing, rather than relying on an unconfirmed guess.

Frequently Asked Questions

Why does my S1000RR drop into neutral during upshifts?

This often points to a microswitch out of adjustment, especially after changing rearsets or shift linkage. On newer models, verify actual clutch adjustment rather than trusting lever free play.

My S1000RR quickshifter feels clunky only at low RPM. What’s wrong?

This is frequently a throttle technique issue rather than a fault. Using the quickshifter without genuine acceleration can feel hesitant even on a fully healthy system.

My bike has an RPM limit but no fault code. What should I check?

On K67-generation bikes from 2020 onward, inspect the ShiftCam solenoid connector directly. Damage here doesn’t always trigger a code, even though it can cause a limp-mode-style power limit.

Do I need to reset anything after fixing a clutch adjustment issue?

Yes. Reset your transmission adaptations by cycling through the gears with the rear wheel elevated, waiting for the indicator to stop blinking at each gear.

How do I know if it’s the quickshifter or the actual gearbox?

If the problem is isolated to one gear pairing, with every other gear shifting normally, suspect the gearbox itself, specifically shift star pins or selector forks, rather than the shift switch.

Browse our full BMW motorcycle parts collection for fitment-matched components across the BMW S1000RR and related platforms.

(Commenting: OFF)

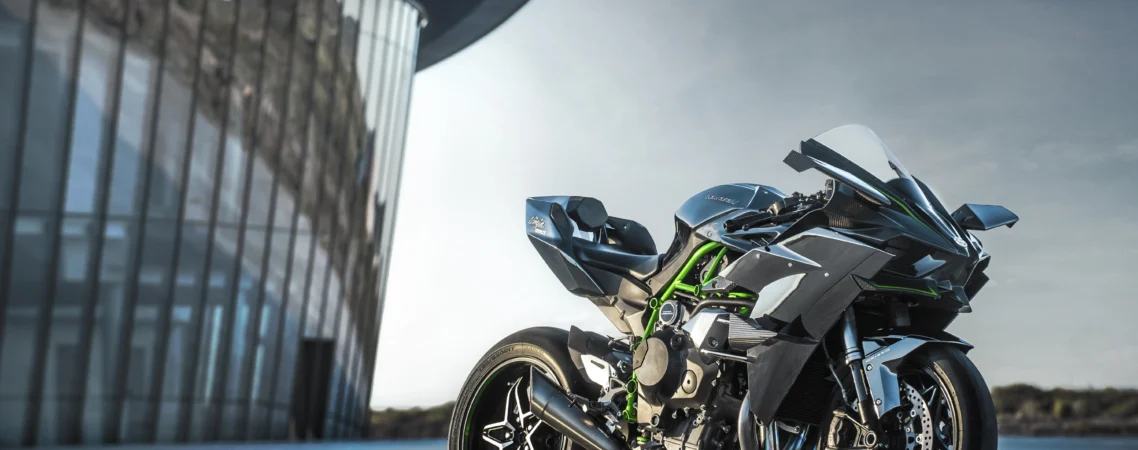
The Kawasaki Ninja H2R is not a street bike. It is a supercharged, track-only machine built for riders who push performance well beyond what most motorcycles are capable of, and that changes what riders actually need from their speedometer. Here is a complete guide to understanding and replacing this critical instrument.

Why the H2R Is a Different Category Entirely

Unlike most bikes where a speedometer simply confirms you are within legal limits, the H2R’s supercharged engine and extreme performance envelope make accurate speed data essential for how you ride the bike. Track riders pushing this machine near its limits rely on precise, real-time speed information to make split-second decisions about braking points, corner entry speed, and overall control at speeds far beyond typical street riding.

This is exactly why a malfunctioning or inaccurate speedometer on an H2R is not a minor inconvenience the way it might be on a commuter bike. It directly affects a rider’s ability to safely maximize the machine’s engineered performance.

What Can Go Wrong With the H2R’s Speedometer

As a track-focused machine, the H2R’s instrument cluster experiences a different stress profile than a typical street bike’s speedometer, and this shapes what tends to fail.

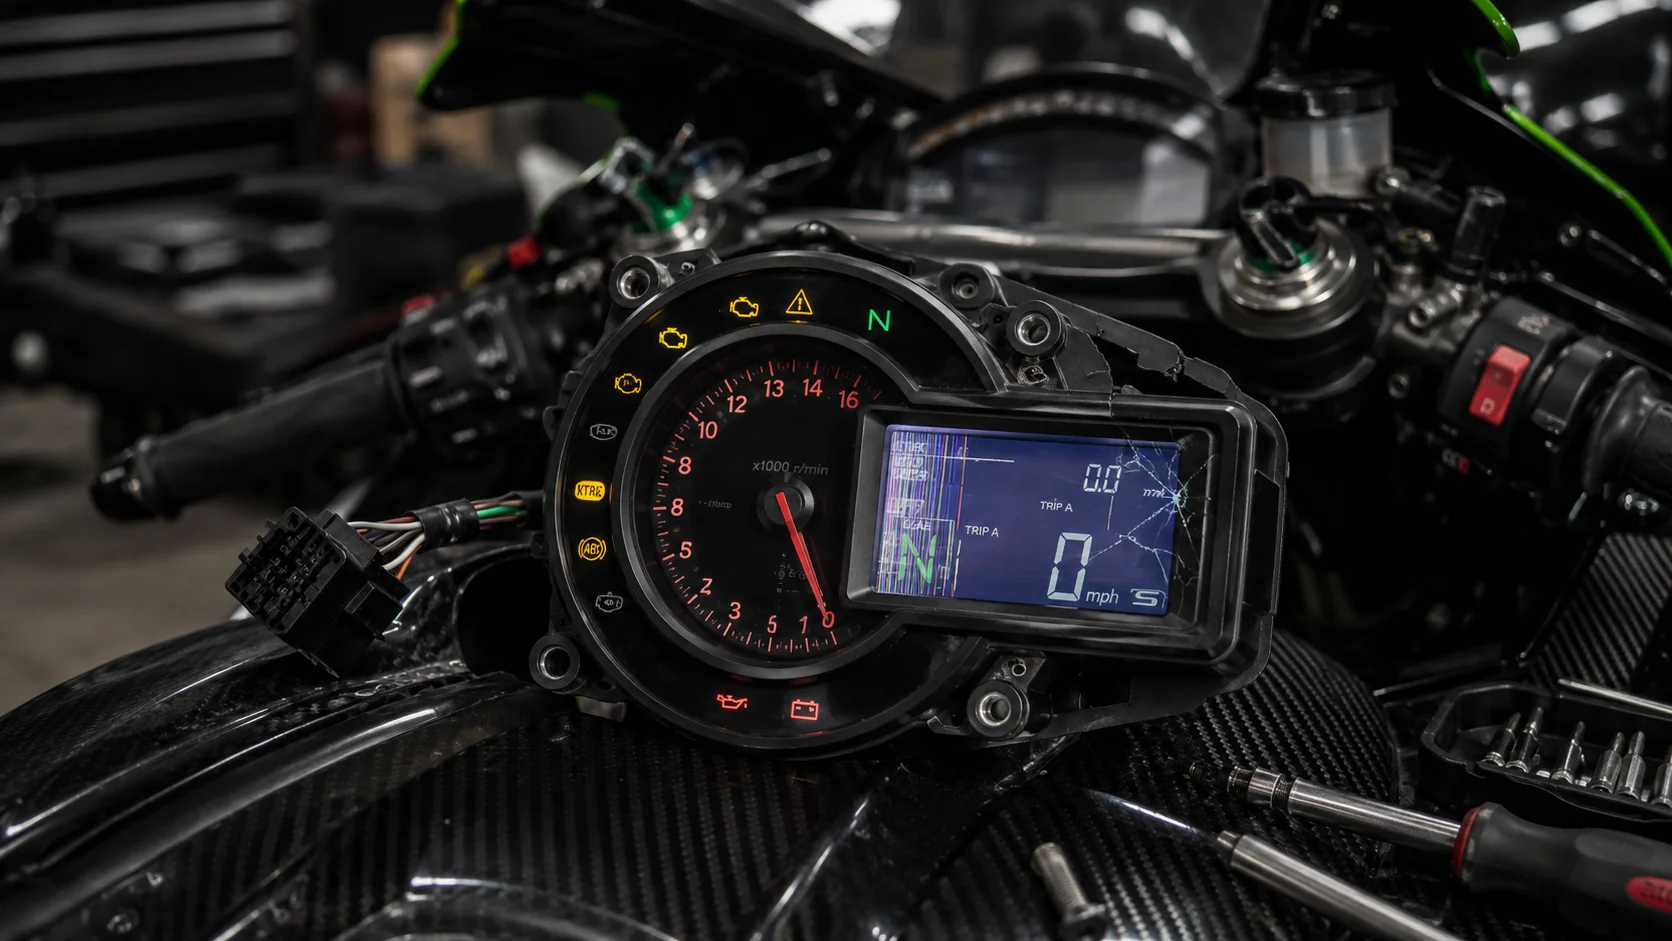
Damaged H2R speedometer

Vibration-related connector issues are a real concern given the extreme performance this bike is capable of. Sustained high-RPM operation and aggressive track use put more cumulative vibration stress on electrical connections than typical street riding ever would, which can gradually work connectors loose or cause intermittent readings over time.

Impact and mounting damage happens more frequently on track-focused machines than casual street bikes, given how these bikes get ridden and occasionally dropped during aggressive riding or track day incidents. A cracked housing or damaged mounting point compromises the entire unit’s reliability, even if the core electronics still technically function.

General wear from extreme use reflects simply how hard these bikes get ridden compared to a typical commuter motorcycle. Components rated for standard use see accelerated wear when consistently pushed to the kind of performance levels the H2R is designed for.

Why You Should Never Ignore Speedometer Issues on This Bike

Given the H2R’s genuinely extreme performance ceiling, riders need reliable, real-time speed data specifically for precision control when approaching the bike’s limits. An inaccurate or malfunctioning speedometer removes a critical piece of information exactly when a rider needs it most, during aggressive track riding where speed awareness directly informs braking and cornering decisions.

This is not a bike where “close enough” speed data is acceptable. If you notice any inconsistency, delay, or complete failure in your speedometer readings, addressing it before your next track session should be a genuine priority rather than something to defer.

Direct Replacement vs Generic Aftermarket Gauges

Given how specialized the H2R’s electronics and mounting are, a direct, purpose-built replacement matters more here than on many other bikes. A generic aftermarket gauge not specifically engineered for this model risks incompatible wiring, incorrect calibration, or a physical fit that does not properly integrate with the H2R’s cockpit layout.

A direct replacement for 2018–2023 models restores accurate function without calibration guesswork or a poor fit that could distract you during high-performance riding.

What Aliwheels Offers for the H2R

Aliwheels carries the Kawasaki Ninja H2R Speedometer for 2018-2023 model years, engineered with premium materials specifically to withstand the extreme demands of aggressive, track-focused riding. This direct replacement installs easily and restores accurate speed data, giving you full command of the bike’s performance without relying on faulty gauges.

Aliwheels H2R speedometer kit

Browse our full Kawasaki motorcycle parts collection for additional fitment-matched components built for this platform’s unique performance demands.

Installation Considerations

Given the H2R’s specialized electronics, confirming proper connector compatibility before installation is essential. Take time to verify the replacement unit’s wiring matches your bike’s harness exactly before finalizing the physical mounting, since a properly matched electrical connection is just as important as accurate physical fitment for this particular component.

After installation, test the speedometer function in a controlled, low-speed environment before returning to aggressive track riding, confirming accurate, consistent readings across a range of speeds rather than assuming correct function immediately after installation.

Maintaining Your Speedometer for Track Use

Given how demanding this bike’s use case is, periodic inspection of your speedometer’s mounting and connections helps catch developing issues before they become a track-day problem. Check for any visible cracking around the housing after aggressive sessions, and confirm electrical connections remain secure given the accumulated vibration exposure from sustained high-performance riding.

Frequently Asked Questions

Why does speedometer accuracy matter so much on the H2R specifically?

The H2R’s extreme performance envelope means riders rely on precise, real-time speed data to make critical decisions about braking and cornering at speeds far beyond typical street riding, making accuracy a genuine safety factor rather than a minor convenience.

What commonly causes speedometer issues on the H2R?

Sustained high-performance riding causes vibration-related connector issues, while aggressive track sessions and incidents lead to mounting damage and accelerated overall wear.

Should I use a generic aftermarket gauge or a direct replacement?

Choose a direct, model-specific replacement over generic gauges, which often cause wiring incompatibilities or fitment issues in the H2R’s cockpit.

Does Aliwheels stock a speedometer for the Kawasaki H2R?

Yes, a direct fitment speedometer is available for 2018-2023 model years, engineered specifically to withstand aggressive, track-focused riding demands.

How do I know if my H2R speedometer needs replacing?

Watch for inconsistent readings, delayed response, or complete failure to display speed data. Given how critical accurate speed information is on this machine, address any of these signs before your next track session.

Browse our full Kawasaki motorcycle parts collection for fitment-matched components built for extreme performance riding.

(Commenting: OFF)

Or login with your social account