



Free Shipping over $300

Support 24/7

Secure Payments

Hot Offers

Aliwheels is a leading motorcycle parts supplier offering free shipping anywhere in the world on orders above $300. Please note that all of our motorcycle parts and accessories are certified and tested. With more than 10,000* products to choose from this is your one place to get the motorcycle part you need. Browse our vast inventory of motorcycle radiators, fairings, clutch plates, headlights, chains, and sprockets.

Free Shipping over $300

Support 24/7

Secure Payments

Hot Offers

Ask any Harley Breakout owner about the passenger seat, and you’ll get an honest reaction fast. Most say the same thing: it looks great parked outside a bar, but it’s rough on longer rides. Your passenger might smile for the photo, then quietly dread the next hour on the road.

This isn’t a rare complaint. It’s one of the most consistent topics across Harley Davidson forums, owner reviews, and even professional bike tests. Let’s look at why the stock Breakout pillion seat causes so much discomfort, and what actually fixes it.

Why the Stock Pillion Seat Falls Short?

The Breakout was designed around a specific look first. Its raked-out stance, low profile, and minimalist styling define the bike’s whole identity. That styling comes at a cost for the passenger seat, though.

Professional reviewers testing the 2023 Breakout 117 noted rider comfort held up fine, but passenger comfort dropped off fast. The seat’s shape and padding simply weren’t built with long-distance two-up riding in mind.
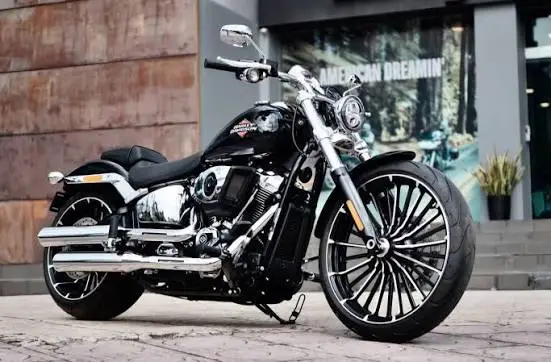
Harley Breakout 117 pillion seat

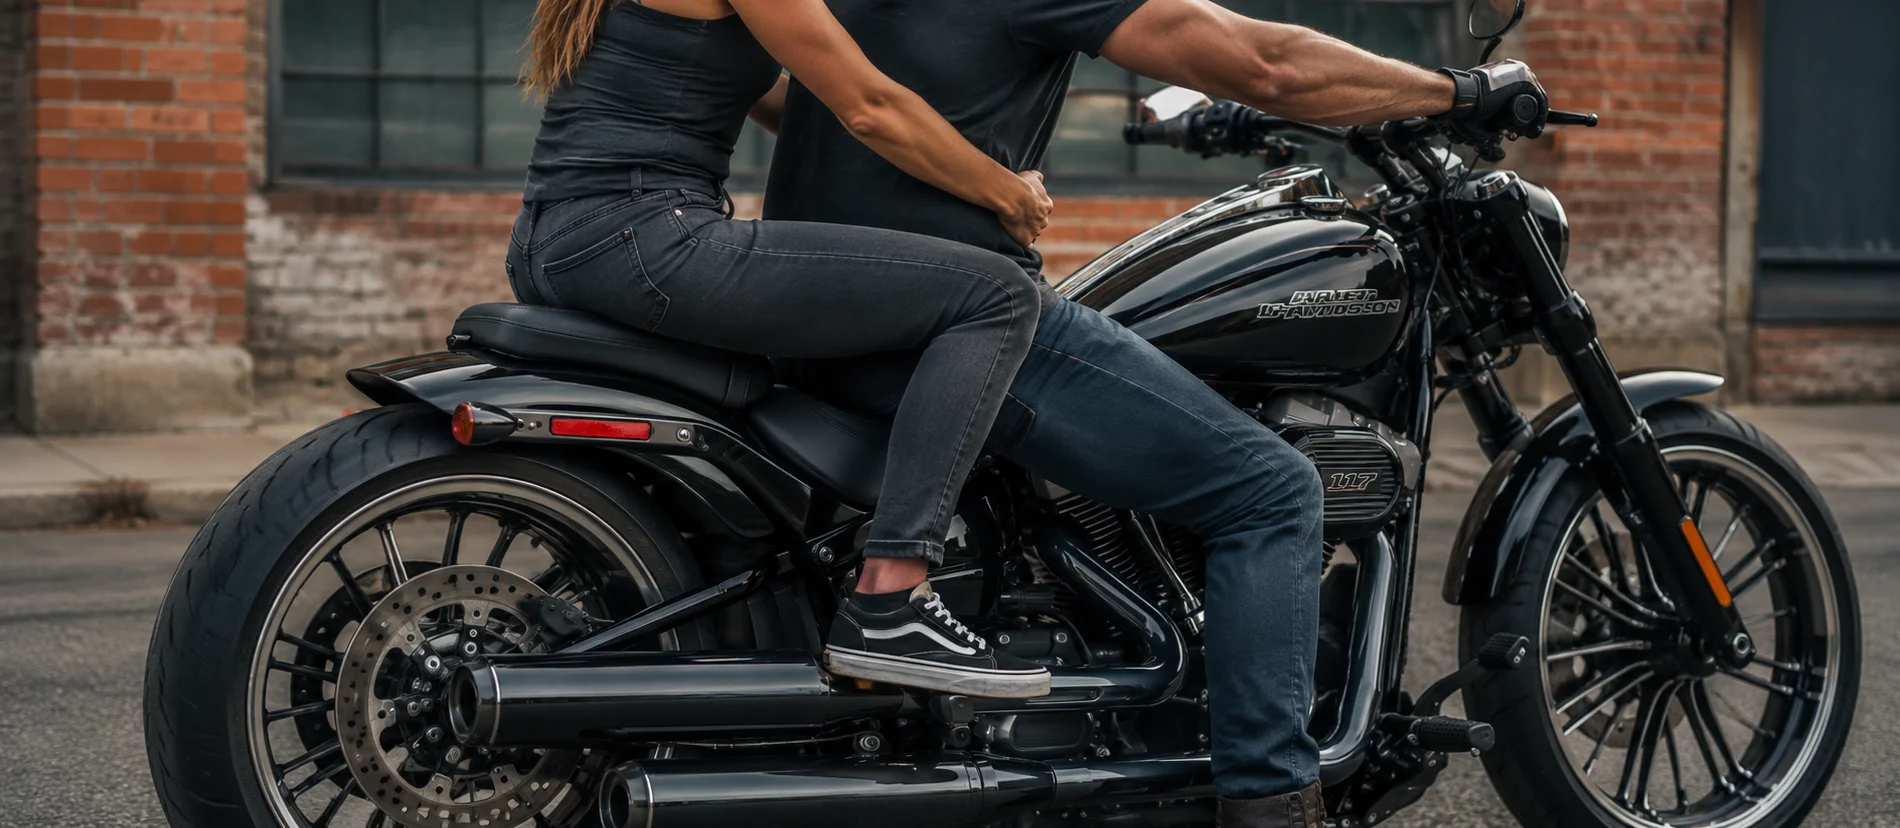
Owners echo this on forums repeatedly. Common complaints include a small, hard pillion pad that doesn’t support proper weight distribution, and a noticeable size mismatch between the rider’s seat and the passenger pad, leaving an awkward gap that looks unfinished and feels worse.

What Riders Are Saying?

Across Harley Davidson forum threads, a clear pattern shows up.

Passengers describe the ride as uncomfortable within the first 30 to 60 minutes, especially on highway stretches. Some owners compare it to sitting on a narrow board rather than a proper seat.

Several riders mention the fit issue directly. Aftermarket driver seats designed for comfort often don’t pair well with the stock pillion pad, creating a mismatched look and an uneven riding surface for the passenger.

Long-distance touring riders report their passengers asking for more frequent stops, purely because of seat discomfort, not fatigue from the ride itself.

This isn’t a one-off complaint from a single unhappy owner. It’s a recurring theme across model years, including the newer 117-equipped Breakouts.

This Matters Beyond Comfort

Passenger discomfort affects more than just how your rides feel. It changes how often you ride two-up in the first place. Riders who love bringing a partner or friend along find themselves avoiding longer trips, simply because the seat makes it unpleasant past the first hour.

There’s also a stability factor worth mentioning. An uncomfortable passenger tends to shift position more, which affects overall balance and control, especially at lower speeds or during stops.

Fixing the seat isn’t just about comfort. It’s about actually being able to enjoy the bike the way it’s meant to be ridden, with someone else on board.

The Fix: Upgrading to a Proper Two-Up Seat

The solution most experienced owners land on is a dedicated driver and passenger seat set, built specifically for proper weight distribution and a matched fit.

Aliwheels carries the Harley-Davidson Breakout FXBR 117 Driver & Passenger Pillion Seats (2023-2024), designed as a matched set rather than a mismatched aftermarket pairing. Built with PU and microfiber leather over foam padding, this set solves the exact fit and comfort gap owners complain about, since both seats are made to work together instead of being sourced separately.
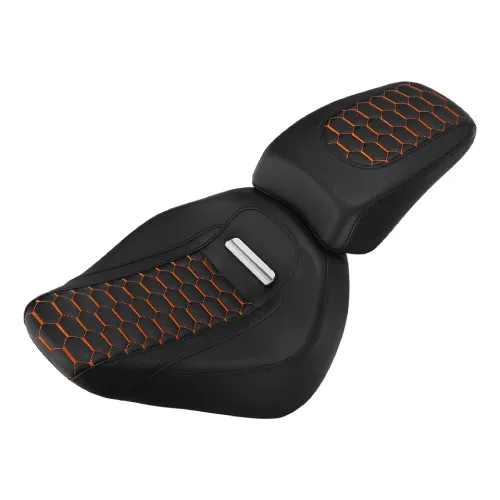
Harley-Davidson Breakout FXBR 117 Driver & Passenger Pillion Seats 2023-2024

What to Look for in a Seat Upgrade

If you’re comparing options, a few factors matter more than looks alone.

Matched proportions. A driver and passenger seat built as a set avoids the awkward gap issue owners report with mismatched aftermarket combinations.

Real foam depth, not just cosmetic padding. Thin padding might look sleek, but it won’t hold up on rides past the one-hour mark.

Proper width for weight distribution. A pillion pad that’s too narrow forces the passenger’s weight onto a small contact area, which is exactly what causes the discomfort in the first place.

Installing Your New Seats

Most seat swaps on the Breakout follow a similar process:

  1. Remove the stock seat by releasing the mounting latch or bolts, depending on your exact setup.
  2. Disconnect any wiring for seat-mounted sensors, if your model has them.
  3. Position the new driver seat and secure it to the factory mounting points.
  4. Attach the matched passenger seat, checking that both sit flush without gaps.
  5. Test the fit before your first ride, adjusting mounting points as needed.

Most owners complete this in under an hour with basic tools.
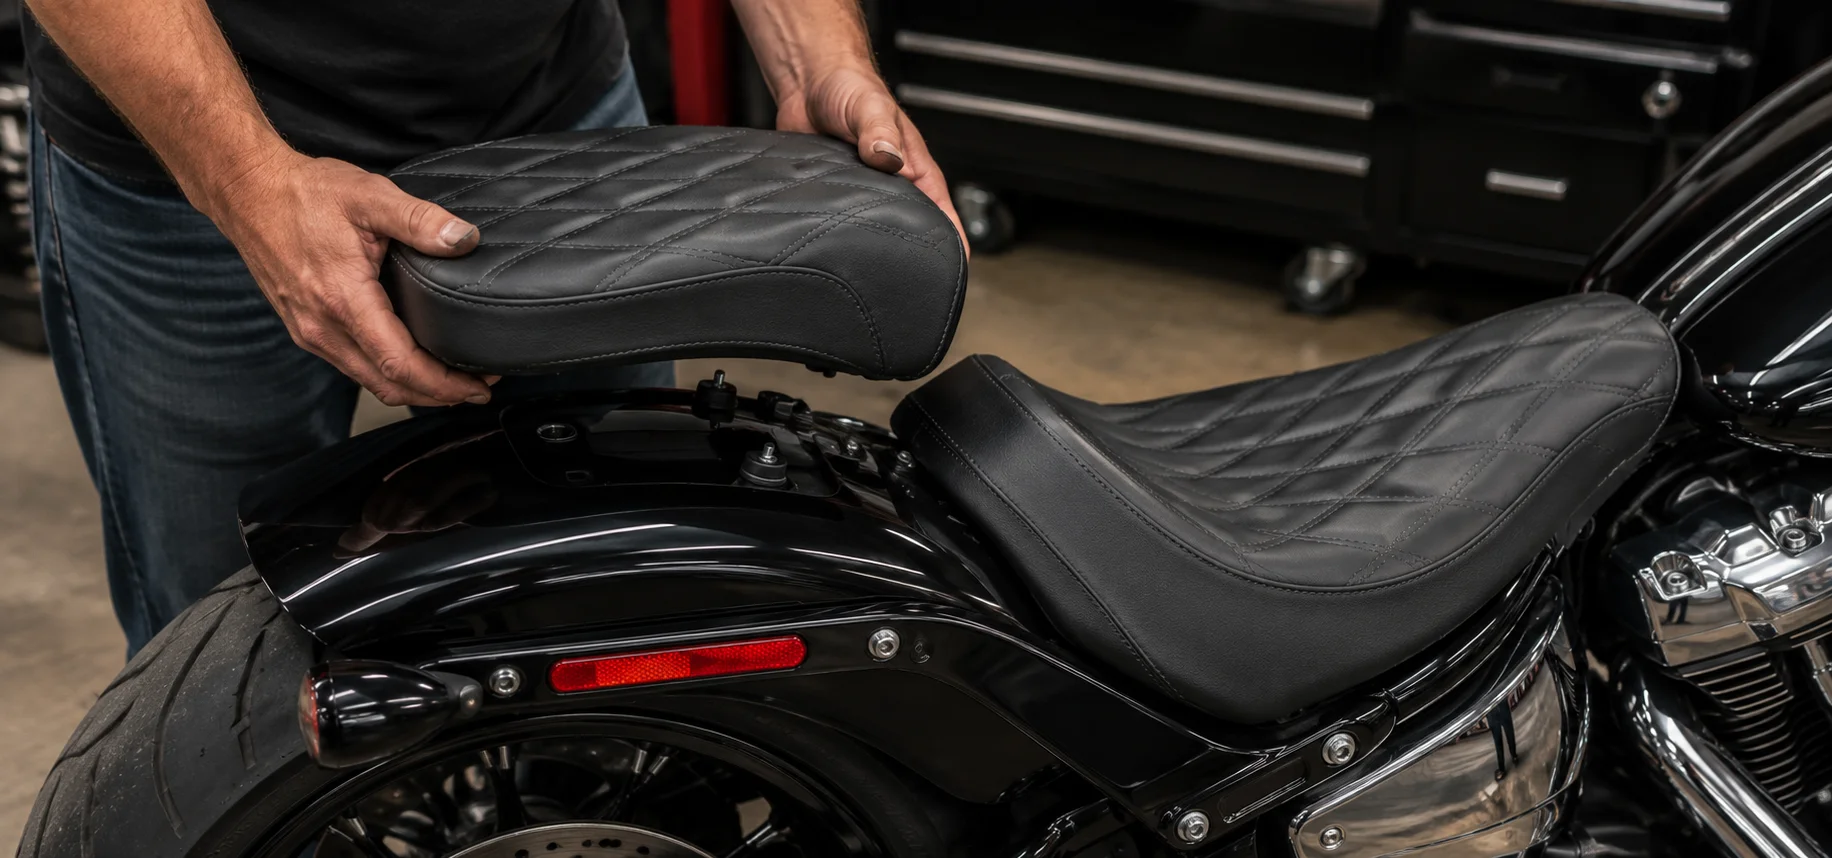
Installing Your New Seats

A Few Other Comfort Tips

Even with an upgraded seat, a couple of small adjustments help further.

Check your passenger’s foot peg height and reach. Comfort isn’t only about the seat. Proper leg positioning reduces fatigue on longer rides too.

Consider a sissy bar or backrest if your passenger rides with you often. Reviewers and forum owners both note that back support makes a noticeable difference on extended trips, especially paired with an upgraded seat.

Break in new seats gradually. Foam padding settles over the first few rides. Don’t judge comfort purely off the first short trip around the block.

Browse More Harley Breakout Parts

If you’re upgrading your seat setup, it’s a good time to check the rest of your touring comfort components too. Aliwheels stocks a wide range of fitment-matched parts for Harley-Davidson models in the Harley-Davidson parts collection, covering everything from foot controls to windshields.

Conclusion

The Breakout’s pillion seat complaint isn’t a myth or an exaggeration. It shows up consistently in owner forums, professional reviews, and real riding experience. The stock seat was built to match the bike’s aggressive styling, not necessarily long-distance passenger comfort.

A matched, properly padded seat set solves this directly, letting you actually enjoy two-up rides instead of cutting them short. If your passenger has been quietly suffering through short rides on your Breakout, this upgrade is worth making before your next long trip.
(Commenting: OFF)

You’re riding your KTM 390, and suddenly your calf feels like it’s on fire. Not a metaphor. The exhaust heat is radiating straight through your riding pants and onto your skin. If this has happened to you, you’re not imagining things, and you’re definitely not alone.

This is one of the most talked-about complaints on KTM Duke and Adventure forums. Riders swap stories about burnt jeans, red marks on their legs, and long rides cut short because of the heat. Let’s break down why this happens and what actually fixes it.

Why the KTM 390 Runs So Hot Near Your Leg?

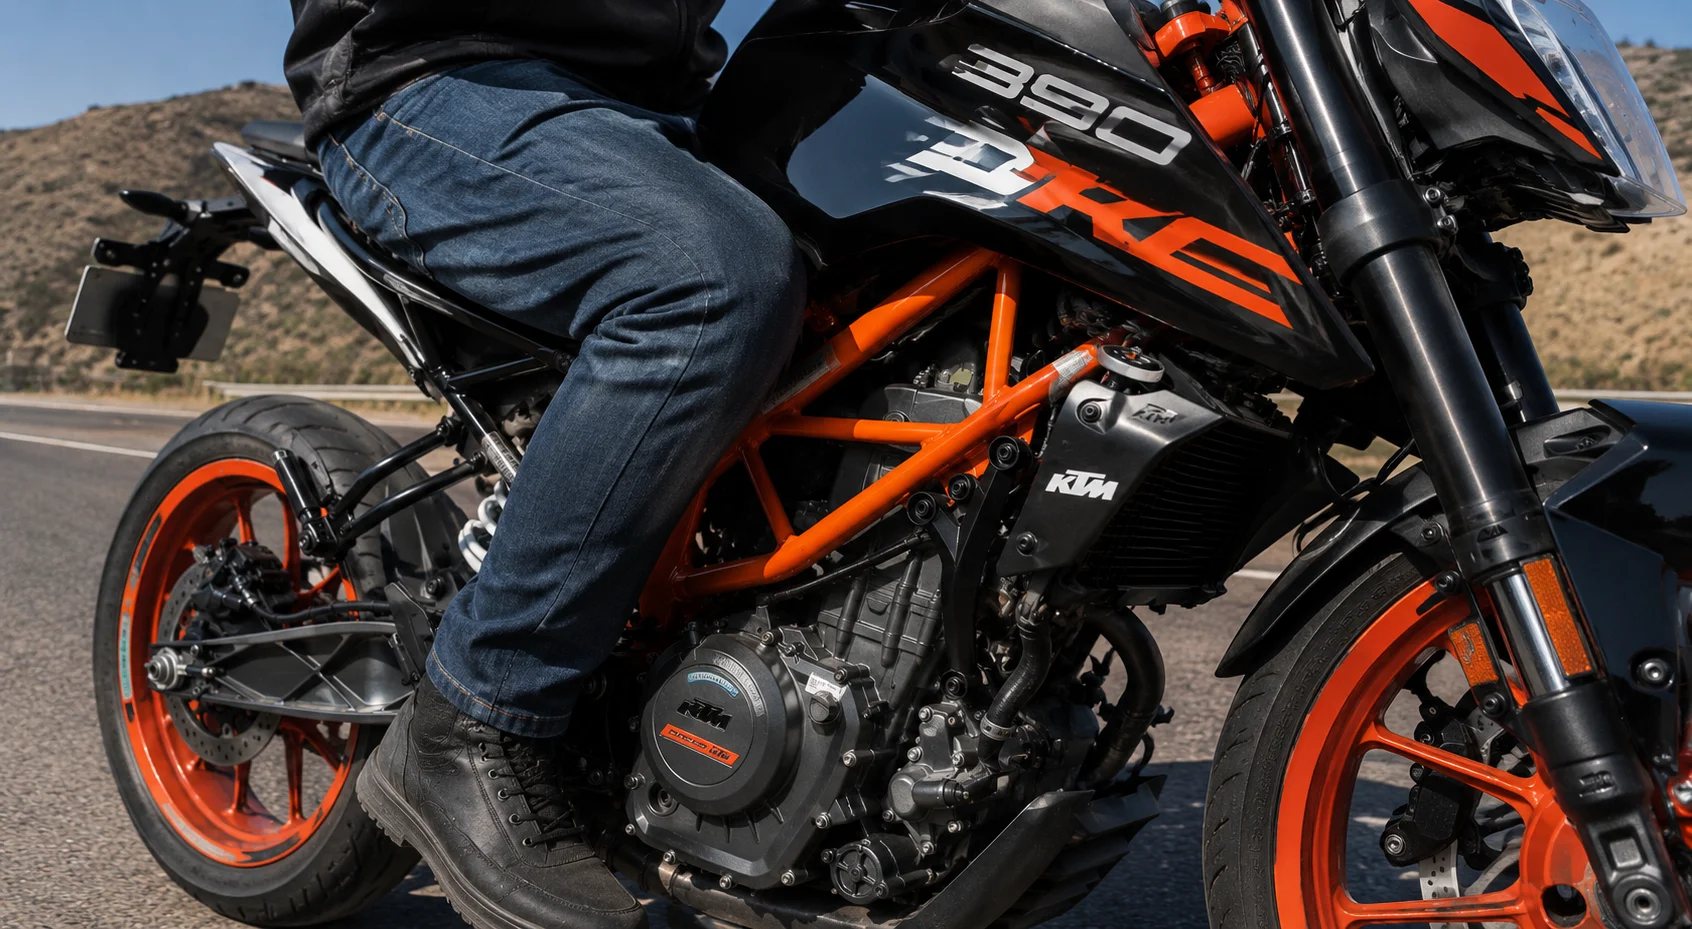
The 390’s exhaust routing sits close to the rider’s right leg by design. Compact bikes like the Duke and Adventure prioritize a tight, aggressive stance. That styling choice puts the header pipe and mid-section closer to your body than on bulkier touring bikes.

Add in KTM’s single-cylinder engine, which runs hotter than a multi-cylinder setup relative to its size, and you get a recipe for serious heat buildup right where your leg sits.

Stock heat shields on many 390 model years are thin, and they cover less surface area than riders actually need. That’s the core of the problem. The shield that ships from the factory simply isn’t built to handle sustained highway riding or hot climate conditions.

KTM 390 engine heat

Common Symptoms Riders Report

Burn marks or discoloration on riding pants. This is usually the first sign. The fabric near your calf starts showing heat damage before you even feel it directly.

Direct skin irritation on longer rides. Short trips around town rarely cause problems. It’s the 30-minute-plus highway stretches where the heat builds up enough to become painful.

Heat radiating even at a stop. Idling at a red light with your leg near the pipe feels noticeably hotter than expected, especially in summer traffic.

Worse heat in stop-and-go city riding. Without airflow to cool the exhaust down, heat builds up fast during traffic jams or slow city commutes.

Riders across multiple KTM forums describe this same pattern year after year. It’s not a one-off defect. It’s a known characteristic of how the bike is built.

Is This Actually Dangerous?

Direct burns from prolonged exposure are a real risk, not just discomfort. Riders have reported blistering after long rides in hot weather without proper protection. Beyond the physical risk of burns, the constant heat is distracting. Distraction while riding is a safety problem, especially in traffic or on unfamiliar roads.

This isn’t a “just get used to it” situation. It’s worth fixing properly.

What Doesn’t Fix It

Before we get to the real solution, let’s clear up a few things riders try that don’t actually solve the problem.

Thicker riding pants alone. This helps a little, but it treats the symptom, not the source. You’ll still feel heat on long rides, just delayed slightly.

Rerouting the exhaust yourself. Some riders attempt DIY reroutes. This is risky, can affect performance, and often voids warranty coverage. Not recommended unless you’re an experienced fabricator.

Ignoring it and hoping it improves. It won’t. Heat shields don’t get better with age. If anything, thin factory shields warp or loosen over time, making the problem worse.

The Real Fix: Upgrading Your Heat Shield

A properly fitted, higher-coverage heat shield solves this at the source. Instead of managing the heat after it reaches your leg, a good shield blocks more of it from radiating outward in the first place.

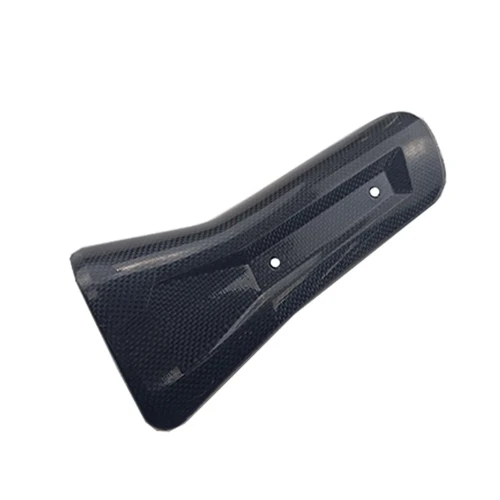
KTM 390 Adventure Exhaust Heat Shield 2020-2023

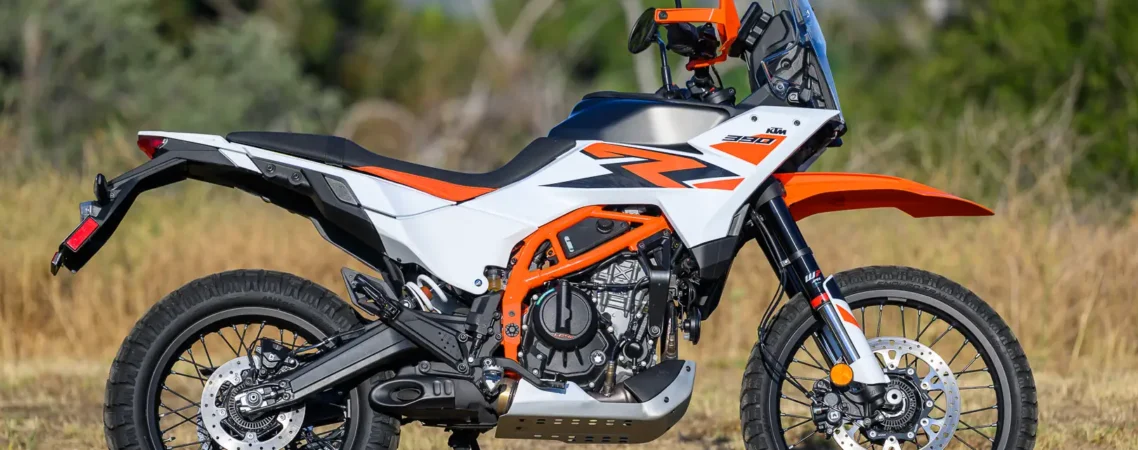
Aliwheels stocks the KTM 390 Adventure Exhaust Heat Shield (2020-2023), made from carbon fiber for better heat resistance and a lighter overall weight than stock steel shields. Carbon fiber handles sustained heat exposure better than the factory setup, and it holds its shape instead of warping under repeated heat cycles.

Installing It

Installation is straightforward for most riders comfortable with basic tools:

  1. Let the bike cool completely before starting. Never work on a hot exhaust.
  2. Remove the factory shield by unbolting the mounting brackets.
  3. Position the new shield over the same mounting points.
  4. Secure it with the provided hardware, checking that it sits flush against the exhaust without touching bodywork.
  5. Double-check clearance around your leg position before your first ride.

Most riders finish this in under an hour without needing a mechanic.

Additional Tips for Hot Weather Riding

Even with an upgraded shield, a few habits help manage heat on brutal summer days.

Wear riding gear rated for abrasion and heat resistance, not just fashion. Proper riding pants make a real difference even with a better shield installed.

Avoid prolonged idling in traffic when you can help it. Filtering through slow traffic, where it’s legal and safe, reduces the time your leg spends near a stationary hot pipe.

Check your shield periodically for loose bolts or shifting position. A shield that’s drifted out of place stops doing its job even if it’s the right part.

Hot weather riding

Browse More KTM 390 Parts

If you’re upgrading your exhaust setup, it’s worth checking your full parts fitment while you’re at it. Aliwheels carries a range of KTM parts built for your exact model and year, helping you avoid guesswork on fitment.

Conclusion

The KTM 390’s heat-near-the-leg problem is real, well-documented, and common enough that riders across forums have been discussing it for years. It’s not something you have to accept as part of owning the bike. A properly fitted carbon fiber heat shield addresses the root cause, protects your gear, and makes long rides comfortable again.

If you’ve been dealing with burnt pants or leg discomfort on your 390, this is the fix riders keep coming back to.

(Commenting: OFF)

Your Yamaha YZF-R7 won’t start. Or maybe it starts fine, then dies on the highway. Your headlight flickers at idle. Your battery keeps draining, even after a full charge. If any of this sounds familiar, don’t blame the battery yet. The real culprit is often the voltage regulator.

This guide walks you through the exact symptoms, how to test it yourself, and what to do once you’ve confirmed the problem. No guesswork. No unnecessary parts swaps.

What Does a Voltage Regulator Do?

Your R7’s stator generates raw electrical power from the engine. But that power comes out uneven and too strong for your bike’s electronics. The voltage regulator steps in here. It converts that raw AC power into clean, steady DC power. Then it sends that power to charge your battery and run your electronics.

When the regulator fails, this whole chain breaks down. Your battery either overcharges or undercharges. Neither outcome is good for your bike.

Common Symptoms of a Failing Voltage Regulator

Riders on Yamaha forums report the same handful of warning signs, over and over. Here’s what to watch for on your 2022-2024 YZF-R7.

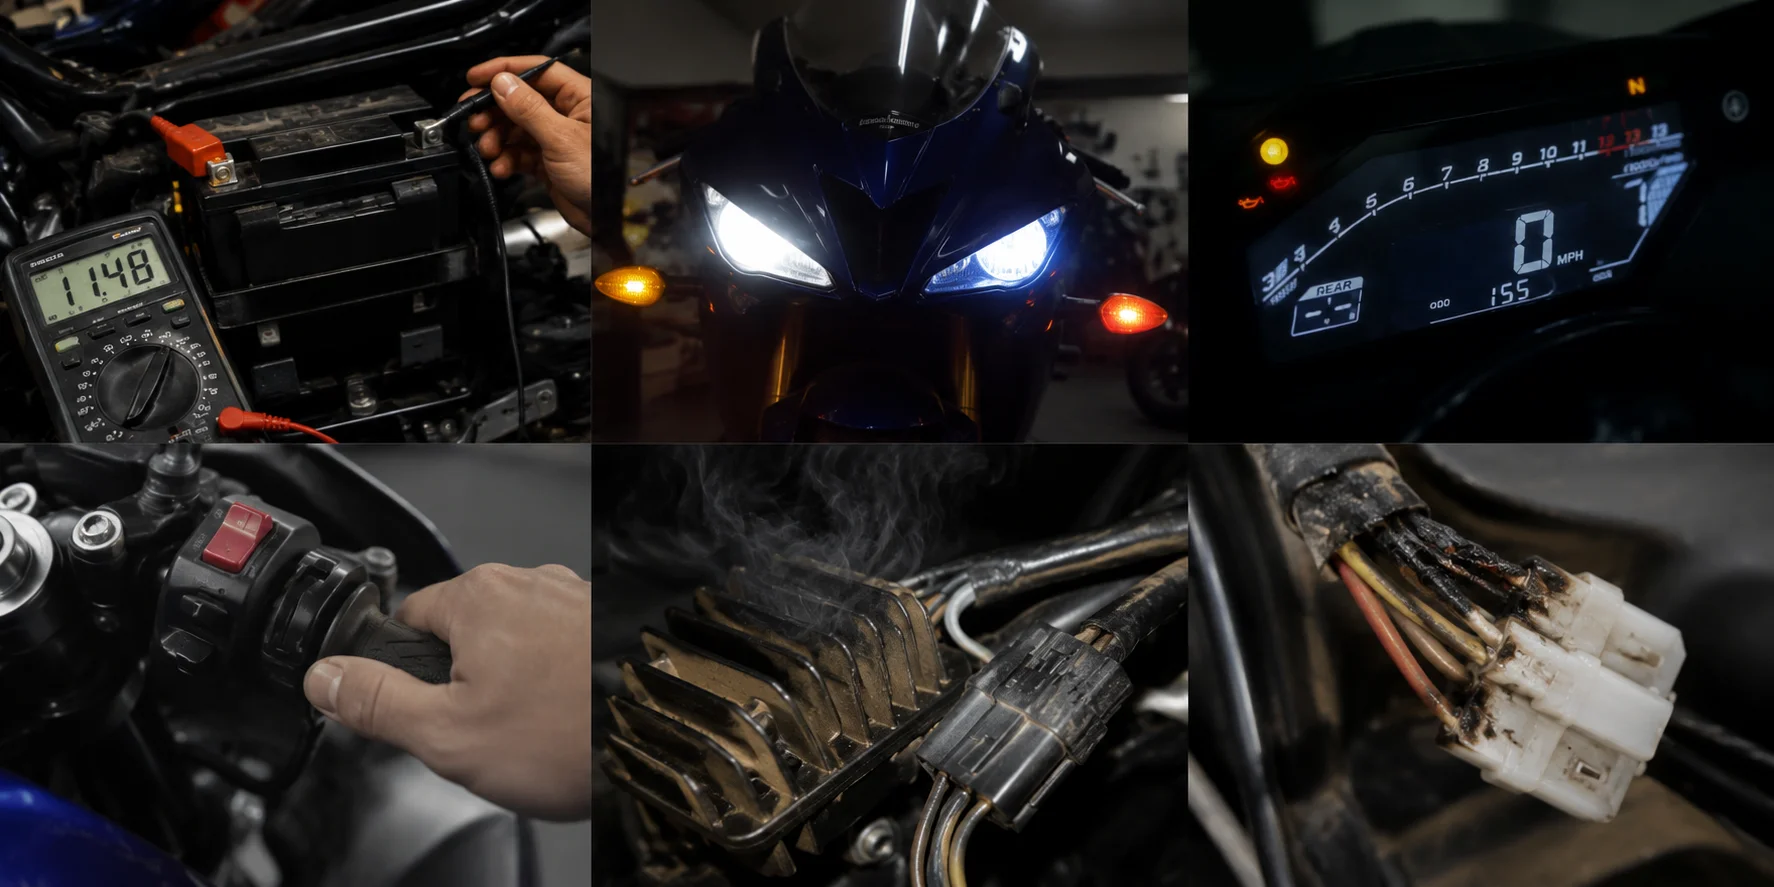
Yamaha R7 regulator failure symptoms

Battery drains even when the bike runs. You’d expect a running engine to charge your battery. Instead, it keeps dying. This usually means the regulator isn’t sending enough voltage back to the battery.

Headlights flicker or dim at idle. Since your regulator controls voltage flow, any instability shows up first in your lights. Flickering at low RPM, then steadying out at higher RPM, is a classic early sign.

Bike won’t start after sitting overnight. A healthy charging system keeps your battery topped up between rides. A failing regulator lets it slowly bleed out.

Burnt smell near the regulator housing. Voltage regulators fail because they overheat internally. Sometimes you’ll catch a faint burning smell before the part dies completely. Don’t ignore this. Replace the part before it takes your battery down with it.

Warning lights on your dash. Some riders see charging system alerts. Others just notice the dash acting strange, dimming or flickering along with everything else.

Melted or discolored wiring near the connector. Open up the regulator housing and check the wiring. Overheating leaves visible damage. Yellow or brown discoloration on the plug means heat has already done damage.

None of these symptoms guarantee a bad regulator on their own. But two or three together, especially the battery drain and flickering combo, point straight at this part.

How to Test Your YZF-R7’s Voltage Regulator

You don’t need a mechanic for this. A basic multimeter and ten minutes get you a clear answer.

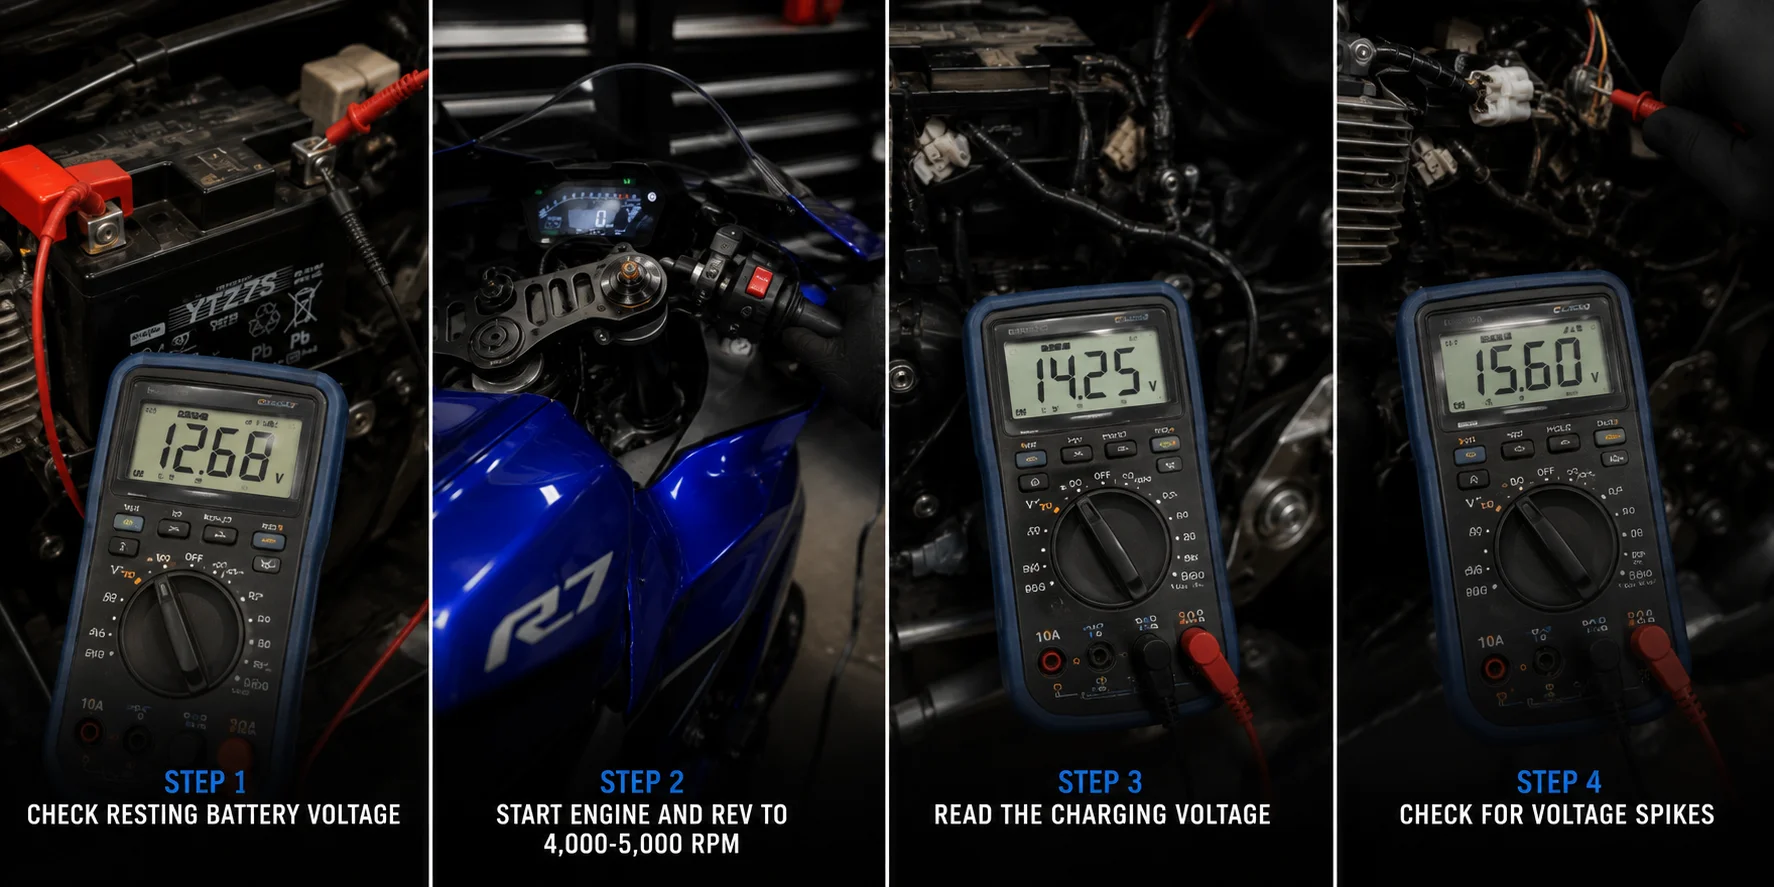
Testing Yamaha YZF-R7 voltage regulator

Step 1: Check resting battery voltage. Turn off the bike. Set your multimeter to DC volts. Touch the red lead to the positive terminal and the black to the negative. A healthy battery reads between 12.5 and 12.8 volts.

Step 2: Start the engine and rev to 4,000-5,000 RPM. Keep your multimeter connected the same way. Watch the reading as the engine runs.

Step 3: Read the charging voltage. A properly working regulator should push the reading to somewhere between 13.5 and 14.8 volts. Anything below 13 volts means your system isn’t charging enough. Anything above 15 volts means it’s overcharging, which is just as damaging.

Step 4: Check for voltage spikes. Rev the engine up and down a few times while watching the meter. Steady, smooth changes are normal. Sudden spikes or drops point to a failing regulator.

If your numbers fall outside the healthy range, your regulator has failed or is on its way out. Don’t wait for it to take your battery with it.

The YZF-R7 uses a compact electrical setup packed tightly under the fairings. That tighter space means less airflow around the regulator, and less airflow means more heat buildup during hard riding or hot weather. Riders who track their R7 or ride aggressively in summer report failures showing up earlier than expected. If you fall into that group, keep a closer eye on your charging voltage during regular maintenance checks.

Fixing the Problem

Once you’ve confirmed the regulator is bad, there’s no real repair option. These are sealed units. Replacement is the only reliable fix.

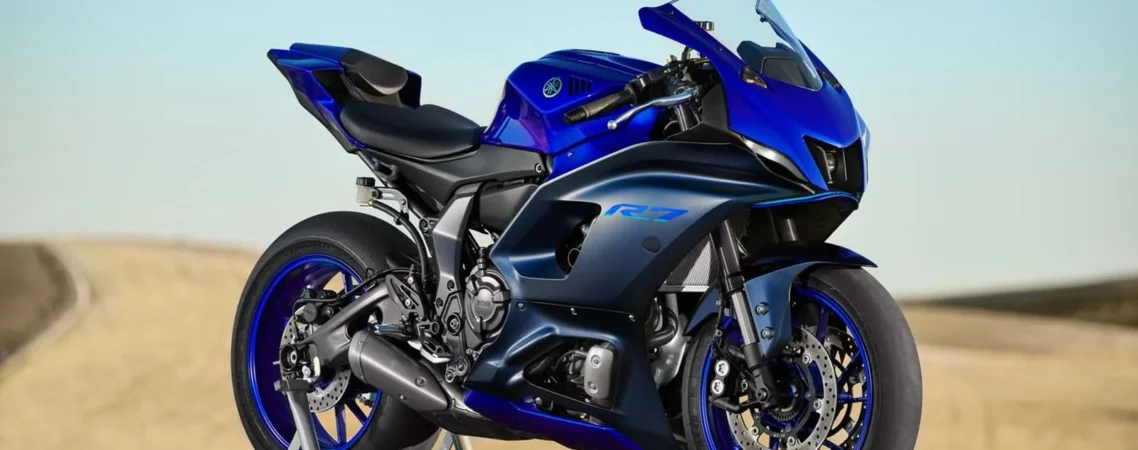
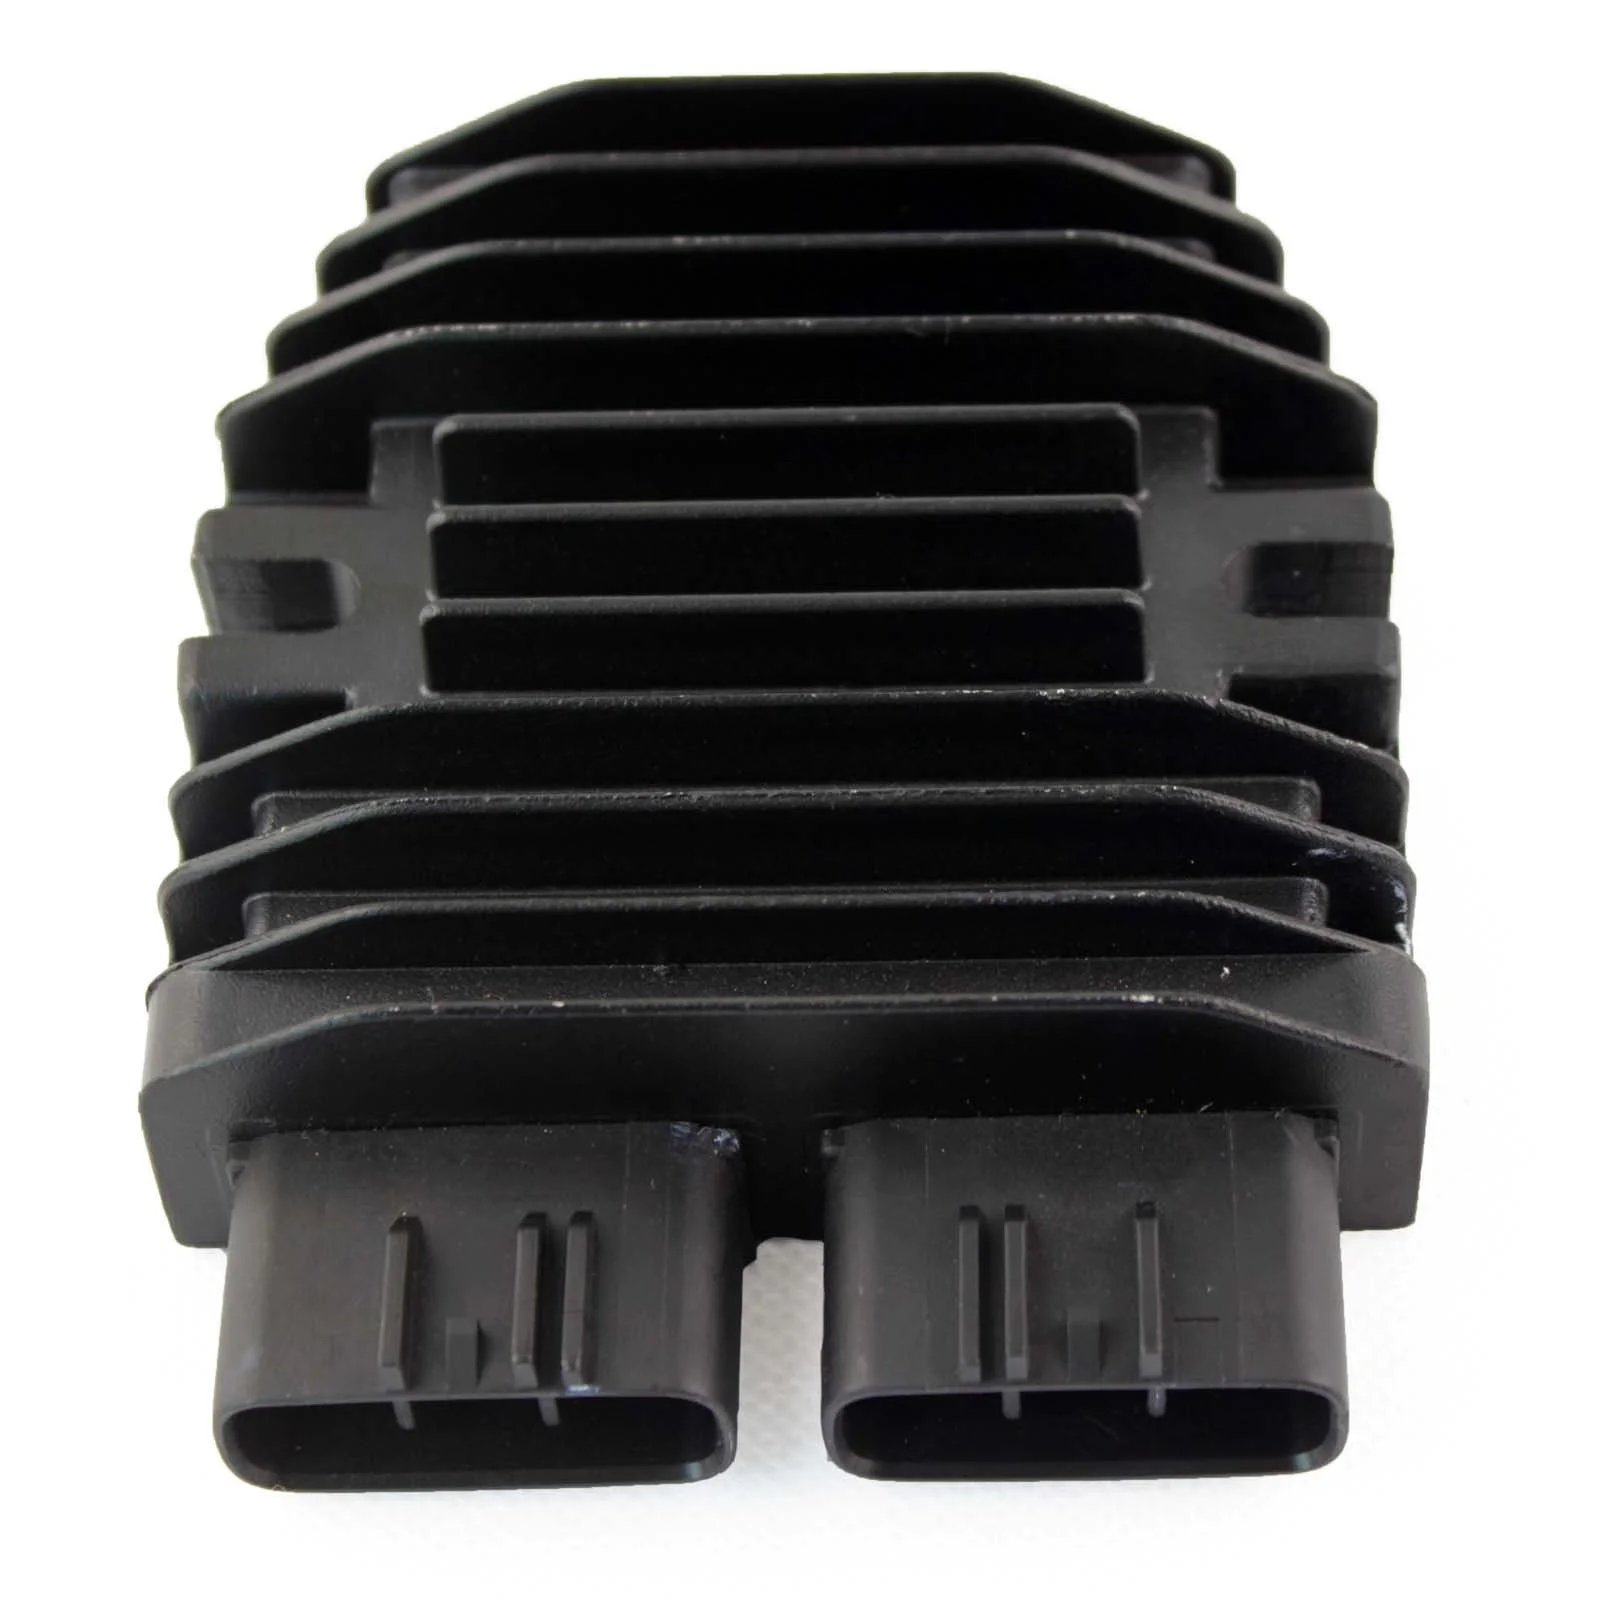
Aliwheels carries the Yamaha YZF-R7 Voltage Regulator (2022-2024), built as a direct fitment replacement for your model year. Swapping it out follows the same steps as testing: locate the unit, disconnect the wiring harness, unbolt it, and mount the new one in its place. Most riders finish the job in under 30 minutes with basic tools.

Yamaha YZF-R7 Voltage Regulator (2022-2024)

Once the new regulator is in, run the same voltage test again. You should see that steady 13.5 to 14.8 volt range return during a rev-up test.

Preventing Future Failures

A few habits extend the life of your new regulator.

Avoid letting your bike idle for long stretches in hot weather. Idle time generates heat without the airflow that riding provides.

Check your battery terminals regularly. Corrosion adds resistance to the circuit, which forces your regulator to work harder than it should.

Keep the wiring harness clean and free of moisture. Water intrusion is one of the fastest ways to short out electrical components on any bike.

Browse More Yamaha YZF-R7 Parts

If you’re already working on your bike’s electrical system, it’s worth checking the rest of your setup while you’re in there. Aliwheels stocks a full range of fitment-matched parts for your model in the Yamaha YZF-R7 parts collection, covering everything from fairings to electrical components.

Conclusion

A failing voltage regulator on your YZF-R7 rarely fixes itself, and it usually gets worse fast. Catching the early signs- flickering lights, slow battery drain, a faint burning smell- saves you from a dead battery on the side of the road. Test it with a multimeter, confirm the diagnosis, and replace the part before it causes further damage to your electrical system.

If you’ve been chasing a mystery electrical issue on your R7, start here. There’s a good chance this small part is behind the whole problem.

(Commenting: OFF)

Or login with your social account