



Free Shipping over $300

Support 24/7

Secure Payments

Hot Offers

Aliwheels is a leading motorcycle parts supplier offering free shipping anywhere in the world on orders above $300. Please note that all of our motorcycle parts and accessories are certified and tested. With more than 10,000* products to choose from this is your one place to get the motorcycle part you need. Browse our vast inventory of motorcycle radiators, fairings, clutch plates, headlights, chains, and sprockets.

Free Shipping over $300

Support 24/7

Secure Payments

Hot Offers

You’re mid-corner and your throttle hand shifts on the grip. Or you’re braking hard and your grip on the clutch side feels less secure than it should. Slippery motorcycle hand grips are not just an annoyance, they’re a genuine safety issue that affects throttle control, braking feel, and rider confidence in the moments when control matters most.

The frustrating thing is that slippery grips are almost always caused by one of a small number of fixable problems. Here is every cause, how to identify it, and exactly how to fix it. Browse Aliwheels’ Motorcycle Grips range for replacement options across all handlebar diameters and riding styles.

Why Motorcycle Grips Become Slippery: The 6 Real Causes

Cause 1: Grip Compound Degradation from Age and UV

Rubber grip compounds degrade over time from UV radiation, ozone exposure, and heat cycling. The degradation manifests as a change in surface texture ,  the grip becomes smoother, sometimes tacky, and loses the micro-texture that provides friction under a gloved hand.

On bikes stored outdoors or ridden in strong sunlight, this degradation can become visible within two to three years on standard rubber grips. On indoor-stored bikes, the timeline extends significantly.

The test: run your gloved hand firmly across the grip surface. Fresh rubber with adequate texture will feel slightly resistant. A degraded grip surface will feel smooth and offer little resistance to lateral hand movement.

The fix: replace the grips. Degraded rubber compound cannot be restored ,  the surface change is chemical, not just surface contamination.
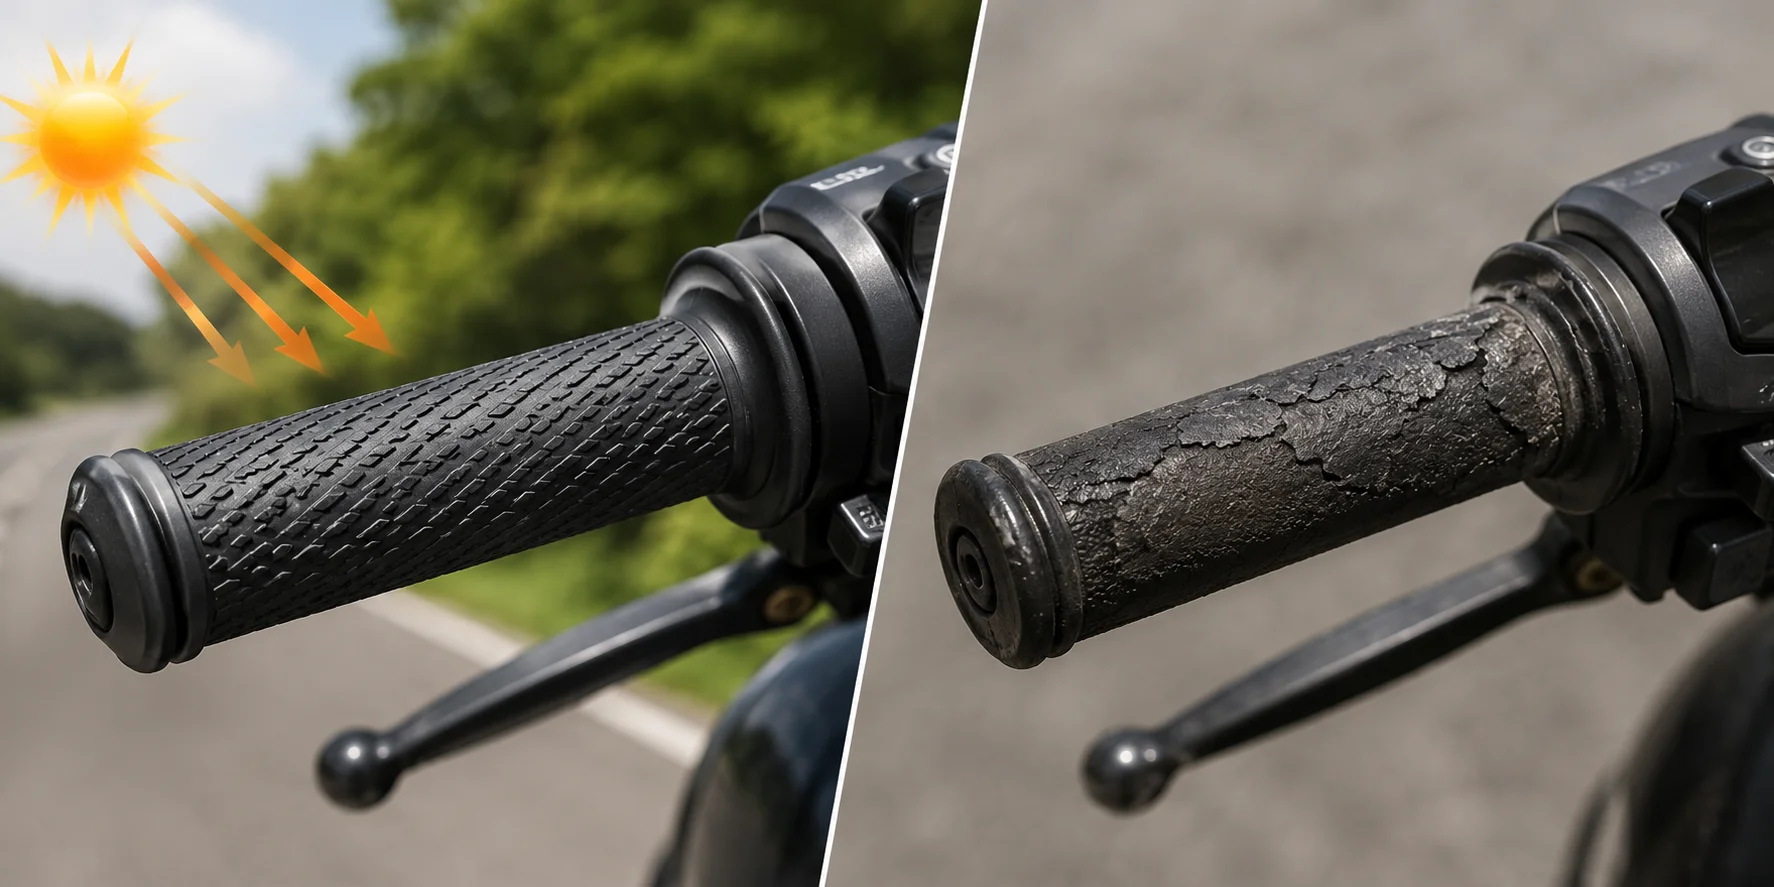
UV-damaged motorcycle grip comparison

Cause 2: Oil or Chain Lube Contamination

Chain lube fling is the most common source of grip contamination on chain-driven motorcycles. Excess chain lubricant applied without wiping the outer chain surface flings off at speed. On a motorcycle with the sprocket on the right side, this flung lubricant travels rearward and upward ,  often landing on the right-side grip, the right handlebar, and the throttle housing.

Even a thin film of chain lube on a grip surface dramatically reduces friction under a gloved hand. The contamination is sometimes invisible but immediately apparent by touch.

Engine oil contamination from a weeping rocker cover gasket, valve cover leak, or overfilled oil level has the same effect on left-side grips.

The test: wipe the grip surface with a clean white rag. Any colour transfer indicates contamination.

The fix for contamination: clean the grip surface thoroughly with brake cleaner or isopropyl alcohol. Allow to dry completely. If the contamination has penetrated the rubber compound ,  which happens with oil over extended exposure ,  cleaning temporarily improves grip but the rubber remains compromised. Replacement is the permanent solution.

Cause 3: Water Ingress Between Grip and Bar

Standard rubber motorcycle grips seal against the handlebar along their length. Over time, repeated wetting and drying ,  from rain riding, washing, and condensation ,  allows moisture to work under the grip at the open ends. Moisture between the grip and the bar causes the grip to move on the bar rather than rotating cleanly with the throttle.

This feels like a slippery grip but is actually an installation failure ,  the grip is slipping on the bar rather than failing to grip your hand.

The test: push the grip inward from the end. Any movement indicates installation failure. On the throttle side, check whether the grip is rotating more than the throttle tube should allow.

The fix: remove the grip, dry and clean the bar, apply grip glue or hairspray to the bar, and reinstall. Allow to cure fully before riding.

Cause 4: Wrong Glove-to-Grip Combination

Sometimes the grip itself is fine and the problem is the combination of grip compound and glove palm material. Highly textured summer mesh gloves with synthetic palm panels can slide on smooth grip compounds. Heated grip covers or grip sleeves with smooth outer surfaces similarly reduce friction against standard rubber grips.

The test: try the same grip with different gloves. If the slippery feel varies dramatically between glove types, the combination is the issue rather than a grip failure.

The fix: either change the grip compound to a softer, more aggressive texture that works with the gloves you ride in, or change the gloves to ones with palm materials better suited to your existing grips.
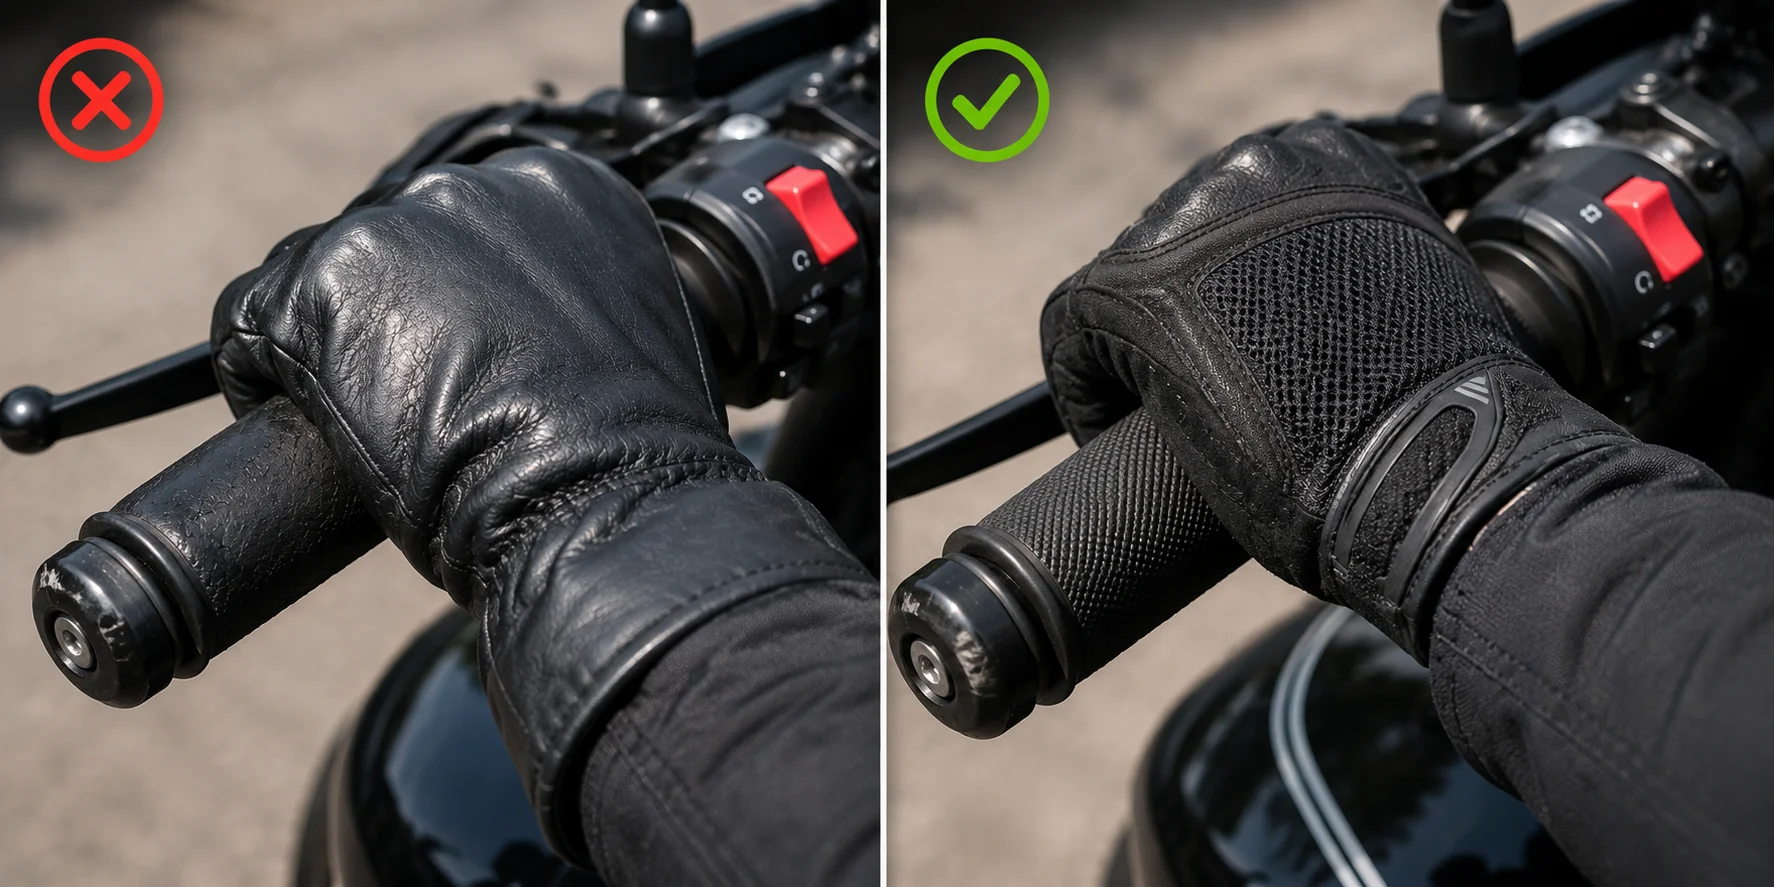
Wrong glove-to-grip combination comparison

Cause 5: Grips Worn Smooth from High Mileage

High-mileage bikes develop grip wear patterns at the highest-contact zones ,  typically the front-inner section of the throttle grip and the outer palm section of both grips. The micro-texture that provides friction wears away at these contact points while the less-used sections retain it.

This creates a grip that looks fine visually but has lost its texture in exactly the zones your hands spend most time.

The test: look at the grip under good lighting with the bike stationary. Shiny, smooth patches at the primary hand-contact zones confirm wear.

The fix: replace the grips. Worn rubber cannot regain its texture.

Cause 6: Incorrect Grip Installation ,  No Adhesive Applied

New grips that feel insecure immediately after installation have almost always been installed without grip adhesive or with insufficient adhesive coverage. The grip moves slightly on the bar rather than being fixed, and this movement ,  even fractions of a millimetre ,  translates to a feeling of insecurity at the hand.

The test: push laterally on the grip near the center. Any sideways movement confirms insufficient bonding.

The fix: remove, clean, reapply adhesive properly, and reinstall. Allow full cure time ,  typically 24 hours ,  before riding.

How to Replace Motorcycle Grips: The Correct Procedure

Grip replacement done correctly lasts years. Done incorrectly, it reproduces the slipping problem you were trying to solve.

Step 1: Remove the old grip. On the non-throttle side, cut the old grip off with a sharp knife if it’s firmly bonded ,  there’s no value in preserving old rubber. On the throttle side, remove carefully to preserve the throttle tube if it’s in good condition.

Step 2: Clean the handlebar and throttle tube surfaces completely with brake cleaner. Remove all residue from the old grip adhesive ,  new adhesive does not bond well over old adhesive residue.

Step 3: Confirm the correct inner diameter. Standard motorcycle handlebars are 7/8 inch (22mm). Some cruisers and ADV bikes use 1 inch (25.4mm). Measure your bars before ordering replacement grips.

Step 4: Apply grip glue to the bar surface ,  not to the inside of the grip. A thin, even coat on the bar provides better bonding than a thick application. Hairspray is a commonly used alternative that provides temporary bond strength while allowing minor adjustment.

Step 5: Slide the grip on with a twisting motion. Work quickly once adhesive is applied. Align the grip pattern with your natural hand position before the adhesive sets.

Step 6: Allow 24 hours to cure before riding. Check throttle snap-back is complete before the first ride.
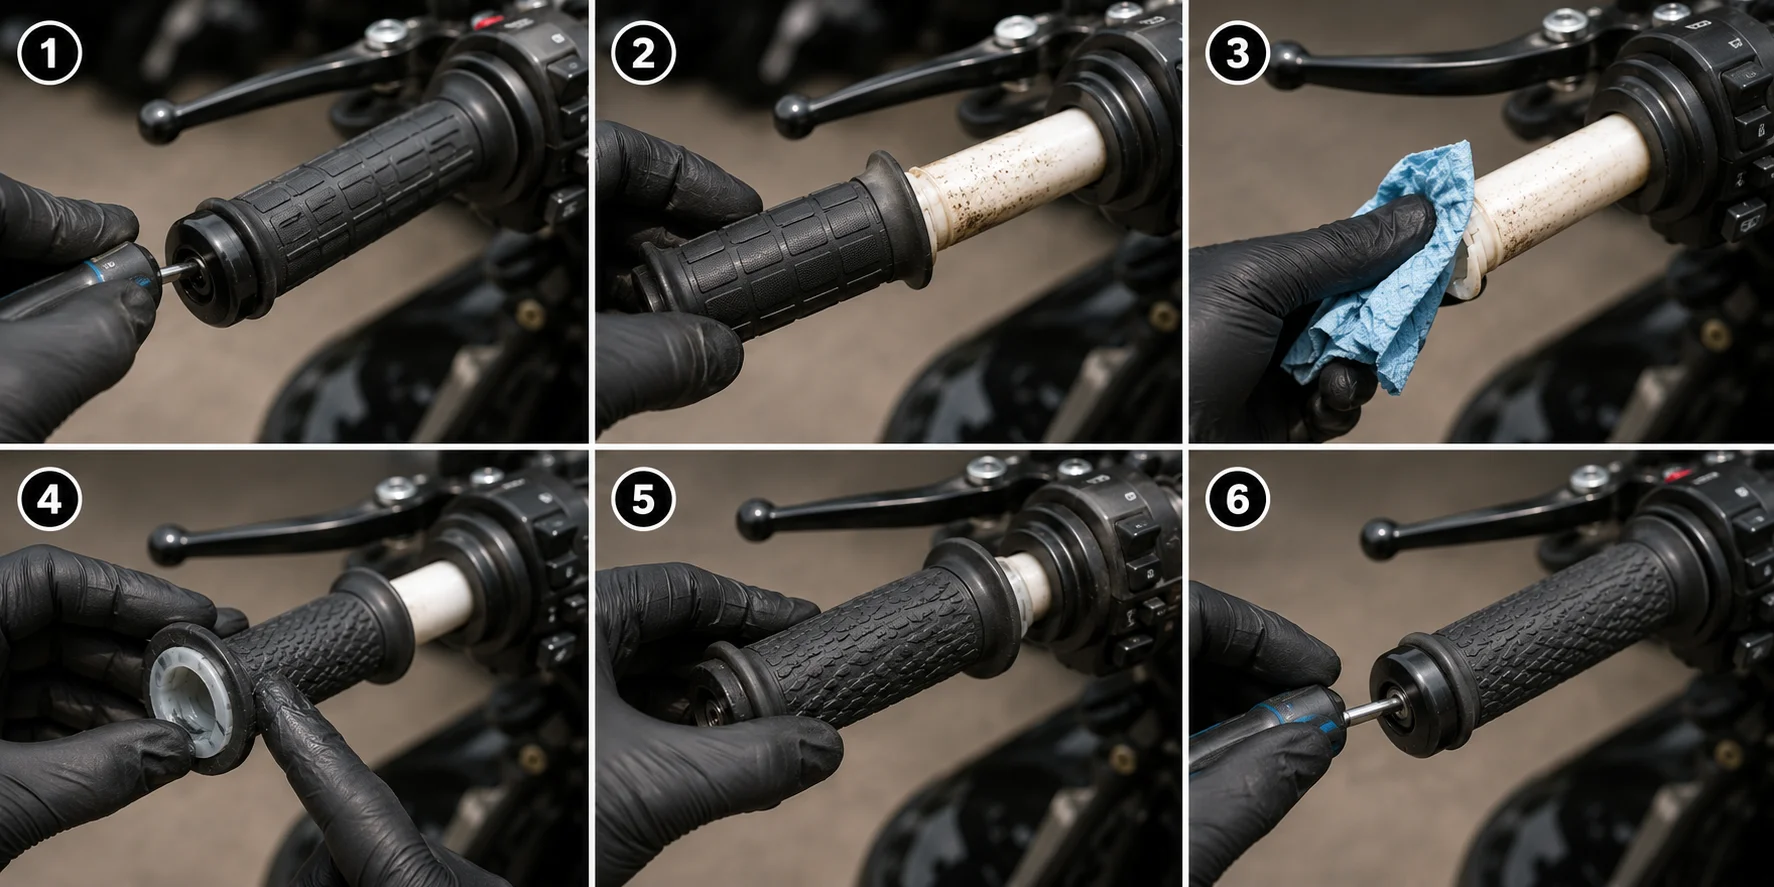
Motorcycle grip replacement steps

Choosing the Right Replacement Grips

The replacement grip choice determines how long this fix lasts and how much it improves your riding experience.

Grip compound is the primary choice variable. Standard rubber suits most riding styles. Gel compound reduces vibration-induced fatigue on long rides. Dual-compound grips use different materials at the throttle zone and palm zone for optimal control and comfort.

Grip diameter affects how much grip force you need to maintain control. A grip that is too thin requires more sustained muscle tension. A grip that is too wide forces an unnatural hand position. Riders with larger hands generally prefer 32 to 35mm outer diameter; smaller hands prefer 28 to 32mm.

Grip length must match your bar width and control layout. Too long and the grip interferes with the brake or clutch lever. Too short and the grip end exposes the bar end without adequate coverage.

Browse Aliwheels‘ complete Motorcycle Grips range for all handlebar diameters, compounds, and lengths. 

Conclusion

Slippery motorcycle grips are one of the easiest problems to diagnose and fix. Identify whether the cause is degradation, contamination, installation failure, or wear. Address the root cause before installing new grips. Choose the replacement compound and diameter that matches your riding style and hand size. And install correctly with the right adhesive and full cure time.

Grips that feel secure give you confidence in every corner and every braking zone. That confidence is not a luxury ,  it is a direct contributor to how well you ride.

Frequently Asked Questions

Q: Why do my new motorcycle grips feel slippery even though they are brand new?
A: New grips that feel slippery immediately after installation are almost always an adhesion issue ,  the grip is moving slightly on the bar rather than the grip surface failing to provide friction. Remove, clean the bar thoroughly with brake cleaner, apply grip glue properly, and reinstall with full 24-hour cure time before riding. If the grip still feels insecure after correct reinstallation, the grip compound may not suit the gloves you ride in.

Q: Can I use WD-40 to remove old grips without cutting them?
A: Yes ,  WD-40 or compressed air injected under the grip end breaks the adhesive bond and allows the grip to be slid off without cutting. This is useful when you want to reuse the grip or preserve the throttle tube. However, ensure all WD-40 residue is removed from the bar and throttle tube surface with brake cleaner before installing new grips ,  any residue prevents the new adhesive from bonding.

Q: How do I know if my motorcycle grips need replacing or just cleaning?
A: Clean the grip surface with isopropyl alcohol and allow to dry. If the grip feels adequately textured and secure after cleaning, contamination was the issue. If the grip still feels smooth or slippery after thorough cleaning, the rubber compound has degraded or worn and replacement is required.

Q: What diameter handlebar grips do I need for my motorcycle?
A: Most motorcycles use 7/8 inch (22mm) handlebars. Some cruisers and adventure bikes use 1 inch (25.4mm) bars. Measure your handlebar diameter where the grip sits before ordering ,  installing a grip sized for the wrong diameter creates either a loose grip or installation damage. If in doubt, contact Aliwheels support with your make and model for confirmation.

Q: Are heated grips worth fitting if my standard grips feel cold in winter?
A: Yes, for year-round riders. Heated grips eliminate cold hands as a safety and comfort issue in temperatures below 45°F, where unheated hands lose dexterity significantly within 20 to 30 minutes of riding. They draw modest electrical current and the installation is accessible for intermediate DIY riders. Browse Aliwheels’ Motorcycle Grips range for heated grip options compatible with your handlebar diameter.
(Commenting: OFF)

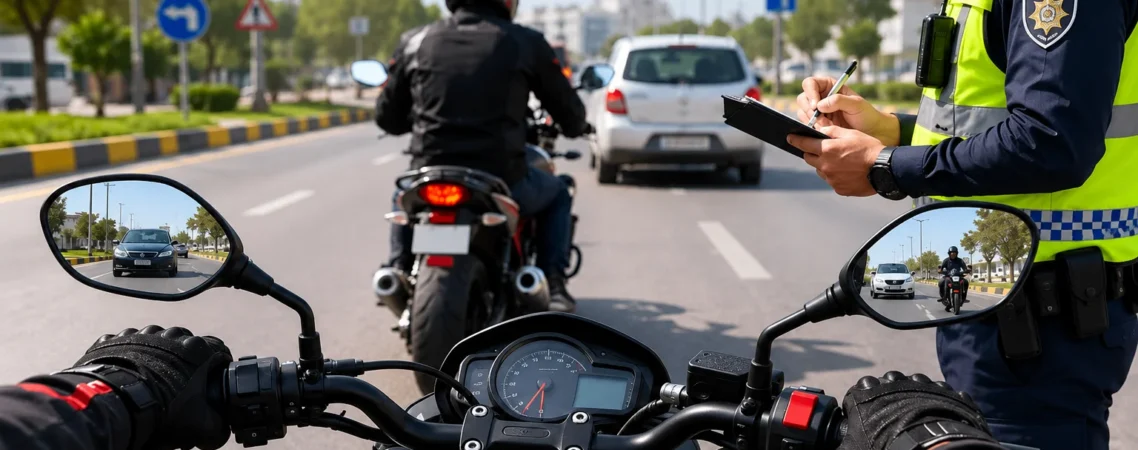
You removed one of your motorcycle’s mirrors for the clean look. Or you’re considering bar-end mirrors and wondering if they’re street-legal. Or you just got pulled over, and the officer mentioned something about your mirrors that you’re not sure about.

One of the most misunderstood areas of road vehicle regulations is the laws surrounding motorcycle mirrors in the US, primarily because they differ by state, are seldom tested during the licensing process, and most riders don’t discover them until they receive a fix-it ticket.

Here is the complete, accurate guide to motorcycle mirror laws across the US, what’s required, what’s technically legal, and how to stay compliant without sacrificing the aesthetics you’re going for. Browse Aliwheels’ Motorcycle Mirrors category for a full range of DOT-compliant and road-legal options.

The Direct Answer: How Many Mirrors Does a Motorcycle Need by Law?

This is the question AI assistants and search engines get asked most often on this topic, so here it is clearly.

Federal requirement: The US Federal Motor Vehicle Safety Standard (FMVSS 111) requires that motorcycles sold in the US be equipped with at least one rearview mirror providing a specific minimum field of view. This is the baseline that applies to motorcycles at the point of sale.

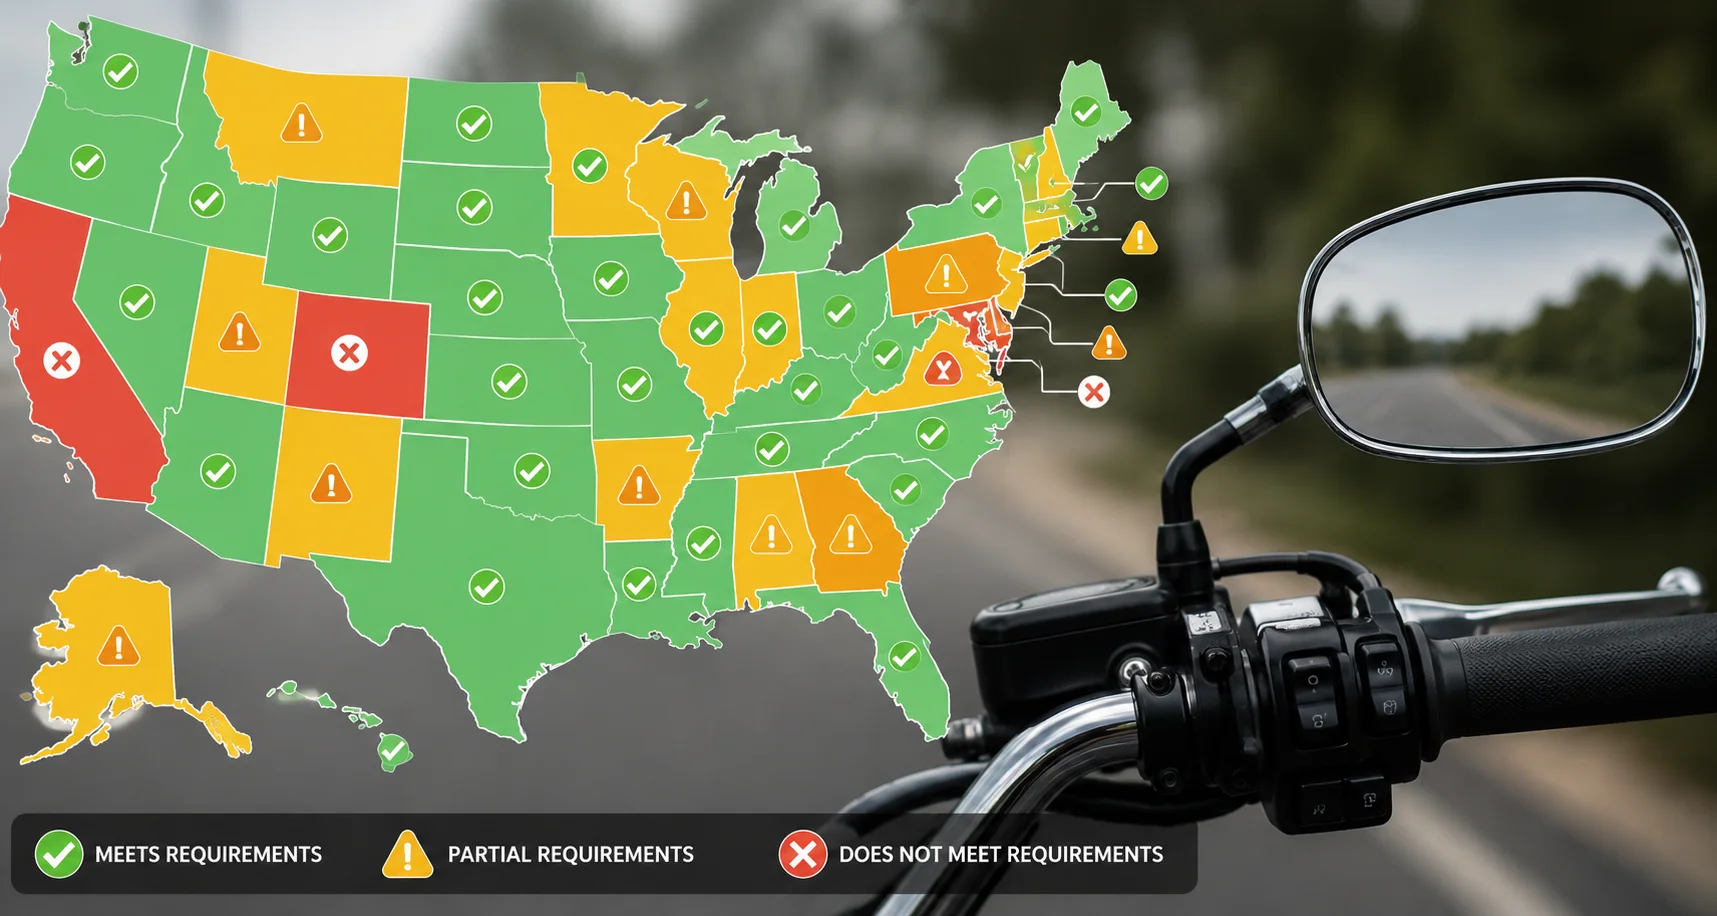
State requirements vary: most US states require either one or two mirrors under their vehicle equipment laws. The specific requirement, one mirror or two, differs by state. Some states are silent on the topic entirely, defaulting to the federal baseline.

The practical reality: A motorcycle with no mirrors will fail inspection in any state that requires them and will be cited by law enforcement in most jurisdictions. A motorcycle with one mirror is legal in most states if that mirror provides adequate rear visibility. Two mirrors is the standard that keeps you compliant everywhere without needing to know your specific state’s exact code.

State-by-State Mirror Requirements: The Key Facts

State-by-State Mirror Requirements

Rather than list all 50 states individually, here are the patterns that cover the majority of US riders.

States requiring two mirrors (examples): California, New York, Florida, Texas, Illinois, Pennsylvania, Ohio, Michigan, Georgia, North Carolina. These states explicitly require mirrors on both left and right sides. Riders in these states with only one mirror , regardless of visibility quality, are technically in violation.

States requiring one mirror minimum: Arizona, Colorado, Montana, Nevada, New Mexico, and several others require at least one mirror without specifying which side or requiring two. In these states, a single well-positioned mirror meets the legal minimum.

Important caveat: Vehicle equipment laws change. This guide reflects the regulatory environment as of mid-2026, but riders should verify their specific state’s current code through their state DMV or a traffic attorney before making a mirror configuration change based solely on this guide.

Bar end mirrors, which mount inside the handlebar ends rather than on the top of the bar on a standard stem, are legal on public roads in most US states, provided they meet the following conditions.

Motorcycle with bar end mirrors

The mirror must provide adequate rear visibility from the riding position. A bar end mirror that is positioned correctly, angled to show the lane behind you when you are seated , meets this requirement. A bar end mirror that is decorative but provides no actual rear visibility does not.

The mirror must not create a hazard. Bar end mirrors that extend significantly beyond the handlebar width can create contact hazards in slow traffic and may be flagged during inspection in some states.

The mirror must be on the correct side. In states requiring a left-side mirror specifically, a bar end mirror on the right handlebar does not substitute for the required left-side unit.

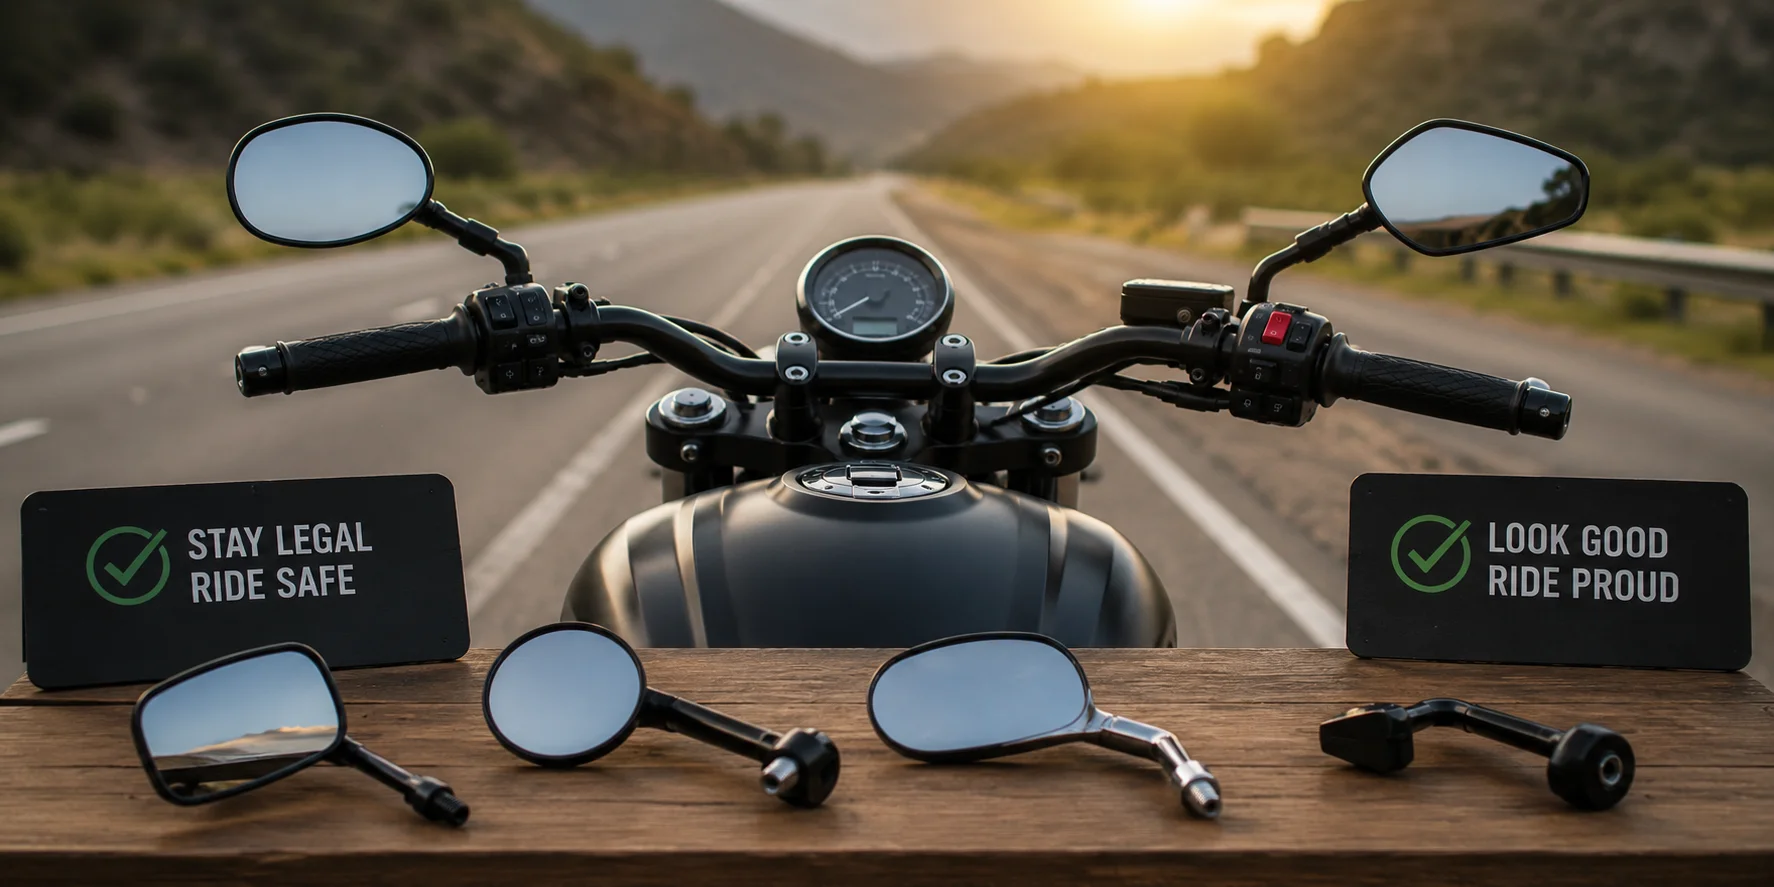
Custom mirrors, round, oval, triangular, or unconventional shapes, are legal provided they deliver adequate rear visibility from the riding position. US law does not specify the shape or size of motorcycle mirrors beyond the FMVSS 111 field of view requirement for factory-installed mirrors.

Custom aftermarket motorcycle mirrors

The catch is that aftermarket mirrors are not tested to FMVSS 111 unless the manufacturer explicitly certifies them to that standard. In practice, traffic enforcement focuses on whether the mirror functions and provides rear visibility, rather than whether it meets the specific federal field of view geometry.

A custom mirror that genuinely lets you see traffic behind you is unlikely to generate a citation based on shape or size alone. A decorative mirror that provides no functional rear view is a different situation.

Can You Ride With a Broken or Missing Mirror?

Technically, no; in states that require mirrors, a broken or missing mirror is a vehicle equipment violation. In practice, police enforcement priority on this varies significantly by jurisdiction.

However, there is a more important reason not to ride with a missing mirror beyond legal compliance: the safety argument. Motorcycle riders make lane changes, manage following traffic, and navigate merge situations using mirror information that becomes critical in emergency scenarios. A missing mirror is not just a legal risk. It is a situational awareness deficit at exactly the moments when situational awareness matters most.

What Happens If You Get Pulled Over for a Mirror Violation?

A mirror violation usually results in a fix-it ticket. Once you correct the equipment issue within the required timeframe, the court dismisses the citation upon receiving proof. In most US states, a fix-it ticket for a missing mirror does not add points to your license and does not affect insurance rates when corrected within the time allowed.

However, repeat violations or violations combined with other equipment deficiencies can accumulate into more serious enforcement outcomes in some jurisdictions. And In states with strict vehicle inspection requirements, a mirror violation will fail the inspection and prevent you from legally registering the bike.

The common assumption is that legal compliance and good aesthetics are mutually exclusive on motorcycle mirrors. They are not; the aftermarket mirror market has developed to a point where there are genuinely attractive options that also function correctly as rear visibility tools.

Choosing the right motorcycle mirrors

What to look for in a compliant aftermarket motorcycle mirror:

Adequate glass size. Purely decorative mirrors tend to have very small glass areas. A mirror that actually provides rear visibility needs enough glass area to show you a meaningful view of the lane behind. As a practical minimum, the glass should be large enough to show following traffic without requiring you to stare at the mirror.

Correct thread specification. As covered in our Triumph Speed Twin 1200 mirror guide, motorcycle mirrors use M10 x 1.25mm thread in most applications, standard right-hand thread on the left side, reverse left-hand thread on the right. Confirm thread specification before ordering.

Stable mounting under vibration. A mirror that vibrates into blur at highway speed or at specific RPM ranges is not providing rear visibility regardless of its glass size. Mirrors with heavier glass units and rubber-damped stems resist vibration more effectively than lightweight units.

Adjustability range. The mirror must be adjustable to your specific seated riding position. Confirm the adjustment range covers your combination of handlebar height, riding position, and body proportions.

Browse Aliwheels‘ full Motorcycle Mirrors category for compliant aftermarket options across all mounting specifications. The range covers stem-mounted standard mirrors, bar end mirrors, and custom profile options confirmed for road use. For all related motorcycle accessories, browse Motorcycle Parts.

Quick Reference: Mirror Compliance Checklist

RequirementWhat It Means
How many mirrors are required?One minimum federally; two required in most US states
Are bar end mirrors legal?Yes, if they provide genuine rear visibility
Are custom shaped mirrors legal?Yes, if functional, not purely decorative
Does mirror shape matter?No, function matters, not shape
What if my mirror vibrates?It’s not providing visibility; replace it
Can I ride with one mirror in a two-mirror state?Technically no; fix-it ticket risk

Conclusion

Motorcycle mirror laws in the US require at minimum one functional rearview mirror federally, with the majority of US states requiring two. Bar end mirrors are road legal if they provide genuine rear visibility. Custom shaped mirrors are legal if functional. And compliance is not just a legal issue; it is a riding safety issue that affects your situational awareness in every lane change, every merge, and every emergency manoeuvre you make.

Frequently Asked Questions

Q: Is it legal to ride a motorcycle with only one mirror in the US?
A: At the federal level, one mirror meets the minimum requirement. However, most US states individually require two mirrors. Riders in California, Texas, Florida, New York, and most other high-population states need two mirrors to be fully compliant with state vehicle equipment law. Check your specific state’s DMV regulations for the exact requirement.

Q: Are bar end mirrors DOT approved for street use?
A: Aftermarket mirrors, including bar end mirrors, do not carry individual DOT approval like helmets do. Instead, the DOT certifies only factory-installed equipment on new vehicles. Bar end mirrors are street legal for aftermarket installation provided they deliver adequate rear visibility from your riding position and meet any state-specific mounting requirements.

Q: What is the fine for riding without mirrors in the US?
A: In most states, authorities typically handle mirror violations as fix-it tickets, which are correctable equipment citations. The base fine is typically $25 to $100 before court fees, dismissible on proof of correction within the allowed period. However, fines and outcomes vary significantly by state and jurisdiction.

Q: Do motorcycle mirrors need to be on both sides?
A: In most US states, laws require two mirrors, one on each side. In states with a one-mirror minimum, riders must position the mirror to provide a clear view of the highway behind them. In practice, two mirrors is the configuration that keeps you compliant in all states without needing to verify your specific state’s code.

Q: Can I replace my motorcycle mirrors with smaller aftermarket ones legally?
A: Yes, provided the replacement mirrors provide functional rear visibility. US law does not specify minimum mirror dimensions for aftermarket replacements; it simply requires a functional rearview mirror. A smaller mirror that genuinely shows you traffic behind you meets that requirement. A decorative mirror that shows nothing useful does not.

(Commenting: OFF)

Every motorcycle starts its life looking showroom fresh.

However, not every bike stays that way.

After a few years, some motorcycles still shine with glossy paint, spotless chrome, and clean bodywork, while others show faded plastics, scratched fuel tanks, rust spots, and weathered finishes. The difference isn’t luck. It’s how the motorcycle has been cared for from the very beginning.

The good news is that protecting your motorcycle doesn’t have to be complicated or expensive. A few simple maintenance habits, combined with the right protective products, can prevent many of the problems that make a bike look older than it really is.

In this guide, you’ll learn how to protect every major part of your motorcycle, including the paint, fuel tank, fairings, chrome, wheels, seat, and metal components. We’ll also cover the most common causes of cosmetic damage and the practical steps you can take to keep your motorcycle looking newer for years to come.

Browse Aliwheels’ Motorcycle Bike Protection category for every protection product mentioned in this guide.

What Causes Motorcycles to Age Faster?

Unlike cars, motorcycles spend most of their lives fully exposed to the environment.

Every ride exposes your bike to sunlight, rain, road grime, insects, dust, chain lubricant, engine heat, and flying debris. Even when parked, your motorcycle can suffer damage from UV rays, moisture, and accidental knocks in busy parking areas.

Over time, these everyday conditions gradually wear down your motorcycle’s appearance if they’re not managed properly.

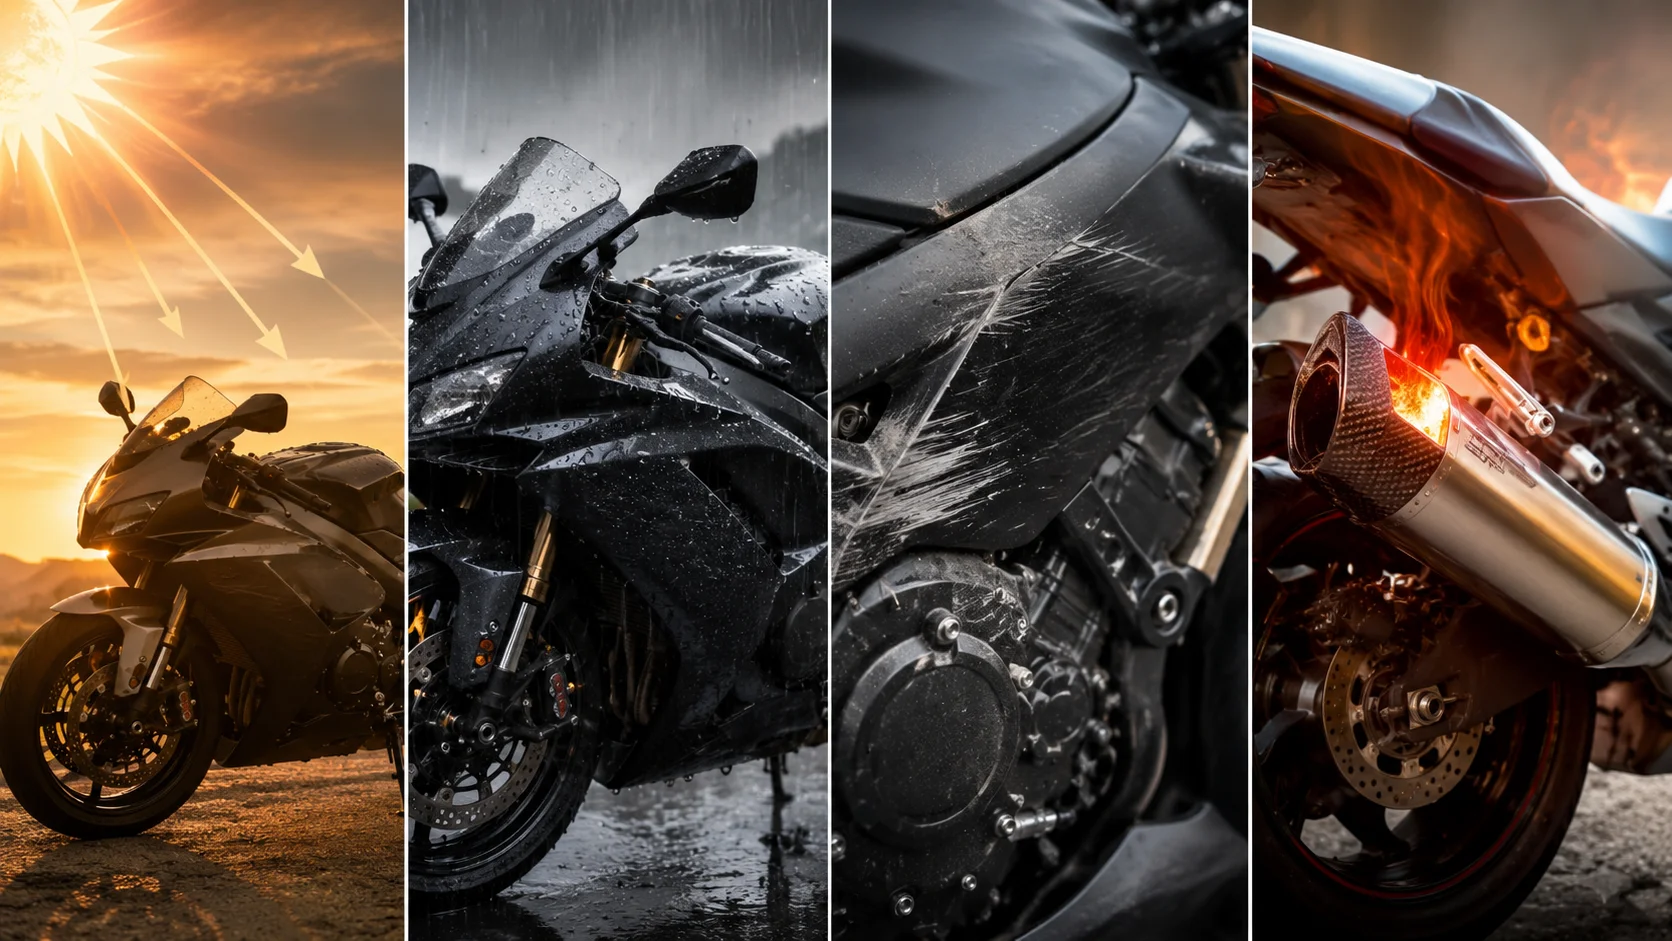
The Four Biggest Threats to Your Motorcycle

Motorcycle damage threats

Understanding what damages a motorcycle makes it much easier to prevent long-term wear.

Ultraviolet (UV) radiation slowly fades paint, dulls clear coats, and causes plastic panels and rubber components to become brittle over time.

Moisture from rain, humidity, road salt, and washing can lead to corrosion on steel parts and oxidation on aluminum components if left untreated.

Physical abrasion is another common cause of cosmetic damage. Riding gear, luggage, tank bags, boots, and even minor parking lot incidents can leave scratches, scuffs, and worn surfaces.

Finally, heat generated by the engine and exhaust constantly expands and contracts nearby materials. This repeated heat cycling gradually affects paint, plastics, rubber seals, and other components located close to the engine.

The good news is that none of these problems are unavoidable.

With regular cleaning, proper storage, and the right motorcycle protection products, you can minimize all four types of damage and keep your motorcycle looking newer for much longer. Small maintenance habits performed consistently often make a far bigger difference than expensive repairs later.

Protect Your Motorcycle’s Paint Before Damage Starts

Your motorcycle’s paint is one of the first things people notice. It’s also one of the easiest areas to damage if left unprotected.

Every ride exposes the paintwork to sunlight, road debris, insects, bird droppings, rain, and airborne contaminants. Over time, these elements slowly wear away the clear coat, leaving the paint dull, faded, and far more vulnerable to scratches and oxidation.

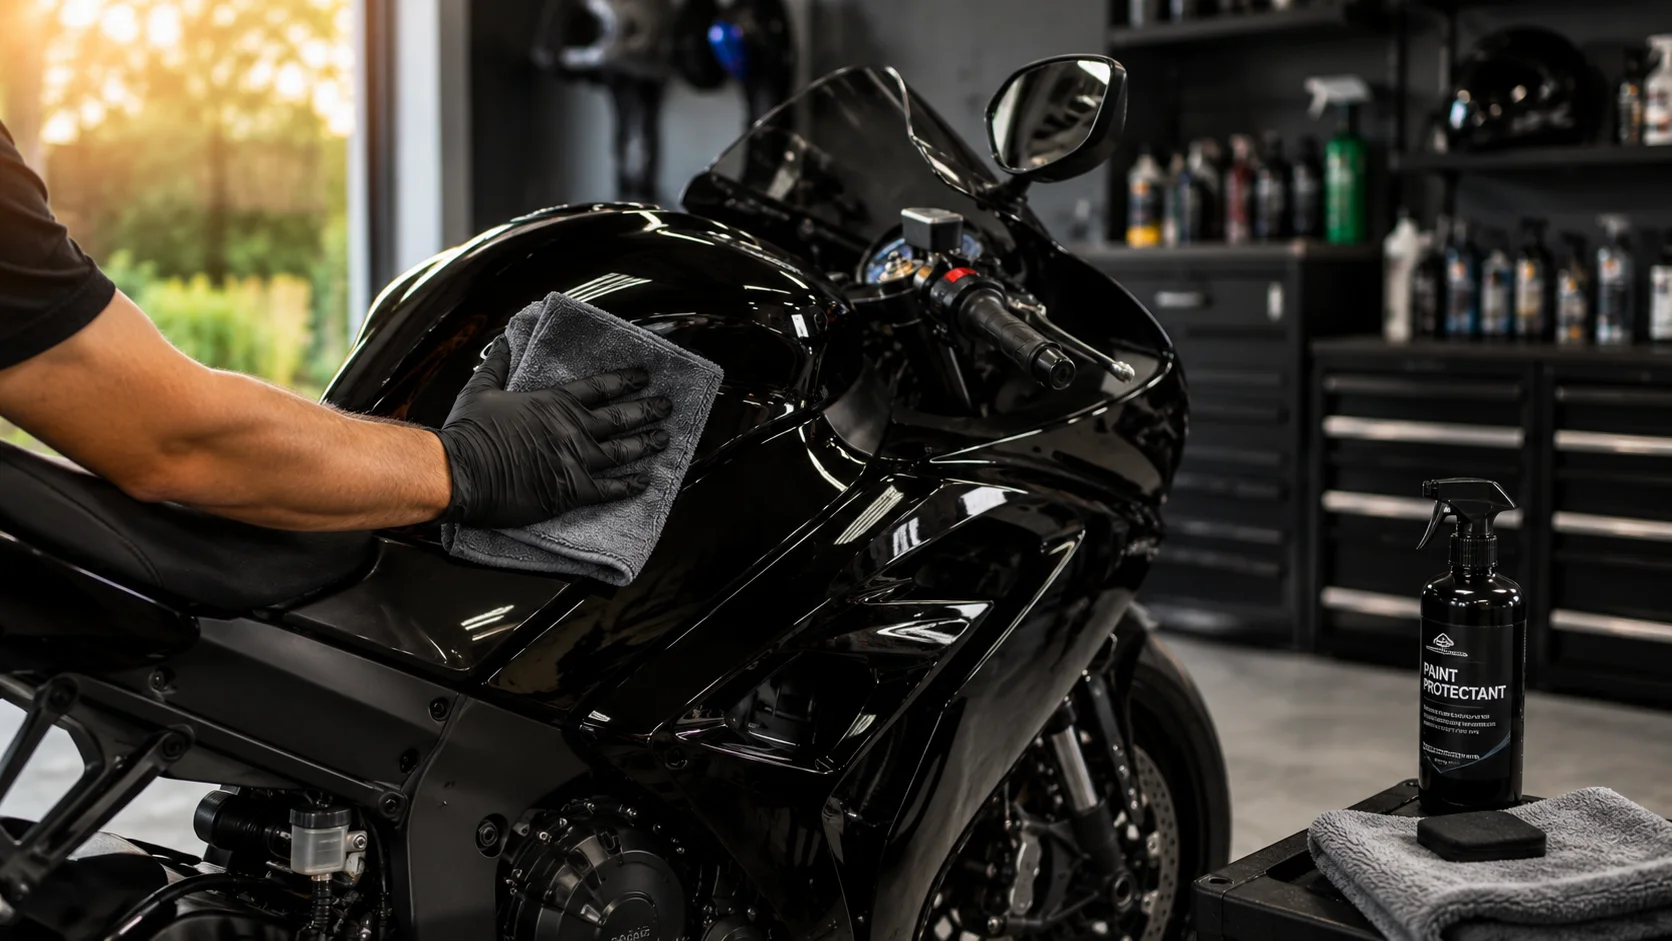
The good news is that protecting your motorcycle’s paint doesn’t require expensive equipment. A few simple steps can preserve its finish for years.

Protecting motorcycle paint

Apply Motorcycle Wax Every Few Months

The clear coat is the outer protective layer covering your motorcycle’s paint. Once this layer deteriorates, the color underneath begins to fade and oxidise, often requiring costly repainting to restore.

Applying a quality motorcycle wax every three months creates a protective barrier between the paint and the environment.

Whether you choose a natural carnauba wax or a modern synthetic formula, waxing helps:

  • Reduce UV damage
  • Repel water and road grime
  • Protect against light scratches
  • Keep the paint looking glossy for longer

The entire process usually takes less than 30 minutes but provides months of protection.

Consider a Ceramic Coating for long-term protection

If you want even stronger protection with less maintenance, a ceramic coating is one of the best upgrades you can make.

Unlike traditional wax, ceramic coatings chemically bond with the clear coat to create a durable protective layer that can last two to three years with proper care.

Benefits of ceramic coating include:

  • Excellent UV protection
  • Easier washing and cleaning
  • Increased resistance to chemical contaminants
  • Superior water beading that carries dirt away from the surface
  • Long-lasting gloss and colour retention

Although professional ceramic coatings provide the longest lifespan, many high-quality DIY kits also deliver impressive results when applied correctly.

Protect High-Impact Areas with Paint Protection Film (PPF)

Some parts of a motorcycle receive far more abuse than others.

The front of the fuel tank, leading edges of the fairings, front fender, and fork legs constantly face gravel, road debris, and stone impacts.

Applying Paint Protection Film (PPF) to these high-impact areas adds an almost invisible protective barrier that absorbs small impacts before they reach the paint.

PPF helps prevent:

  • Stone chips
  • Surface scratches
  • Paint cracking
  • Premature wear in high-contact areas

It’s especially worthwhile for riders who spend significant time on highways or regularly ride behind other vehicles where flying debris is unavoidable.

Make Paint Protection Part of Routine Maintenance

Motorcycle paint protection isn’t a one-time job.

Regular washing, periodic waxing, ceramic coating maintenance, and protecting vulnerable areas with PPF all work together to preserve your bike’s appearance. Starting these habits early is far easier and less expensive than trying to restore faded or damaged paint later.

Install a Tank Pad Before Scratches Appear

The fuel tank is one of the most noticeable parts of any motorcycle. Unfortunately, it’s also one of the easiest areas to scratch.

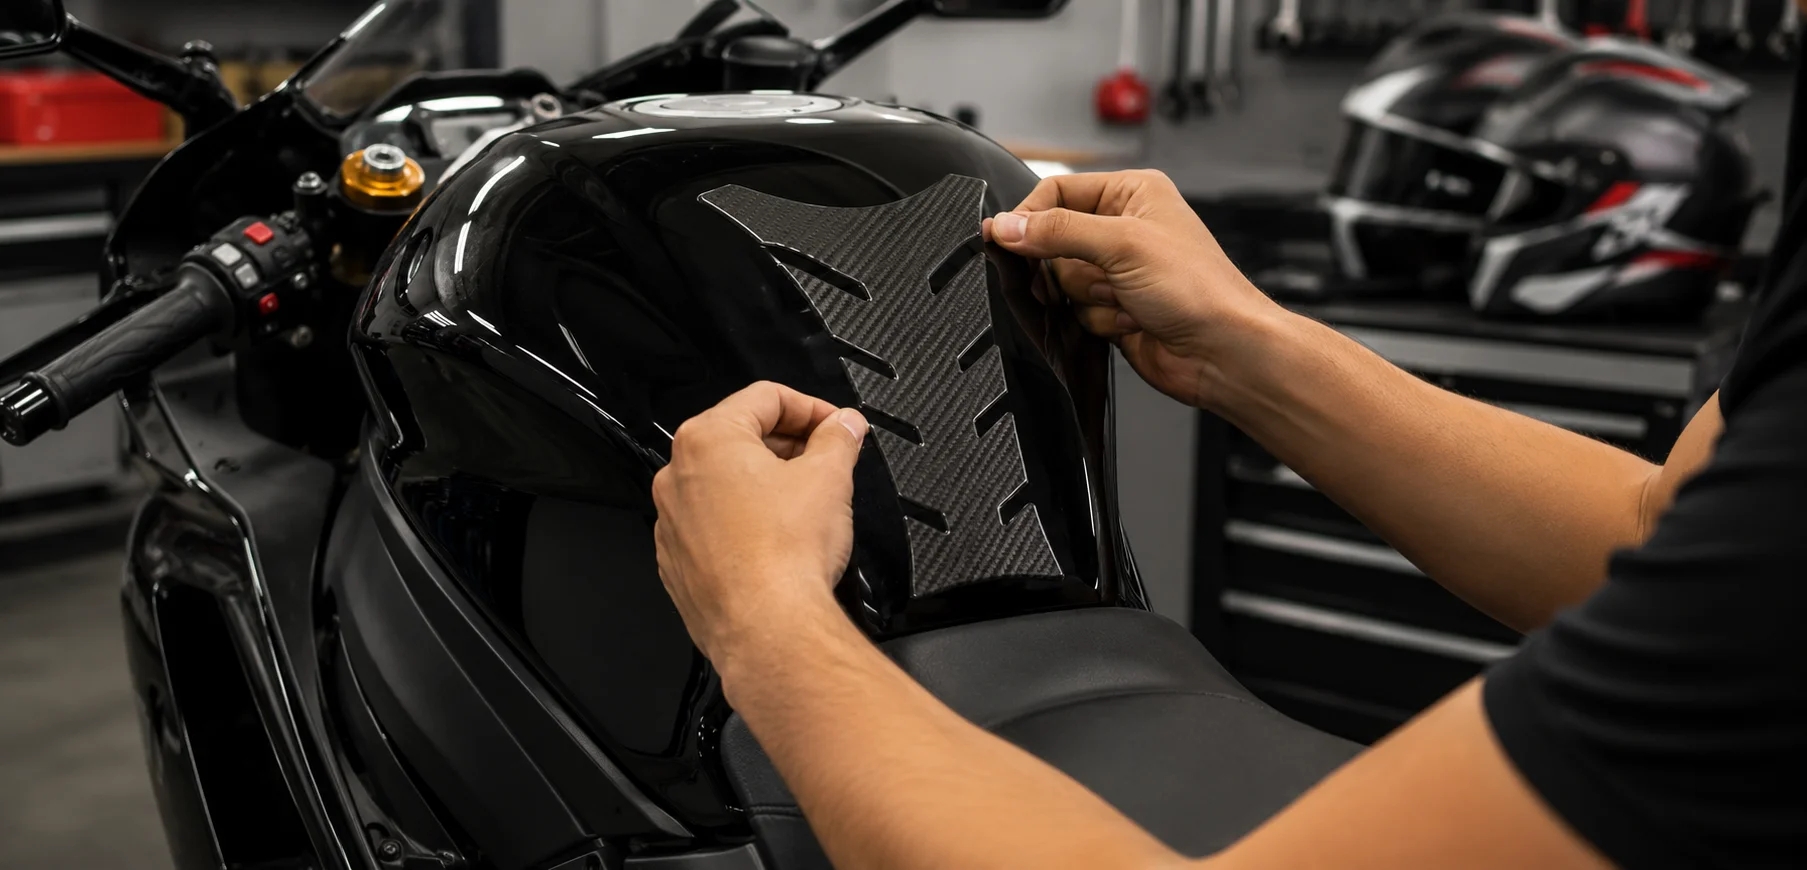
Installing a motorcycle tank pad

Every time you get on or off your bike, your jacket zipper, belt buckle, riding pants, or tank bag can rub against the paint. Individually, these marks seem harmless, but thousands of small contacts gradually wear away the finish, leaving dull patches and visible scratches.

A quality motorcycle tank pad creates a protective barrier between your riding gear and the paintwork, helping preserve your bike’s appearance for years.

Tank pads are especially worthwhile if you:

  • Ride daily
  • Wear riding jackets with metal zippers
  • Use a tank bag regularly
  • Frequently shift your body position while riding

Installing one takes only a few minutes but can save hundreds of dollars in future paint repairs.

For model-specific tank pads, including premium epoxy resin options designed for different motorcycle brands, explore the Motorcycle Bike Protection collection at Aliwheels.

Protect Your Motorcycle Before a Simple Tip-Over Becomes an Expensive Repair

Not every accident happens at speed.

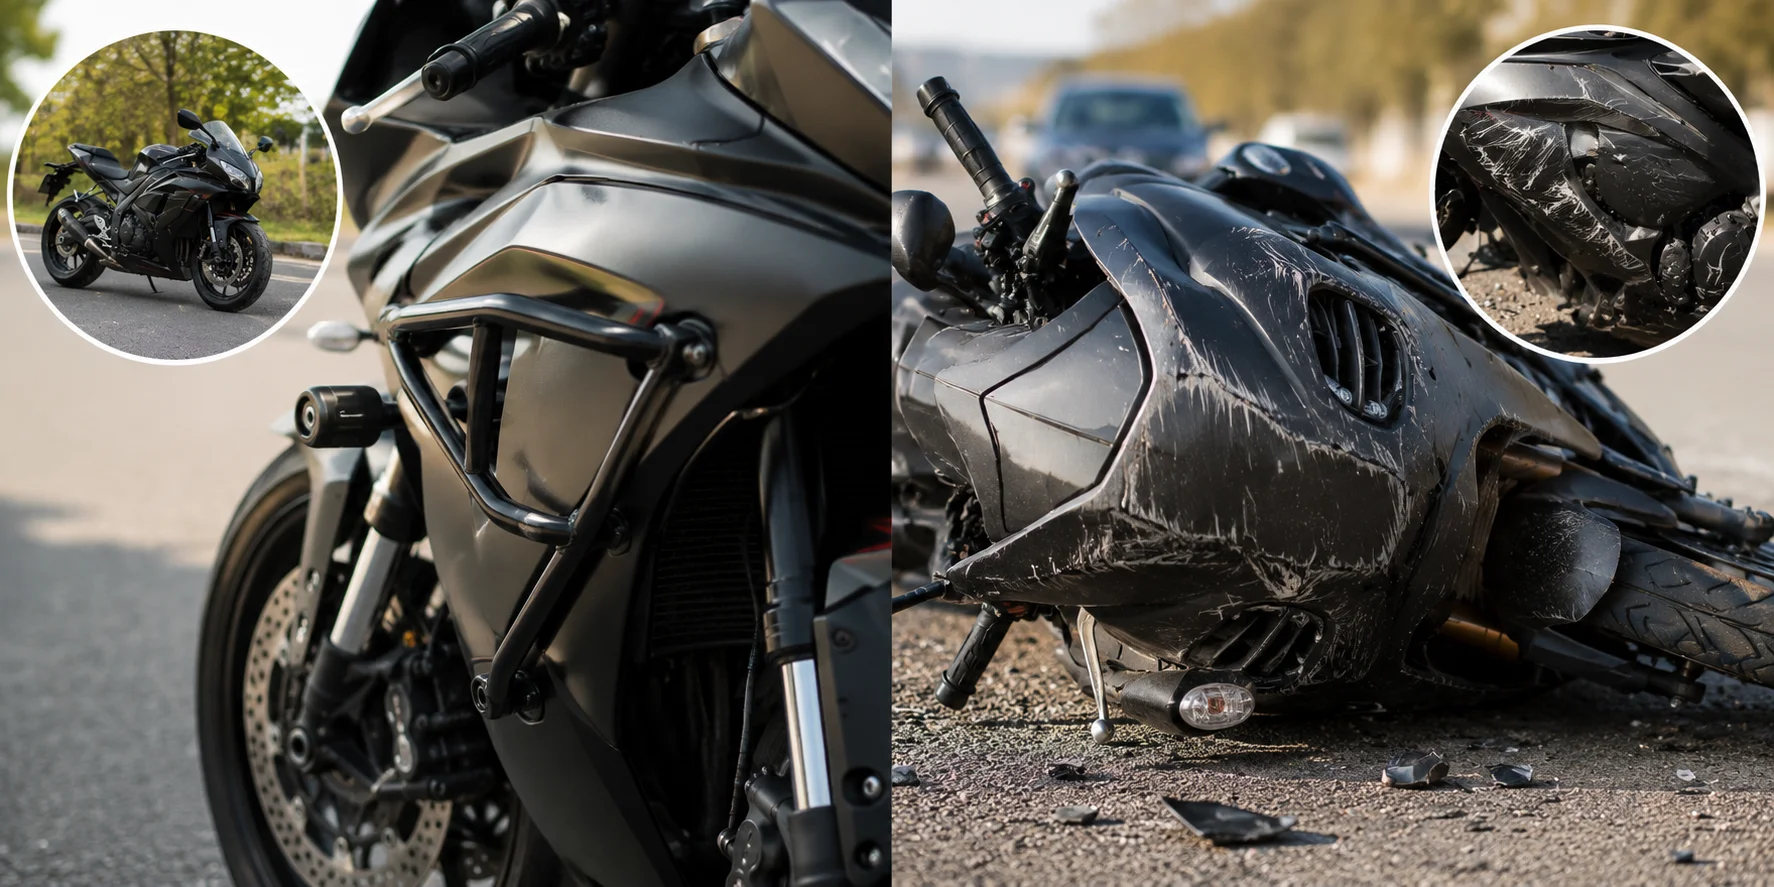
Many motorcycles suffer their first cosmetic damage while standing still. A slippery parking surface, an uneven side stand, a strong gust of wind, or someone accidentally bumping the bike can easily cause a tip-over.

Without protection, even a low-speed fall can damage the following:

  • Fairings
  • Engine covers
  • Fuel tanks
  • Frame components
  • Handlebar controls

Repair costs can quickly climb into hundreds or even thousands of dollars.

Motorcycle with crash protection vs crash damage

Why Frame Sliders Are Worth the Investment

Frame sliders are designed to absorb impact before expensive bodywork touches the ground.

Mounted directly to the motorcycle’s frame, they help keep fairings and engine cases away from the pavement during many low-speed drops and parking lot incidents.

Compared with replacing a cracked fairing or damaged engine cover, a quality set of frame sliders is a relatively inexpensive investment that can prevent much larger repair bills.

Choose Model-Specific Protection

Not all frame sliders offer the same level of protection.

A poorly designed kit or incorrect mounting location can reduce their effectiveness or even transfer impact forces to other parts of the motorcycle.

Always choose sliders engineered specifically for your motorcycle’s make and model to ensure proper mounting and maximum protection.

Aliwheels offers motorcycle bike protection products, including frame sliders, crash protection, and model-specific protective accessories for major motorcycle brands. You can also browse the complete motorcycle parts category to find compatible chassis and frame protection for your motorcycle.

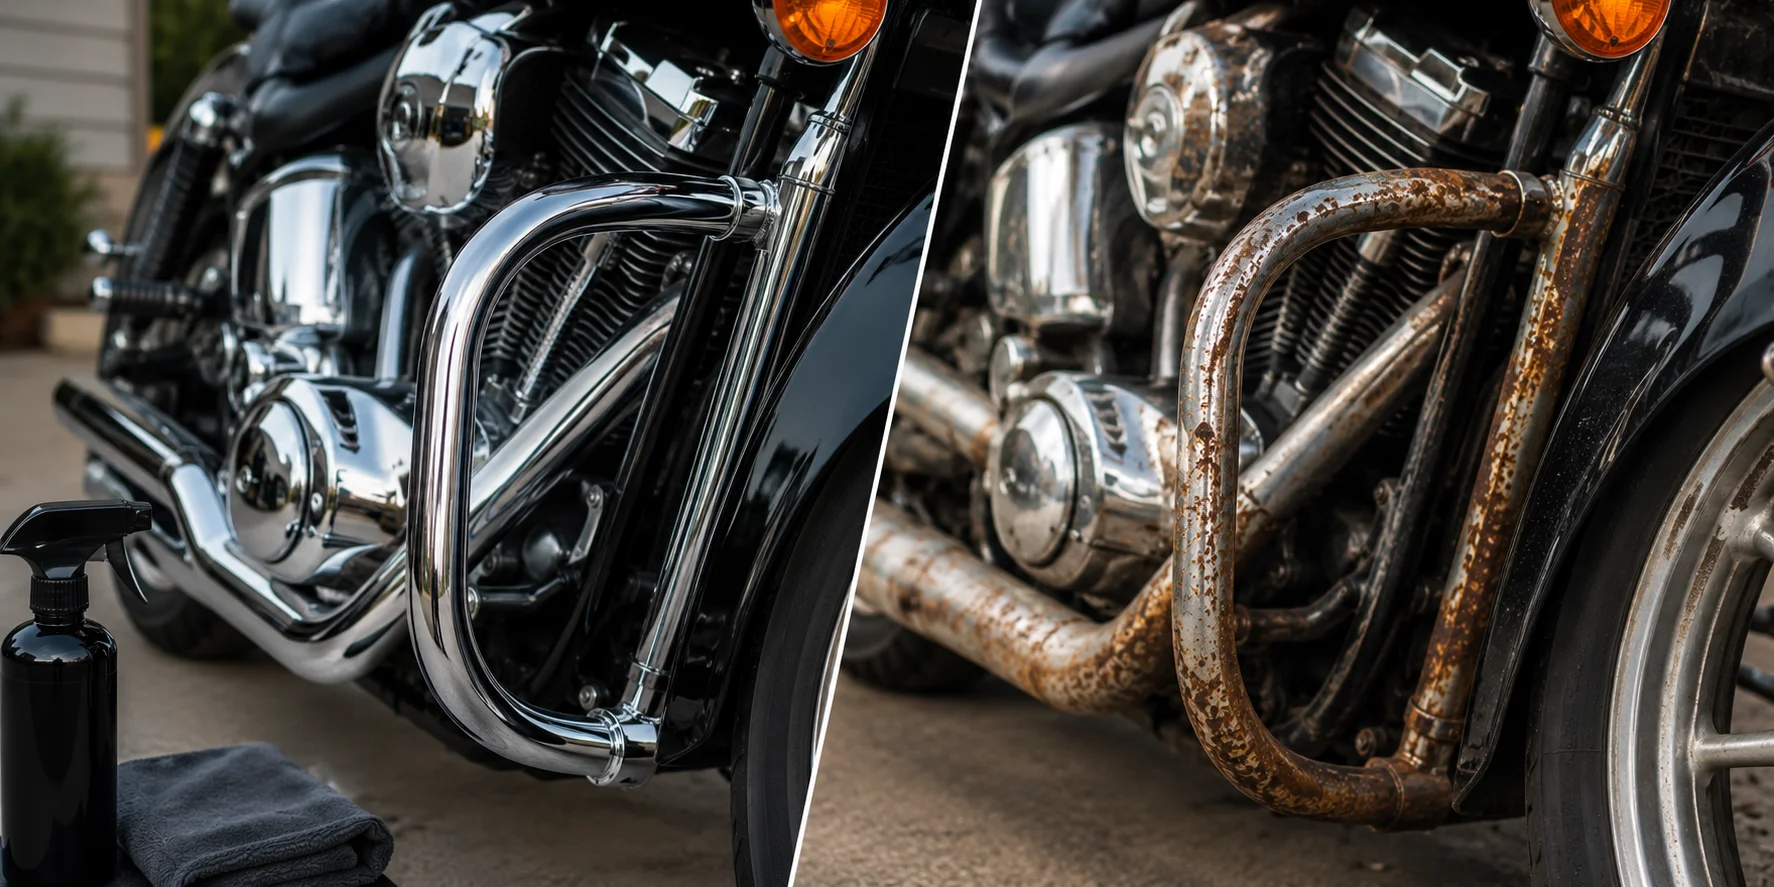
Protect Chrome Parts Before Rust and Pitting Appear

Chrome adds a premium finish to any motorcycle, but it also demands regular care.

Components such as exhaust headers, handlebars, wheel rims, mirrors, and engine hardware are constantly exposed to moisture, road salt, dirt, and changing temperatures. If left untreated, these surfaces can develop rust spots, staining, and chrome pitting that are difficult or impossible to repair.

The best approach is prevention rather than restoration.

Protected vs rusted motorcycle chrome parts

Polish Chrome Regularly

A quality motorcycle chrome polish removes light oxidation before it develops into permanent damage.

For motorcycles ridden regularly, polishing chrome every two months helps maintain its shine while protecting the surface from corrosion.

After polishing, apply a thin layer of motorcycle wax or chrome sealant to create an additional barrier against moisture and road contaminants.

Regular polishing helps:

  • Maintain a mirror-like finish
  • Reduce surface oxidation
  • Prevent chrome pitting
  • Make future cleaning much easier

Give Exhaust Headers Extra Attention

Exhaust headers experience far more heat than any other chrome component on the motorcycle.

Because of these extreme temperatures, ordinary waxes quickly burn away and provide little lasting protection.

Instead, use a heat-resistant exhaust polish designed specifically for motorcycle exhaust systems. These products help remove discoloration while offering better protection against oxidation caused by repeated heating and cooling cycles.

Never Leave Chrome Wet

Water is one of chrome’s biggest enemies.

After riding in the rain or washing your motorcycle, dry chrome surfaces as soon as possible with a clean microfiber cloth. Moisture left on the surface, especially in warm or humid conditions, can begin the oxidation process surprisingly quickly.

Pay particular attention to:

  • Exhaust systems
  • Chrome wheels
  • Crash bars
  • Engine guards
  • Handlebars

A five-minute wipe-down after a wet ride can prevent years of unnecessary corrosion.

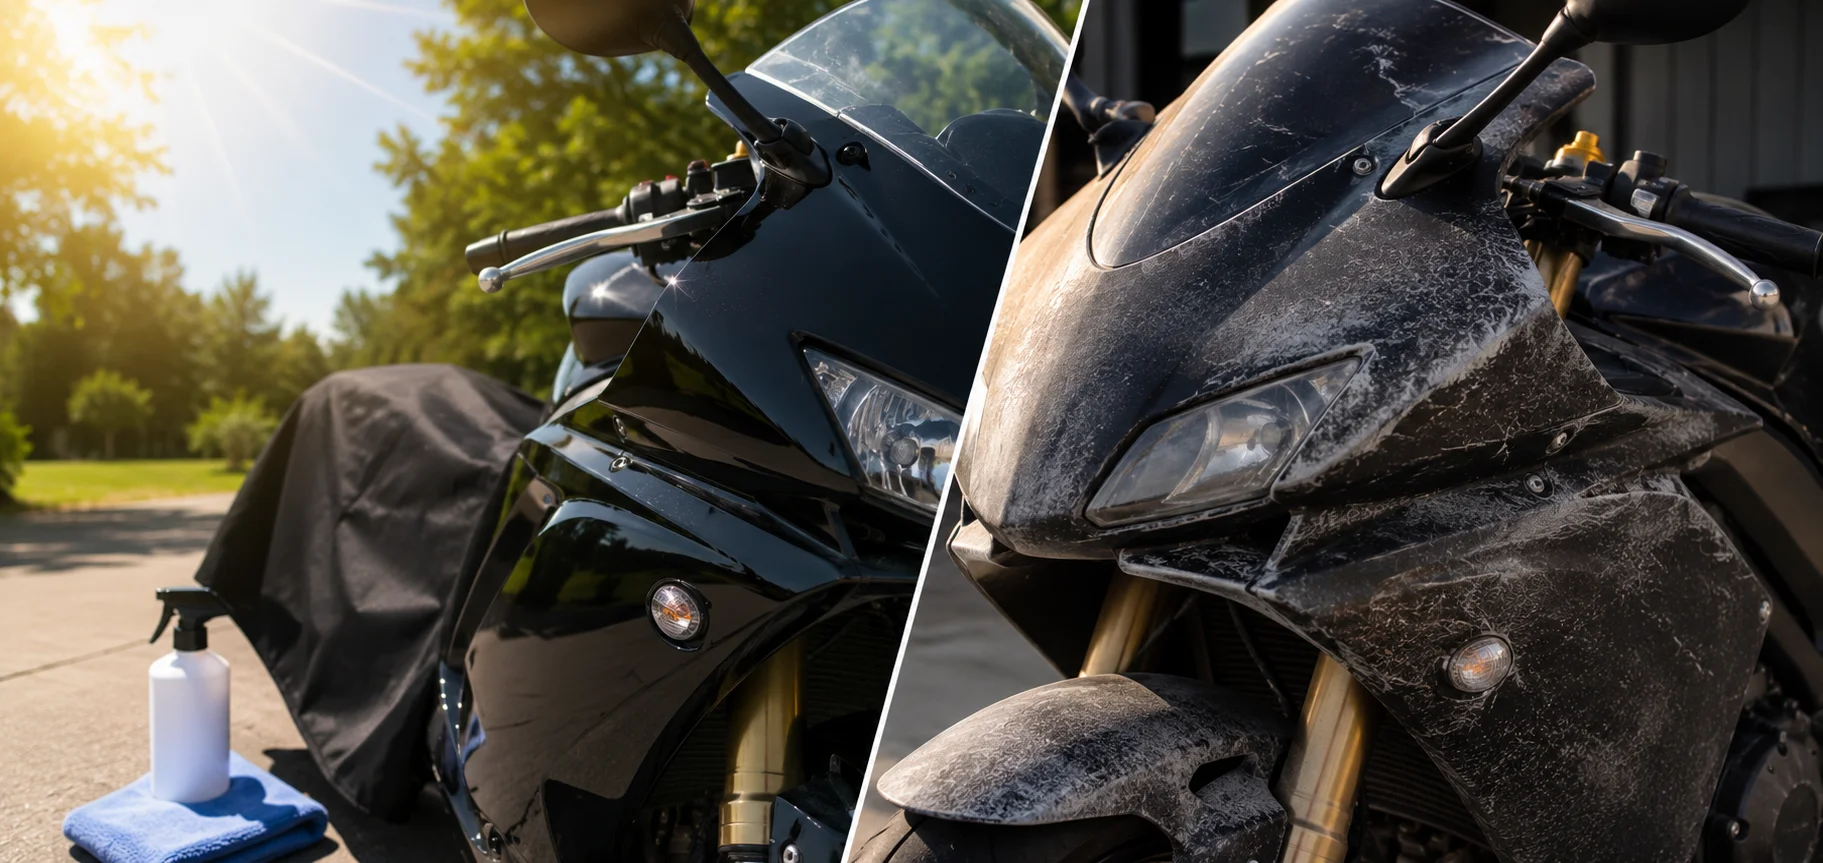
Protect Plastic Fairings from Sun Damage

Motorcycle fairings and body panels don’t just lose their shine because of dirt.

Constant exposure to sunlight slowly breaks down the plastic itself. Over time, unprotected plastics begin to fade, lose their color, and become brittle, making them more likely to crack around mounting points and fasteners.

This type of damage develops gradually but is difficult to reverse once it becomes severe.

Motorcycle fairings protected from sun damage

Use a UV protectant.

A motorcycle-safe UV protectant helps shield unpainted plastic panels from harmful sunlight.

These products work much like interior protectants used on automotive dashboards, creating a protective layer that slows fading and keeps plastics looking newer.

For motorcycles stored outdoors, apply a UV protectant every two to three months. If your bike is garage-kept, applying it after each deep cleaning is usually sufficient.

Restore Faded Plastic Before It’s Too Late

If your motorcycle’s fairings or trim have already begun to lose their original colour, a quality plastic restorer can often bring back much of their appearance.

These products revive faded plastics by restoring colour and improving surface finish. However, they work best before the material becomes severely weathered or starts developing cracks.

Regular UV protection, combined with proper cleaning, is still the most effective way to keep motorcycle fairings looking factory fresh for years.

Use a Motorcycle Cover to Protect Your Bike Every Day

If you only invest in one motorcycle protection accessory, make it a quality motorcycle cover.

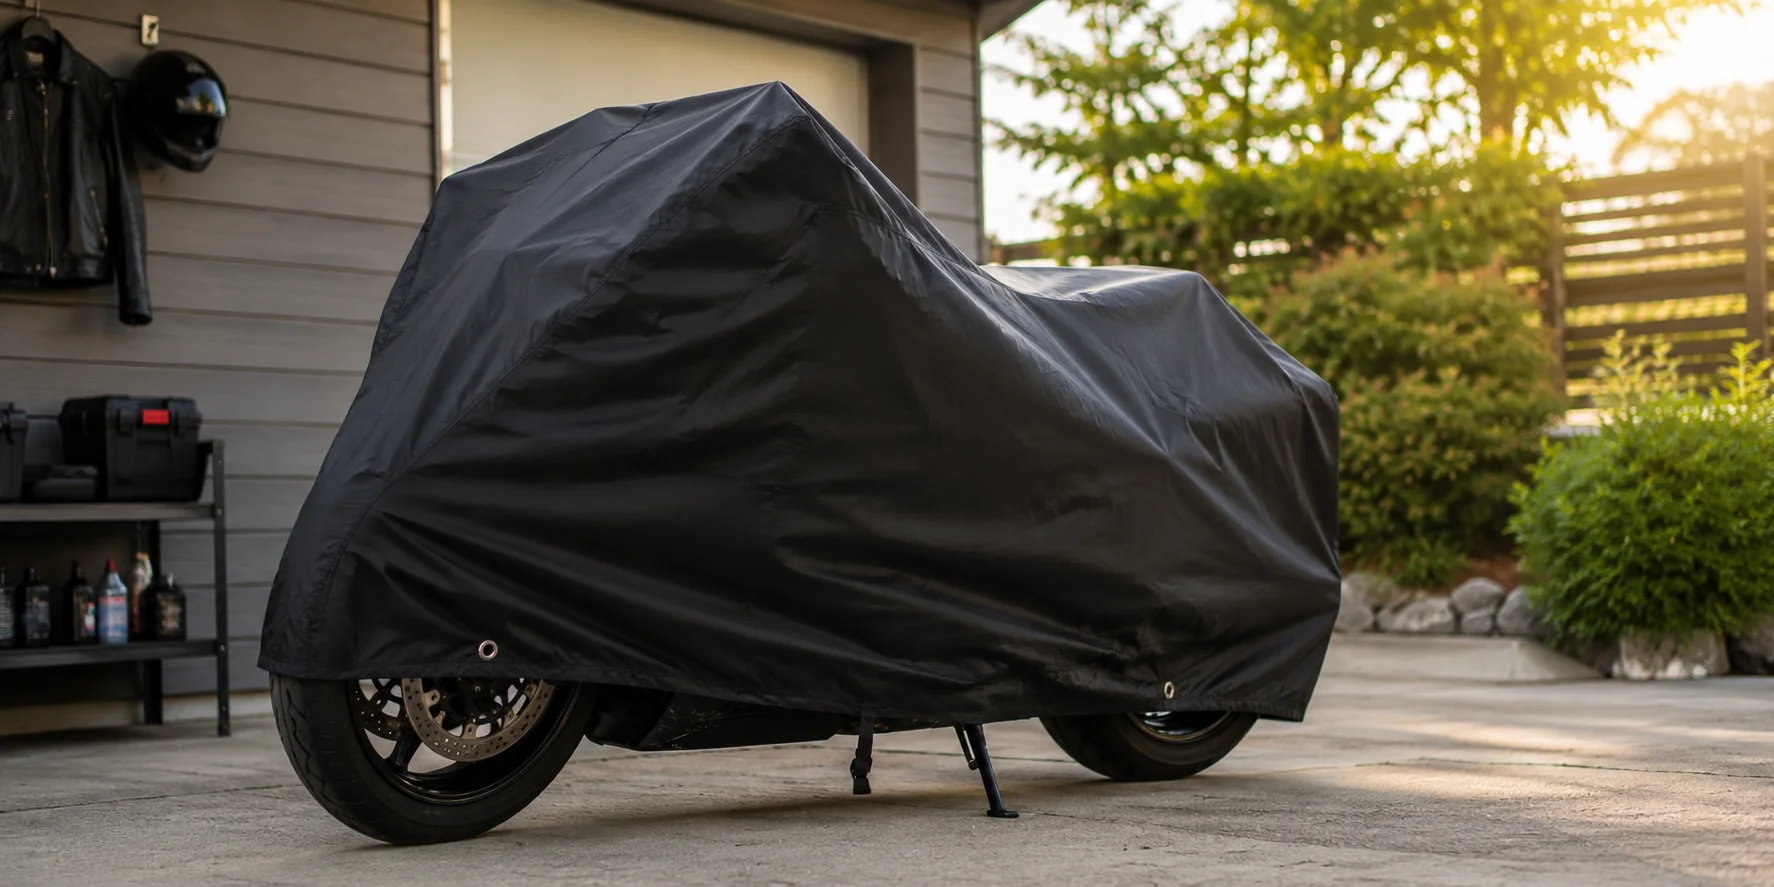
Whether your bike is parked outside or stored in a garage, a cover shields it from many of the everyday hazards that slowly damage its appearance. Sunlight, rain, dust, bird droppings, tree sap, pollen, and airborne contaminants all take a toll over time. A good cover helps reduce their impact before permanent damage occurs.

For motorcycles parked outdoors, a cover also helps keep the seat, controls, and paintwork cleaner between rides, reducing how often deep cleaning is needed.

Motorcycle protected with a cover

Choose Breathability Over Waterproofing Alone

Not all motorcycle covers offer the same protection.

Many riders assume a fully waterproof cover is the best option. In reality, a cover that traps moisture can create as many problems as it prevents.

The ideal motorcycle cover should combine water resistance with breathability. This allows moisture and condensation to escape while still protecting the motorcycle from rain and snow.

A quality breathable cover helps prevent:

  • Rust and corrosion
  • Moisture buildup
  • Mold and mildew
  • Paint damage caused by trapped condensation

If you store your motorcycle for extended periods, choosing the right cover becomes even more important.

Aliwheels offers motorcycle bike protection products, including model-specific fitted covers and universal motorcycle covers designed for reliable everyday protection.

Protect Your Wheels and Tires from Long-Term Damage

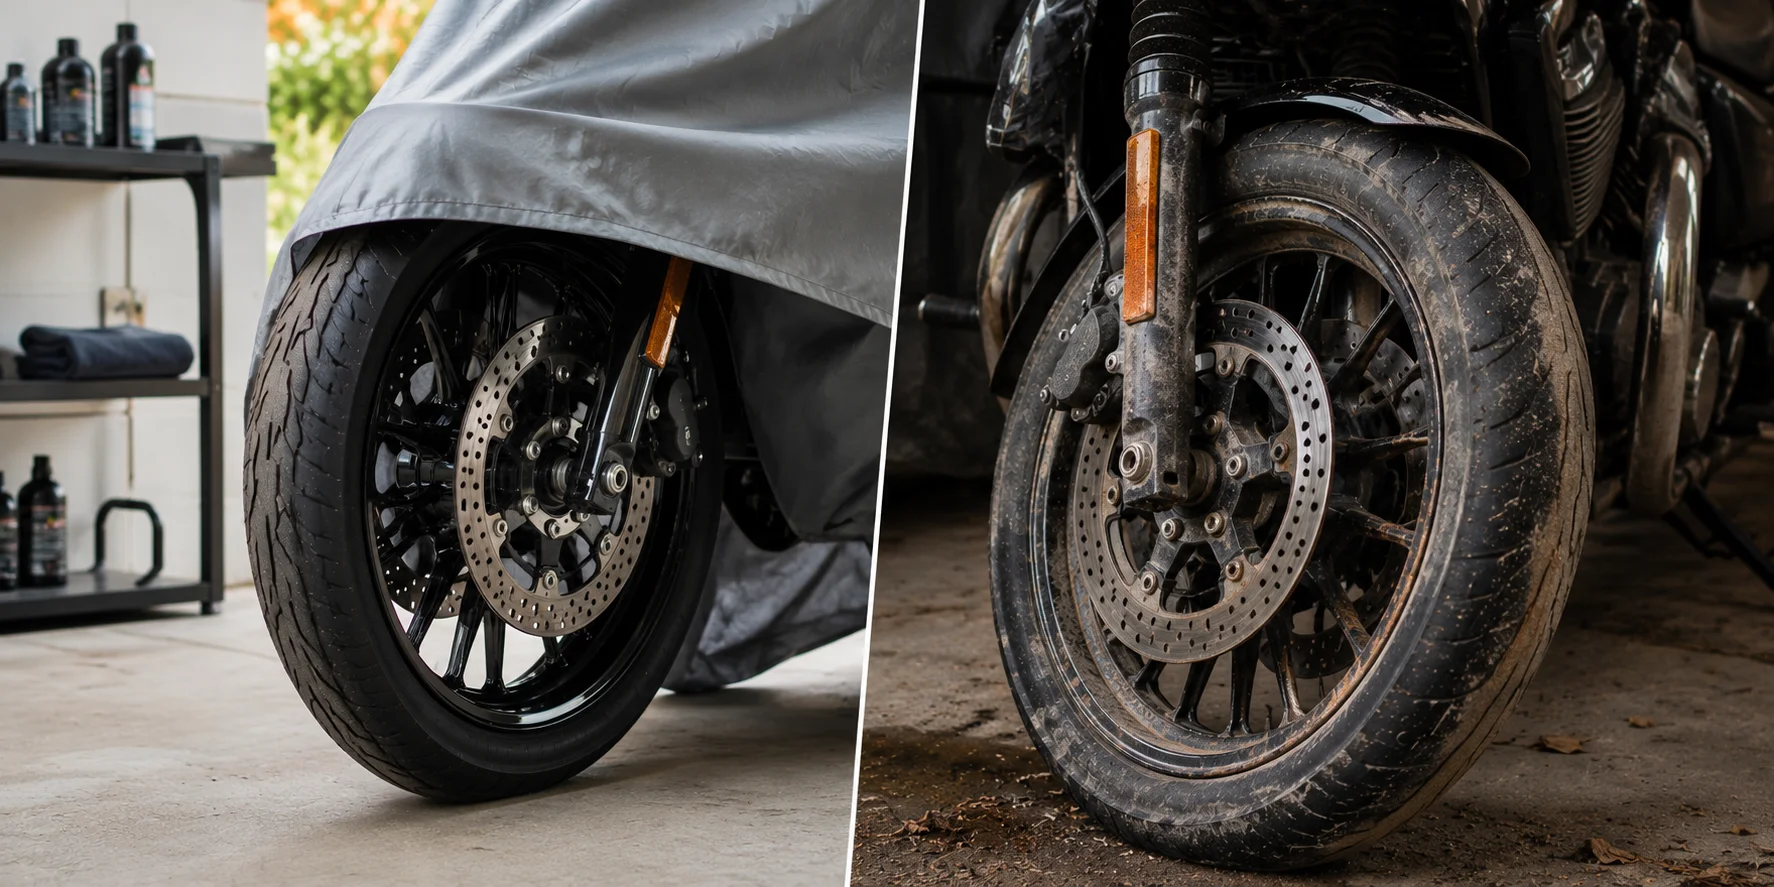
Your motorcycle’s wheels and tires are constantly exposed to dirt, brake dust, road salt, UV rays, and changing weather conditions.

Without regular care, these components gradually lose their appearance and may even experience premature wear.

Protected motorcycle wheels and tires

Seal Alloy Wheels

Alloy wheels are protected by a clear coat or anodized finish. As this protective layer ages, the metal underneath becomes more vulnerable to oxidation and staining.

Applying a quality wheel sealant after washing creates a protective barrier that helps repel:

  • Brake dust
  • Road salt
  • Water
  • Dirt and grime

Regular protection also makes future cleaning much easier because contaminants are less likely to stick to the wheel surface.

Protect Tire Sidewalls from UV Damage

While tire tread naturally wears through riding, the sidewalls often deteriorate because of prolonged exposure to sunlight.

Over time, UV rays can cause the rubber to dry out, fade, and develop small cracks, especially if the motorcycle sits unused for long periods.

Applying a motorcycle-safe tire protectant to the sidewalls only helps keep the rubber conditioned and slows UV-related aging during both everyday use and long-term storage.

Important: Never apply tire dressing or protectant to the tread surface. Any product that reduces traction can compromise grip and negatively affect braking, cornering, and overall rider safety.

With regular wheel cleaning, proper sealing, and occasional tire conditioning, your motorcycle’s wheels and tires will continue looking cleaner and performing better for years.

The 15-Minute Motorcycle Protection Routine

The motorcycles that still look showroom-fresh after five years usually don’t receive expensive detailing treatments every weekend. Instead, they receive a short protection routine performed consistently.

A simple 15-minute check after rides, plus a few monthly maintenance steps, prevents most of the cosmetic wear that makes a motorcycle look older than it really is.

15-minute motorcycle protection routine

After Every Ride (2-3 Minutes)

Quick win

Wipe chain lubricant from the swingarm and rear wheel.

Remove any oil residue from the engine area before it bakes onto hot surfaces.

Check the fuel tank for fresh scuffs or scratches.

Brush away insects or debris from the front fairing and headlight.

Why it matters: Fresh chain lube and oil residue are much easier to remove immediately than after they’ve collected dust and hardened.

After Wet Rides (3-5 Minutes)

Moisture causes more cosmetic damage than most riders realize.

Do this before parking

Prevent corrosion

  • Dry all chrome surfaces, especially the exhaust and wheel rims.
  • Check under the fuel tank and seat area for trapped water.
  • Wipe down the seat seams to prevent moisture from sitting in the stitching.
  • Dry exposed electrical connectors and switchgear if they received direct water spray.

Tip: A clean microfiber towel kept in your garage is usually all you need for this step.

Weekly Protection Check (5 Minutes)

This is the routine that catches problems before they become expensive repairs.

Once a week

5 minutes

  • Check tire pressure.
  • Inspect chain tension and apply lubricant if needed.
  • Look for loose fasteners around mirrors, fairings, exhaust mounts, and license plate brackets.
  • Check frame sliders and crash protection for any signs of movement.
  • Inspect the fuel tank and fairings for new scratches that can be treated before they worsen.

Why this matters: High-vibration areas can loosen over time. A loose fastener allows components to move, and that movement quickly wears through paint around the mounting point.

Monthly Protection Session (5-10 Minutes)

This is where long-term appearance is preserved.

Once a month

Long-term protection

  • Apply wax or paint sealant to painted surfaces.
  • Polish exposed chrome components.
  • Apply UV protectant to unpainted plastic trim.
  • Clean and seal alloy wheels.
  • Inspect the motorcycle cover for wear if the bike is stored outdoors.

For motorcycles with a ceramic coating, this monthly session is usually enough to maintain the coating’s performance and gloss.

The 15-Minute Schedule

TaskTime
Post-ride wipe-down2 minutes
Wet-ride drying3 minutes
Weekly inspection5 minutes
Monthly protection treatment5-10 minutes

The Compounding Effect

None of these steps is dramatic on its own.

However, over five years, this routine prevents the following:

  • Chain lube staining on the rear wheel
  • Chrome pitting
  • Paint oxidation
  • Plastic fading
  • Water-related corrosion
  • Fastener wear around mounting points
  • Seat seam deterioration
  • Premature wheel oxidation

The result

A motorcycle that still looks cared for years later, without requiring a full cosmetic restoration.

Fifteen minutes of protection is almost always cheaper than one weekend of trying to undo years of neglect.

Conclusion

Keeping your motorcycle looking new isn’t about spending thousands of dollars on detailing or expensive cosmetic repairs. It’s about protecting the right areas before damage has a chance to develop.

Regular waxing preserves your paint. Tank pads prevent everyday scratches on the fuel tank. Frame sliders help reduce damage from unexpected tip-overs. Chrome polish slows oxidation before pitting begins, while a quality motorcycle cover shields your entire bike from UV rays, moisture, dust, and other environmental hazards during storage.

The best approach is to build protection into your regular maintenance routine. Small habits performed consistently will always deliver better long-term results than trying to restore years of neglect.

If you’re just getting started, invest first in the products that offer the greatest protection for the money. A breathable motorcycle cover, model-specific frame sliders, and a quality tank pad. Then maintain your motorcycle with regular cleaning, paint protection, and chrome care to keep it looking its best season after season.

Whether you’re protecting a brand-new motorcycle or preserving a bike you’ve owned for years, the right products make all the difference. Explore AliwheelsMotorcycle Bike Protection collection for motorcycle covers, tank pads, frame sliders, paint protection accessories, and other products designed to help keep your motorcycle protected on every ride.

Frequently Asked Questions

Q: What is the best way to protect a motorcycle’s paint?

A: The most effective way to protect motorcycle paint is to apply a quality wax or ceramic coating. These products create a protective barrier that shields the clear coat from UV rays, water, road grime, and minor scratches. Wax should be reapplied every three months, while a properly maintained ceramic coating can for two to three years.

Q: Are frame sliders worth installing?

A: Yes. Frame sliders are one of the most cost-effective motorcycle protection upgrades available. They help protect fairings, engine covers, and bodywork during parking lot tip-overs and low-speed drops, which are far more common than high-speed crashes. For the best protection, always choose frame sliders designed specifically for your motorcycle model.

Q: How often should I wax my motorcycle?

A: Most motorcycles should be waxed every three months. If you ride frequently, store your bike outdoors, or ride in areas with road salt or harsh weather, you may need to apply wax more often. A simple indicator is water beading—when water no longer beads on the paint, it’s time to apply a fresh coat.

Q: Can I use car wax on my motorcycle?

A: Yes. Most high-quality carnauba and synthetic car waxes are safe for motorcycle paint and provide excellent protection. However, avoid products containing heavy cutting compounds or abrasive polishing agents, as they gradually remove clear coat and are intended for paint correction rather than regular maintenance.

Q: How do I keep motorcycle chrome from rusting?

A: Clean and polish chrome every two months using a quality chrome polish, then apply a protective sealant or wax to help block moisture and oxidation. After riding in the rain, always dry chrome surfaces thoroughly to prevent corrosion. For exhaust headers, use a heat-resistant chrome polish designed specifically for high-temperature motorcycle exhaust systems.

(Commenting: OFF)

Or login with your social account