bikerbiker Aliwheels is a leading motorcycle parts supplier offering free shipping anywhere in the world on orders above $300. Please note that all of our motorcycle parts and accessories are certified and tested. With more than 10,000* products to choose from this is your one place to get the motorcycle part you need. Browse our vast inventory of motorcycle radiators, fairings, clutch plates, headlights, chains, and sprockets. biker
Logo

Forget the stilettos, leave the leather behind! Riding motorcycles through the woods calls for a different kind of fashion statement. Discover the “don’ts” (like high heels) and the “must-haves” for tackling the trail in style (and safety).

Riding a motorcycle in the woods can be super fun, but it’s important to be safe, too! That’s why you need to make sure you’re wearing the right motorcycle riding gear. It’s not just about a helmet and gloves – you need stuff that can handle all the bumps and twists of the trails. From tough armor to sturdy boots, every piece of gear keeps you safe and comfy in the wild.

So, before you hit the gas and head into the forest, let’s talk about what you should wear. Get ready to gear up and explore the awesome world of off-road riding!

Risks Affiliated Riding in the Woods and their Prevention:

When riding a motorcycle in the woods, there are several risks that can be minimized with the proper motorcycle riding gear:

Injury from falls:

Motorcycle riding gear such as armored jackets, pants, gloves, and boots can provide protection against abrasions, cuts, and impacts in the event of a fall.

Branches and debris:

Riding in wooded areas increases the risk of encountering branches, rocks, and other debris on the trail. A sturdy helmet with a visor can protect your head and face from low-hanging branches and flying debris.

Weather conditions:

Riding in the woods means being exposed to various weather conditions, including rain, wind, and extreme temperatures. Waterproof and insulated riding gear can keep you dry and comfortable in adverse weather conditions.

Visibility:

Dense vegetation and low light conditions in wooded areas can reduce visibility. Wearing brightly colored or reflective motorcycle gear can make you more visible to other riders, hunters, and wildlife.

Insect bites and scratches:

Riding through wooded areas exposes you to insects, thorns, and brush that can cause bites, scratches, and irritation. Protective gear such as full-face helmets, jackets with integrated armor, and sturdy riding boots can minimize the risk of injuries from insects and vegetation.

Overall, wearing motorcycle riding gear designed for off-road or adventure riding can significantly reduce the risks associated with riding in the woods and enhance your safety and comfort on the trail.

8 Tips to look at before you Move out in the Woods with your Motorcycle:

  1. Wear the Right Gear: Make sure you wear a helmet, gloves, long pants, and sturdy boots to protect yourself.

  2. Start Slow: Begin by riding slowly and get used to the feel of the terrain.

  3. Stay Alert: Keep your eyes on the trail and watch out for obstacles like rocks, branches, and roots.

  4. Use Proper Technique: Learn how to stand up on the footpegs when going over rough terrain to maintain balance and control.

  5. Maintain Control: Keep your speed in check and use both brakes evenly when needed to avoid skidding or losing control.

  6. Respect Nature: Stay on designated trails and avoid disturbing wildlife or damaging plants.

  7. Ride with a Buddy: It’s safer to ride with a friend in case of emergencies or accidents.

  8. Carry Essentials: Bring along tools, a first aid kit, water, and snacks in case of emergencies.

By following these tips and exercising caution, you can enjoy a thrilling and safe motorcycle ride through the woods while respecting nature and minimizing risks.

Top 10 gears for Riding Motorcycle in the Woods:

  1. Helmet: A high-quality, DOT-approved helmet is essential for protecting your head in case of falls or collisions.

  2. Off-road Boots: Sturdy off-road boots provide ankle support, protection from rocks and branches, and offer good grip on the footpegs.

  3. Body Armor: Body armor such as a chest protector and elbow guards can help shield you from impacts and abrasions.

  4. Goggles or Visor: Protect your eyes from dust, debris, and branches with goggles or a helmet visor designed for off-road riding.

  5. Gloves: Durable gloves with reinforced palms and knuckle protection provide grip and protect your hands from blisters and injuries.

  6. Riding Jacket and Pants: Choose a durable, abrasion-resistant jacket and pants designed for off-road riding. Look for options with ventilation to keep you cool.

  7. Hydration Pack: Stay hydrated during long rides with a hydration pack that fits comfortably on your back.

  8. Tool Kit: Carry a basic tool kit with essentials like wrenches, tire repair kits, and a multi-tool for on-the-go repairs.

  9. GPS or Maps: Ensure you can navigate through the woods by using a GPS device or carrying maps of the area.

  10. Emergency Kit: Pack a first aid kit, emergency blanket, whistle, and other essentials in case of emergencies.

Remember to always ride responsibly and within your skill level, and consider taking a riding course specific to off-road riding to improve your skills and safety awareness.

Gear Up for Adventure: Riding Motorcycles in the Woods Safely and Stylishly

In conclusion, riding a motorcycle in the woods is an exhilarating adventure that requires careful preparation and the right gear. By equipping yourself with the appropriate protective gear such as helmets, body armor, and off-road boots, you can mitigate the risks associated with off-road riding and ensure a safer and more enjoyable experience. Additionally, following safety tips such as starting slow, staying alert, and respecting nature’s surroundings further enhances your riding experience while minimizing potential hazards.

Remember to always prioritize safety, respect the environment, and carry essential tools and emergency kits to handle unforeseen circumstances. With the right gear, knowledge, and mindset, you can embark on thrilling woodland rides with confidence, knowing that you’re well-prepared for whatever the trail may bring. So gear up, ride responsibly, and embrace the adventure that awaits amidst the beauty of nature’s trails.

FAQs

The helmet is the most critical piece of gear for woodland riding, as it protects your head in case of a fall or collision.

Look for boots with ankle support and sturdy soles to protect your feet and ankles from rocks, roots, and other obstacles.

Incorporate high-visibility gear with reflective elements and bright colors to enhance your visibility to other riders and motorists.

It’s essential to have waterproof gear on hand, including a jacket and pants, to stay dry and comfortable during unexpected rain showers.

Yes, thermal layers can help keep you warm and comfortable in colder weather, ensuring you can enjoy your rides year-round.

(Commenting: OFF)

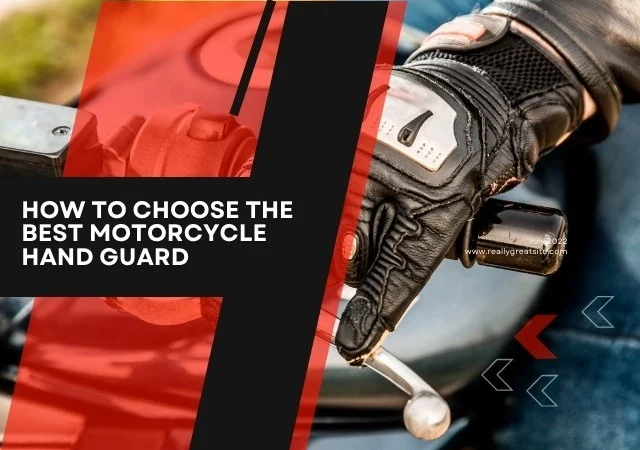
No one likes cuts or scrapes while riding their motorcycles. A way to protect your hands from the external influences of the environment is to use a motorcycle hand guard. You can easily attach these accessories to your motorcycle. It would take roughly 20 minutes of your time to install. They offer an aesthetic look while also ranging in ways they can protect your hands and bike controls. They can help protect against bad weather, off hanging branches or twigs and they can also protect your hands during the event of an accident.

Types of hand guards

Two types of hand guards typically divide based on the level of protection they offer. Motocross also known as open-ended hand guards, and off road hand guards more commonly known as full wrap-around hand guards.

Open Ended Hand Guards

Open-ended hand guards are a great option for lightweight protection against mud, wind, rain, or rocks, they can easily deflect these small objects and protect your hands. A hand guard that offers this can be Ali Wheel’s Hand Guard Protector for Kawasaki

Full Wrap-Around Hand Guards

On the other hand, full wrap-around hand guards offer much better protection for more intense situations. If you fall off of your bike or have a crash in which you make contact with the ground, you will better protect your hands if you use these hand guards. They emerged in the 70’s as bikers began going into the wilderness and started exploring and riding in the great outdoors.

Protect against:

Harsh weather conditions

Motorcycle hand guards come in handy during bad unpredictable weather conditions. Especially during the cold winter months or during heavy rain. These hand guards will protect against the cold wind and keep your hands dry from the rain providing you a better sense of comfort to allow you to ride for longer without inconveniencing you.

Losing control

During an accident, these hand guards can help prevent you from losing control of your bike. In the instance of having a direct impact with the riding surface, a motorcycle hand guard’s metal frame will protect the bike controls, allowing the clutch and brake lever to remain untouched if you fall and will stop your bike from going out of control

Broken wrists

During a high-intensity impact the main joint that can break or get injured while riding is your wrist joint. This makes your wrists a vulnerable target that can break in an accident. Using a hand guard provides another layer of added protection to prevent this. It also helps protect against the possibility of broken wrists.

How To Install A Motorcycle Hand Guard

Installing a hand guard is based on what type of hand guard you have. The process is more or less the same as the one listed below. You might need to make a few minor tweaks and adjustments. A general guideline on its installation is given below and adjustments may be needed.

Tools you will need:

  • Utility knife
  • Motorcycle hand guard
  • Allen wrench/key
  • Drill machine
  • Screwdriver
  • Thick gloves

Installing The Hand Guard

  1. Firstly remove the grip on the handle.
  2. Take a sharp utility knife and cut off the end of the grip that is connected to the handlebar of the bike.
  3. The thick gloves will prevent your hands from getting any nicks or cuts.
  4. Drill a hole into the plastic throttle handle of the bike, roughly the same size as the handlebar.
  5. Now that the handlebar is prepped and ready we will start to assemble the hand guard on it.
  6. Place the hand guard on the handlebar so that the holes on the hand guard align with the holes on the handlebar.
  7. Use a screwdriver to insert the screws in the holes, attaching the plastic guard to the metal bar.
  8. Place the rings on top of the screws and use your Allen wrench to tighten it.
  9. Tightened the screws and rings in place with your Allen wrench.
  10. Lastly, make sure to check if the hand guard is mounted on nice and snug on the handlebars.

Choosing A Hand Guard Fit For You

Choosing the best motorcycle hand guard all comes down to preference. The user needs to determine their own needs and the amount of protection necessary.

For mild protection, a lightweight open-ended hand guard would be a suitable option. Although restricting in allowing movement for your hands, it protects them well. These are better for bikers who mainly travel in cities and just want some protection against rough weather conditions and small objects such as rocks.

For moderate to high protection a full wrap-around hand guard would be an appropriate choice. It provides more protection during demanding circumstances such as a crash or accident. This type of hand guard although restrictive in the allowing movement of your hands is much safer. It also prevents the brake and clutch levers from being affected during a crash. High forces can easily break open-ended hand guards attached to bikes at a single point. Full wrap-around hand guards attached on two points make them more durable and less prone to breakage.

(Commenting: OFF)

The Yamaha R3, also known as the Yamaha YZF-R3, is a 321cc sports bike brought into production by Yamaha in 2015 and later updated in 2019. The first offset cylinder design bikes introduced by Yamaha were the R3 and R25. The Yamaha R3 is a very lightweight sports bike, and the engine used in the R3 is liquid-cooled and works on a downdraft induction fuel injection system, while all the cylinders are aluminum-based. The Yamaha R3 came in three color options: rapid red, Yamaha blue/matte silver, and raven. The 321 cc engine allows it to have more power than other bikes. The Yamaha YZF-R3 is perfect for beginners based on its style, affordability, and performance.

Its low seat, aerodynamic design, and light weight make it a suitable option for novice riders.

Because it is portable, easy to use, stable, and comfortable to ride on, it is practical to use. It is a great alternative to consider if you are a novice cyclist or rider.

Many variables support this bike as a recommendation to people who could be more capable, as this bike is entirely steady. The engine power is in an effectively controllable reach. It additionally has safety features.

Lightweight

Because of its lightweight and smaller plan, it is sensible for novices; it is simpler to settle and deal with. Indeed, even with a full tank, The Yamaha R3 weighs just 375 pounds. A lightweight sports bike is significantly more agreeable for new riders as it helps support their certainty and is not difficult to move in restricted spaces. The R3 has an aerodynamic design, which helps in its agility and free movement.

Low seating

The R3’s seat is roughly 30.7 inches in height, implying it is a lower seat that gives more solace to its clients. Another essential plan element of the Yamaha R3 is that with the delicate seat, the handlebars are raised, giving riders a considerably more comfortable position to ride for longer without stressing their back.

This is an exceptionally ergonomic plan decision made in light of the patient’s solace. Novice riders anxious about lengthy voyages will be reassured that this will make their drive more open and agreeable without forfeiting their delight.

Controllable Power

The Yamaha R3 has a 321 cc engine that is fluid-cooled, and that implies it has a considerable power motor. However, the client can undoubtedly control that. The additional uprooting in the machine gives the bike more power. This expansion in size permits the R3 to create more energy than different bikes in the scopes of 286 cc or 296 cc. The force of the R3 is more prominent. However, the more unimposing body permits unpracticed riders to control the bike and increment its ability as they become more familiar with riding and foster more trust in their capacities and skills.

Inclusive

The Yamaha YZF-R3’s small body design and light weight make it available to people, everything being equal. It is effectively open for more modest people because the bike seat is lower than just 30.7 inches or for people who can’t deal with heavy bikes. This small, petite design offers people more command over the development and moving of the cycle. This gives you more control over your bike. It is the best methodology for amateurs to learn how to ride it.

Security factor

The additional security component of the R3 incorporates hostile-to-slip tires, a double zone ABS, and an anti-locking braking system. The anti-locking braking system works on the possibility that when the front wheel has a low foothold with the street, it keeps the wheel from securing. This decreases the probability of a mishap occurring. It allows the rider to voyage without agonizing over their wheels unexpectedly, securing and lurching off the road.

Conclusion

To sum up, the Yamaha R3 is an optimal decision for fledgling riders. It permits them to acquire a vibe for riding while at the same time being secure and safe. The well-being elements will allow understudies to dominate new abilities while sharpening their current ones. The variable power component will allow users to continuously build their bicycle’s force. The ergonomic design will cause them to feel quieter, uplifting certainty and propelling them to develop their bike abilities further.

(Commenting: OFF)

Having a motorcycle exhaust leak can be frustrating and can negatively affect your riding comfort. It compromises your bike’s performance and fuel economy and may produce an uncomfortably loud and uneven exhaust noise. But from now you’re insured, so don’t worry. We’ll lead you through the procedure of correcting that leak in this article so you can go back on the road with a bike that is screaming like a champion.


1. Diagnosing the Exhaust Leak:

Finding the cause of the exhaust leak is crucial before starting any repairs. Beginning with a visual inspection, pay particular attention to all joints, gaskets, and connections in the exhaust system. Look for rust stains, black carbon deposits, or obvious holes that might be evidence of a leak. Additionally, when the engine runs, pay attention to odd popping or hissing sounds. Use a smoke machine or water and soap mixed together and sprayed around the exhaust system while the bike is running to locate the leak’s exact location.

2. Replacing Gaskets and Seals:

Worn-out or broken gaskets and seals are one of the most prevalent causes of motorcycle exhaust leaks. By using the preceding diagnostic procedures, start by identifying the defective gasket or seal. To reach the affected region, remove the required parts. Remove the old gasket or seal with caution so as not to harm the adjacent components. To remove the dirt or residue, use a solvent or scraper to clean the mating surfaces. Install a fresh gasket or seal, ensuring it is seated and aligned correctly. Tighten the fasteners to the manufacturer’s suggested torque levels before reassembling the exhaust system.

3. Repairing Cracks or Holes:

Cracks or holes in the exhaust pipes may occasionally be the source of a motorcycle exhaust leak. To begin, carefully clean the afflicted region to get rid of any dirt, rust, or grime. High-temperature epoxy or exhaust repair tape can be used to patch up minor fractures or holes, depending on the extent of the damage. As directed by the package, apply the epoxy or securely wrap the tape around the damaged area. Give the repair substance enough time to cure or set. It could be essential to completely replace the damaged piece of the exhaust pipe if the damage is more severe.

4. Tightening Loose Connections:

Loose connections can also cause exhaust leaks. Check and tighten any loose bolts, clamps, or brackets throughout the exhaust system. To guarantee a tight fit, use a wrench or socket set. Avoid overtightening, as this might harm the parts or cause new leaks. After a brief test ride, check all connections again to ensure their stability.

Conclusion:

Correctly repairing exhaust leaks is essential for maintaining a motorcycle’s top performance and ensuring rider safety. By following the guidelines in this handbook, you can quickly detect, locate, and fix motorcycle exhaust leaks. Always remember to seek the assistance of a qualified motorcycle mechanic if you are hesitant or uneasy performing the repairs yourself. Enjoy the ride with a fully functional and sealed exhaust system!


(Commenting: OFF)

Or login with your social account