bikerbiker Aliwheels is a leading motorcycle parts supplier offering free shipping anywhere in the world on orders above $300. Please note that all of our motorcycle parts and accessories are certified and tested. With more than 10,000* products to choose from this is your one place to get the motorcycle part you need. Browse our vast inventory of motorcycle radiators, fairings, clutch plates, headlights, chains, and sprockets. biker

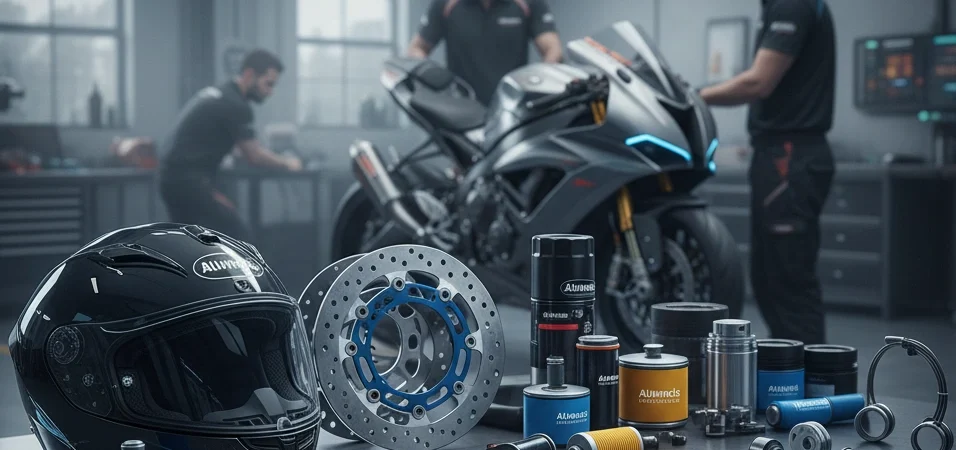
Imagine your motorcycle like an orchestra of moving parts. The combination of all these performance-grade components will create harmony, resulting in a motorcycle that reacts to your signals, keeps you safe, and brings you smiles for every mile. It is this vision at Aliwheels that makes us selective in our product range. We do not only sell components, we give you the blocks for a fantastic ride. Aliwheels motorcycle parts provide performance, safety, and style. In this blog, we will discuss different categories of the product range that could be a great purchase for you.

Clutch Mechanisms  

  • The clutch: The area that connects you to the rear wheel upon that phenomenally powerful engine. A worn-out clutch not only deprives you the acceleration but also makes gear changes rudimentary and unresponsive.  
  • What we are selling: a variety of high-performance clutch kits, durable friction plates, matched steel drive plates, and heavy-duty springs.  
  • The Rider Advantage: The right clutch kit has given the rider a smooth, precise engagement and steady power in every ride, with or without a pillion, regardless of whether the ride involves city traffic or a tourer. Our kits permit greater torque, so there is no slippage, and you have your sense of connection and directness.  

Why use a bad clutch to blur your motorcycle performance? The first modification that you can make is upgrading your clutch, which will give greater acceleration and smoother control.

Braking Parts

It is as necessary to control as to create. There should be no compromise during the process of brakes.  

  • What We Sell: Sintered and organic brake pads, wave and standard rotors and high-quality brake fluid.  
  • The Rider Advantage: Sintered metal pads are designed with high stopping power in all weather conditions and do not fade away when the rider goes on an aggressive ride. The performance rotors are also more efficient in heat dissipation, and hence the braking efficiency is maintained during long descents. This is equivalent to shorter distances of stopping, consistent lever feeds, and unshaken confidence that you need the most.  

It is your brakes that can save your life. Our parts are put to the test to give us maximum stopping power and repetitive performance at all times.

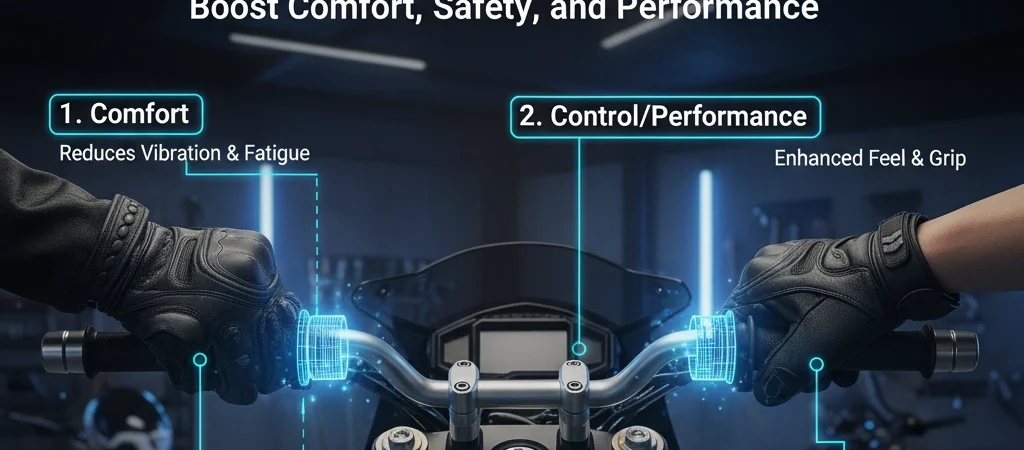
Grips, Controls and Handlebars

This is the place you touch your steering, throttle, and clutch lever. Here, ergonomics has a direct effect on fatigue and control.  

  • What We Sell: Ape hangers, tracker bars, replacement levers, and a plethora of grips (rubber, gel, heated).  
  • The Rider Benefit: When changing to handlebars that are most comfortable with your posture, you will have eliminated back pain and wrist pain. Quality grips contain vibrations and offer a good and non-slippery grip. Adjustable shorty levers are hand-sized, lowering reach, and increasing comfort.  

Control is not to be a war. Handling and comfort are upgraded by optimising the handlebar setup.

Mirrors and Lighting

Awareness is safety. You must have a clear view of what is behind you and the capability of being seen in low-light situations.  

  • What We Sell: Bar-end, stem-mounted, and custom mirrors, improved LED light kits for headlights, indicators, and brake lights.  
  • The Rider Benefit: Good mirrors remove blind spots and minimise head-turning, and keep your eyes forward. The current LED light is whiter and brighter to see better in the dark and consumes less power, hence making it more reliable.  

Improved vision is a two-fold upgrade-you will be safer, and night riding will be an easier task.
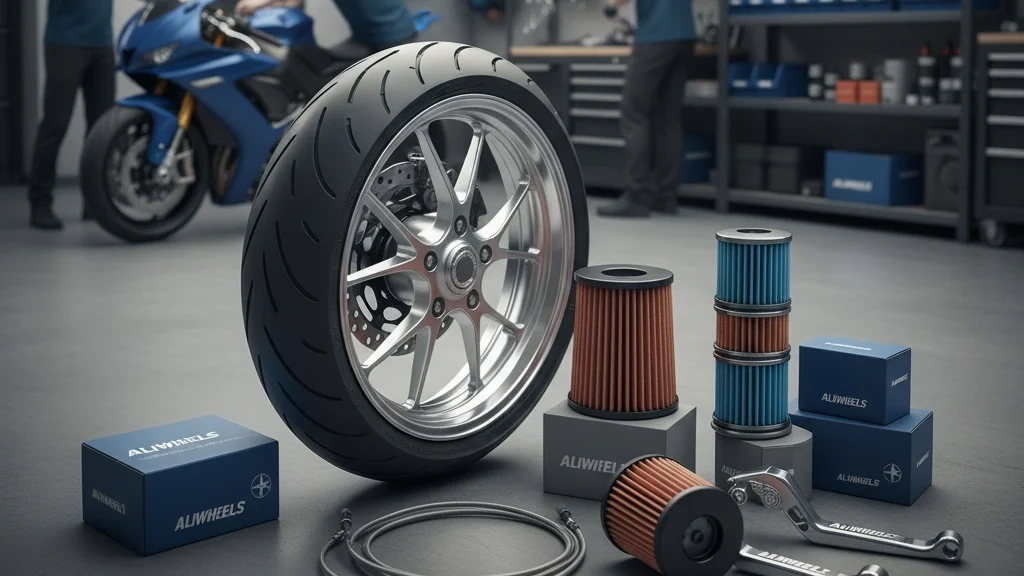
Filtration and Oils

Quality and regular filtration and lubrication are the most affordable insurance money to the health and performance of your engine in the long run.

  • What We Sell: Inline fuel filters, high-flow air filters, spin-on oil filters, and engine oils of premium JASO MA.  
  • The Rider Advantage: An air filter with high flow will also increase throttle response and horsepower because it allows your engine to inhale more easily. A good quality oil filter will pick up microscopic particles of metals, and this will eliminate wear. Appropriate motorcycle-specific oil means that the motorcycle will be well lubricated, and the clutch will operate smoothly.  

Electrical and Batteries

It is a dead battery and a dead motorcycle. It is a good electrical system that makes your machine alive.

  • What We Sell: Lithium-ion (LiFePO4) and AGM batteries, stators, rectifier-regulators, and spark plugs, which are maintenance-free.  
  • The Rider Advantage: Lithium-ion batteries are small yet have higher capacity to store energy and have more performance during cranking, particularly in low-temperature weather. Replacement of spark plugs results in efficient burning, smooth idling and higher fuel economy.

One of the common places of failure is electrical gremlins. A good battery and good electric parts ensure that your Motorcycle works each and every time you flick the switch.

Aesthetic and Functional Accessories

Here is where you personalise the motorcycle. The accessories must be designed with a combination of form and functionality that improves the appearance and use.  

  • What We Sell: Saddlebags, tank covers, windscreens, crash bars, and custom footpegs.  
  • The Rider Advantage: The tight-fitting windscreen helps in shielding the wind blast on long routes, thereby significantly reducing fatigue. Saddlebags are a good way to pack up to go to work or sightseeing. Crash bars prevent damage in a tip-over to your engine and other costly parts, and save you money in repairs.  

The accessories that you need to have are not only those that make your motorcycle look good; they are those that make it more practical, comfortable, and safer in the face of the real world.

Conclusion

All the parts on your motorcycle serve a purpose. The motorcycle can be powered through the clutch, brakes allow you to feel safe, the filters help to keep the engine safe, and the accessories give you your style. Quality does not consist of a detail; it is the whole picture.  

We have developed this portfolio in Aliwheels to give you the choice of power: to replace, upgrade, repair, and enhance. We promise to offer real, performance-proven components that will allow you to construct a motorcycle that will be more capable and reliable and unique to you.

(Commenting: OFF)

Each rider is directly in touch with their machine at the handlebars. The control interface of the main interface mainly consists of grips, which have an influence on throttle response, braking feel or operating grip in handling. They do not have to be rubber tubes; the correct ones can increase comfort, accuracy and riding duration.

Fatigue, loss of precision and slippage of hands are associated with worn or poor grip. This guide discusses the importance of motorcycle grips, the different kinds of grips, and demonstrates how the correct selection of grips may result in a tremendous change in your ride in terms of comfort, safety and the flavour of the ride.

What Are Motorcycle Grips and Their Significance?  

Motorcycle grips, in simple terms, are basically referred to as the rubber or composite sleeves which are slipped on your handlebars. They have two tasks, to offer a secure and non-slipping surface and absorb these engine and road vibrations.

This may be simple to hear, but they play a significant role. They allow you to have control also under throttle, particularly when cornering, braking or even in wet weather. Typical issues related to the worn-out or inexpensive grips are:  

  • Slippery surfaces which make the hands slide.  
  • Shaky type: Transferring of vibration, and then becomes numb or tired.  
  • Front-end poor feedback, obstructing handling.  

The grip is more than a matter of taste, but it is also an aspect of balancing your bike.

The role of Grips on Comfort, Safety and Performance

The choice of grip varies in all respects:

  • Comfort: Damping grips to prevent high-frequency engine vibrations and low-frequency bumps of the road, so that you can ride longer with no pins and needles. Foam and gel materials are good for this. 
  • Safety: In case of emergency, a safe hold is all that is required. Non-slip textured handlebars will prevent your hands from sliding down the bars or loss of throttle control with sharp braking, or avoidance cuts or swerves. Your line of first defence is that.  
  • Performance: The appropriate diameter and texture enhance the handling precision of the riders who wish to take their performance to the next level. With a sport grip, you get instant feedback, whereas you are not affected by the shocks on the road with a touring grip.

Types of Motorcycle Grips  

1-Rubber Grips  

General and most popular. The contemporary rubber grips are strong, cheap and waterproof. Softer ones pick up less vibration, pick up more, and hard compounds have much longer life. Good at commuting and all weather.

2-Foam Grips  

Foam grips are very light and delicate, and vibration-damping. They make a favourite of the long-distance traveller and the rider of a cruiser ( consider Suzuki Boulevard or Yamaha V-Star). The trade-off includes a quicker degradation during rainy seasons when it is in heavy rain, and it is necessary to be able to replenish it constantly.

3-Gel Grips  

These are a combination of a rubber shell, combined with an internally embedded gel core, and this serves as a shock absorber. They are the final solution to the rider who has wrist tiredness, arthritis or carpal tunnel syndrome. A little bit heavier, they provide outstanding comfort not only on bumpy roads but also on long distances.

4-Heated Grips  

An innovation to 365-day riding on a national scale in the UK. They are electrically powered, which allows hands to be warm in cold weather, keeping them warm without feeling numb and stiff, affecting control. Most kits are based on a normal 12 editions and are common on tour and adventure bikes.

5-Performance Grips  

Factory balanced to racetrack racing or loose road riding. They have braver texturing and are made thinner, and focus more on hard throttle feel and hard control instead of trim comfort.

The Selection of Motorcycle Grips  

Choose the ideal grip as your ride style and requirements match one of them:

  • Purpose: Touring? Choose foam or gel. Sport riding? Opt for performance grips. All‑whether commuting? Heated grips or rubber are most suitable.  
  • Dimensions and size: Ergonomics. An excessively thick grip produces fatigue, and one that is excessively thin produces diminished leverage. Riders with bigger hands use grips that tend to be slim, making them have a natural grip.  
  • Fittings: Check that he grip fits your model of motorcycle. The standard handlebar that is normally used is 7/8″, although the throttle tube side should always be checked to ensure the proper size.

How to Install Motorcycle Grips 

Proper installation is critical towards performance and safety.

  • Removal: Slide the old grip off under a squirt of a compression spray or with a spray of isopropyl alcohol under the old grip.  
  • Preparation: Clean up the handlebars and throttle tube, getting all the adhesive and residue off.  
  • Fitting: This is done by applying a piece of grip glue or hairspray (which is a lubricant which settles to its sticky state) so that the new grip will slide on.  
  •  Safety Check: Make sure that the throttle tube is rotating when not attached and closing easily.

Maintenance and Replacement Guide

Check grips periodically in case of cracks, hardness or shiny spots. A hard or greasy grip has a safety risk and must be changed immediately. Wash them with soaps and do not use strong chemicals, as this may destroy the finishing.

Advantages of Replacing

Grip upgrades are among the least expensive upgrades.

Benefits are immediate:  

  • Radical accent on ride comfort and cutback vibration fatigue.  
  • Better throttle response, which is sharper and safer and much more reliable.  
  • An easy solution to renew the morphology of your motorcycle in a variety of colours and textures.

Conclusion

Your motorcycle grips are a trivial object with an immense influence. The direct physical connection to the motorcycle that determines the safety, comfort and performance of each journey. The right set will decrease fatigue, increase confidence and leave a person with an actual better riding experience.

(Commenting: OFF)

The Suzuki Boulevard C50 Gas Tank Cover 2005-2015 consists of a masterpiece cruiser design, with raw power that creates eternal beauty. This machine has its iconic gas tank at the visual centrality of the machine, something that should be given protection and pride. A gas tank cover is not a fashion accessory. It provides the surest form of protection against scratches, oil leaks and the beat of the sunny sun.  

Nevertheless, Improper installation may cause fitment problems, trapped moisture and even create damage to paint. The step-by-step guide will teach you the proper method for attaching a tank cover to your Boulevard C50 to create a perfect, fitting cover that will make your bike look good all the way to the furthest future.  

Knowing Your Suzuki Boulevard C50 Gas Tank Design

It is good to know the form of a tank beforehand. The (2005–2015) Boulevard C50 is one of the unique teardrop fuel tanks that have chrome side panels and a middle gauge. The shape of your cover should be exactly that, not cover any gauges or badges.  

There are minor model variations in the cosmetics, and thus, the case needed in the 2005-2015 model series is vital. These are made of such materials as sticky leather or abrasion-resistant synthetic vinyl or athletic carbon-fibre replicas. Both of them feature an exclusive combination of style, protection, and feel.  

Tools and Materials You Will Require

  • Suzuki Boulevard C50 miscellaneous (2005-2015) Suzuki gas tank cover  
  • Microfiber cloths  
  • Spray bottle of a small amount of soapy water  
  • Isopropyl alcohol or an adhesive promoter (to act like adhesive-backed covers)  
  • Thick paper (to trace the bridge)
  • Taping (so the bridge fits in the stylus grooves of a record)  
  • Hairspray (to stiffen fabric)
  • Heat gun or a hair dryer (to mould vinyl)  
  • A clean, shaded workspace  

Step 1: Preparation 

The preparation involves the cleaning of surfaces before the procedure begins (infection control). This is the most paramount step. A bubble or a scratch can be made when there is a speck of grit.  

  • Cool Down: Make sure that the tank is cooled in terms of touching it. The metal can swell when subjected to heat and produce changes in the fit.  
  • Deep Clean: Sprays the inside of the tank using light soapy water, wipes, then dries using a fresh microfiber cloth.  
  • Final Wipe: put isopropyl alcohol to wipe away invisible wax or oil residue. Let it evaporate fully.  
  • Protect Surroundings: Apply masking tape over chrome accents around the place to prevent scratches which may be caused accidentally.  

Step 2: Positioning and Alignment

Take your time. A few extra minutes at this time saves wrinkles at a later stage.  

  • Dry Fit: Peel the cover on the top of the tank, keeping the adhesive or straps intact.  
  • Centre Covers: Get the covers centred so that the hole that holds the fuel cap, the holes where the gauges are, and the badges all lie in line.  
  • Mark with Tape: David, when you are happy with the cover of the tape, use little pieces of masking tape on the sides of the cover to mark the cover. This will determine the ultimate placement.  
  • Heat the Material (where necessary): In the case of vinyl covers, one has to heat them a little by using a hair dryer in order to get them to conform better. Don’t overheat.  

Step 3: Securing the Cover 

This approach is based on the type of cover.  

  • Strap-Style Covers: Keep the straps tight and pull them up slowly on a side-by-side basis. Always maintain straps flat, and do not contact wiring or painted tank surfaces beneath the tank.  
  • Adhesive-Backed Covers: This is a section of the top centre covered with a peeling of backing. Follow masking-tape guides, and press. Step Ellen worked around by peeling off more support with backing and applying a squeegee or microfiber cloth, and pushing out any air bubbles to the centre of the cover and towards the edge.  
  • Bolt-On Covers: Insertions by the use of a screwdriver, then tighten with the correct tool in order to gently fit the cover into place. Do not crimp in a manner that will produce warps or damage in the threads.  

Lastly, ensure that the fuel cap opens easily, and the cover does not obstruct this fuel gauge, as well as your vision.  

In certain respects, tests conducted by the project timeline indicate complete work completion, with the construction field taking the ultimate decisions on the site.

Step 4: Post-Installation Checks 

The tests to be taken by the project timeline show full completion of work on the site, with the ultimate decision made by the construction field.  

It is not over as soon as your cover is on.  

  • Check around the bike: Check to see that there are no air bubbles, folds or wrinkles, or loose edges.  
  • First Ride Inspection: Re-examine all the edges and straps after a brief ride. Loosening of a fresh installation can be caused by vibration.  
  • Cure Time: In the case of adhesive covers, make sure not to wash or reexpose the adhesive for at least 24 hrs so as to ensure complete machine dryness.  

Common Mistakes to Avoid

  • Putting in on a greasy tank, the quickest way to get a bad job.  
  • The cold vinyl that is stretched can crack or peel off with time.  
  • Excessive strapping of the backpack onto the knees or shoulders of the rucksack carrier while carrying some weight in the bag can dent the paint and press components.  
  • Spread the fuel cap thinly, test the block first before laying it out.  

Tips on cover maintenance of tanks  

A little care goes a long way. Wipe your cover with a wet microfiber towel and gently wash it with soap. Clear of rough solvents, scathing cleaners or petrol spills. On leather covers, apply specific conditioner every now and then. Always park where it is shady so as to avoid fading and brittle shapes.  

Why Buy from Aliwheels  

Aliwheels realises the significance of an ideal fit. We provide real-fit gas tank coverings confirmed with our model, such as the Suzuki Boulevard C50. In the case of Aliwheels, where it has customer-proven quality, it is durable and with durability comes a snug, professionally fitted one that lasts long term.  

Conclusion

An appropriate gas tank shielding cover not only adds to the look of your Boulevard C50, but also protects your fine paint job and retains the value and persona of your bike. It is one of the easiest and most efficient upgrades as it requires the right component and proper installation.  

Shop Suzuki Boulevard C50 accessories and more at Aliwheels and ensure that your vehicle continues to appear factory-fresh.

(Commenting: OFF)

One of the most popular additions among riders is the addition of a fender eliminator kit. It replaces the large, standard rear fender with a clean and sportier tailpiece. It immediately personalises the appearance of your motorcycle, sheds it off and even cleans it more easily. Such a journey to a smooth rear end is not always smooth, however. Substandard installation or the bad quality of a kit may lead to a headache of troubles. As the most popular fender eliminator kit issues, this guide identifies them all and offers a logical step-by-step solution. We ensure your upgrade remains not only slick and fashionable, but issue-free.

The Riders prefer using Fender Eliminator Kits

The popularity of a fender eliminator kit is self-evident. It provides a sharper and track-inspired appearance to the motorcycle, which most riders desire. There is more than aesthetic appeal to it. The large plastic fender can be removed, reducing weight and hence taking away a dirt-trap; cleaning the rear wheel and swingarm will become simpler. This modification is very popular among sportbike owners so that they can personalise their machines. Whereas other manufacturers market OEM-type kits, the aftermarket boasts a variety of products with every flavour.

1- Common Loose or Vibrating Mounts

It has been named as one of the most common complaints that the kit does not remain in position. Bolts and brackets also become loose due to road and engine vibrations. Especially when they were not correctly torqued during the fitting process.

  • Symptoms: You will hear some continuous rattling or buzzing in the back of the motorcycle. The number plate or indicators could appear out of line or shake violently.
  • Hazards: When the mount is terribly loose, it is likely to plummet off the number plate (at worst, leading to stress fractures in the subframe where it is fitted).

2- Problems with Electrical Turn Signals

A large number of installations are also changing or redistributing the turn signals, which are also where electrical issues tend to occur, particularly when a modern LED unit is involved.

  • Hyper-flashing: This is the most prevalent problem; the turn signals usually flash at a higher rate than usual. LED lamps consume less energy than standard incandescent bulbs, fooling the motorcycle flasher relay into thinking there is a broken bulb.
  • Wiring and grounding: Flawed splicing or wrong connection to earth may create lit lights that may never turn on or flicker, or may turn on only occasionally.

3- Number Plate Visibility Issues

The primary legal purpose of the rear fender is to allow the number plate being able to be positioned in a visible and lit spot. This can be easily violated by a poorly designed or poorly adjusted fender pilot kit.

  • Non-compliance with the law: Law enforcers insist that the number plate should not be in a way that makes it difficult to see, or it must begin with a white light during the night. This has some kits making the plate too high, too steep in an angle, or just not giving the required illumination.
  • Fines: This attracts police fines and an automatic fail in a MOT check, making a simple act of styling a vehicle worth a fortune.

4- Added Mud and Water Splash

These stock fenders prevent a massive amount of road spray. The outcome of any effort to eliminate it without a backup plan is messy.

  •  Rider discomfort: During wet conditions, water, mud, as well as grime behind the tyre are directly sprayed onto your back and the back of the motorcycle.
  • Accelerated wear: The rear shock, linkage and other components are frequently sprayed with corrosive dirt, increasing wear and tear.

5- Materials of Inadequate Quality and Fitment

Not every kit is made the same way. A very affordable, bad-quality fender eliminator kit can look good in a picture online, but it can be a nightmare to install.

  • Problem with durability: Low-grade aluminium or plastic that is used to make kits rust, crack or bend under force. The hardware provided is typically of low quality and can malfunction or fail.
  •  Long-run costs: The ill-fitting kit will really strain the mounting positions, and since the product only lives a short life, you will need another one shortly, taking away whatever savings you might get initially.

Troubleshooting and Fixes

  1. Fixing Loose Mounts: Use precise techniques. Use thread-locking material on every screw. Screw on all the fasteners using a torque wrench to the required specification. To provide additional damping of the vibration between the kit and where it should be mounted. Add rubber washers or grommets between the thermostat and the mounting points.
  1. Solving Electrical Issues: In the case of inherent to hyper-flashing, a patch is easy. Either add load resistors in parallel with the new LED turn signals, or even better, upgrade to an electronic LED-compatible flasher relay. Always tidy up your solder, and put heat-shrink tubing over all your wire connections. Ensure that the earth wire connects to a clean, bare metal surface on the frame.
  1. Ensuring Plate Visibility and Legality: All in all, to install the plate, verify your locals on where the plate is mounted, and the lights. In case the kit does not have a special LED plate light, add one. Slide the bracket and get the plate standing straight up, and with the whole plate in view. It is safer and lawful to be safe than to be content with a fine.
  1. Running Mud and Water Splash: Complementary modifications are good to consider, provided you are riding in all weather. Minimise the amount of spray in a rear tyre by adding a rear tyre “hugger”. Even simply an extension of a fairly universal mudguard, which will not spoil the sleek appearance of the eliminator kit.
  1. Avoiding Quality Issues: Make a quality investment in the beginning. Quality brands utilise stainless steel or T6 aluminium, which are not prone to corrosion, are strong and lightweight. They also provide clear directions and quality hardware to fit absolute perfection.

Conclusion

An eliminator kit in a fender on a motorcycle is a great personalisation tool. To install it successfully, one needs a lot more than simply screwing in new bits. With knowledge of pitfalls: loose mounts, electrical errors, and failure to abide by the rules of law, you may prevent these pitfalls.

(Commenting: OFF)

Or login with your social account