
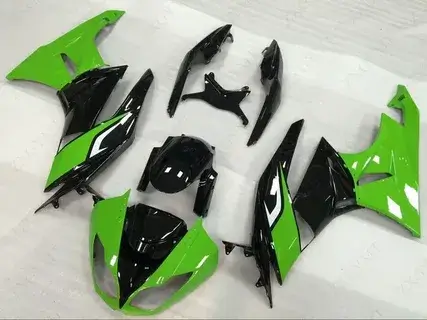
Aftermarket fairings are a popular choice for motorcycle enthusiasts who want to replace damaged OEM fairings, customize the look of their bikes, or improve aerodynamics. These aftermarket options are often more affordable than original manufacturer parts and come in a variety of designs and colors. However, one of the most common complaints riders face when installing aftermarket motorcycle fairings is improper fitment. Many expect a direct bolt-on replacement, only to find that the panels don’t align correctly, leave noticeable gaps, or require modifications.
If you’ve experienced this issue, don’t worry—you’re not alone. In this guide, we’ll explore why aftermarket fairings don’t always fit properly and how to adjust them to ensure a secure and professional-looking installation.

Common Reasons Aftermarket Fairings Don’t Fit
Before making adjustments, it’s crucial to understand why the fairings might not fit as expected. Here are the most common reasons:
1. Manufacturing Differences Between OEM and Aftermarket Fairings
Original Equipment Manufacturer (OEM) fairings are designed specifically for a motorcycle model and undergo strict quality control. In contrast, aftermarket fairings are produced by third-party manufacturers, sometimes with minor deviations from the original specifications.
Even small changes in mold designs, hole placements, or panel angles can lead to poor fitment. Since some aftermarket companies try to make fairings compatible with multiple models, the lack of precision can cause misalignment.
2. Material Differences Affecting Flexibility
Most OEM fairings are made from high-quality ABS plastic that offers durability and a flexible fit. Some aftermarket fairings, however, are made from cheaper plastic, fiberglass, or carbon fiber, which can be more rigid.
- Fiberglass and carbon fiber fairings can be stiffer and harder to adjust during installation.
- Lower-quality plastics may be more brittle, making them prone to cracking when forced into place.
3. Low-Quality or Incorrect Mounting Hardware
Aftermarket fairing kits often come with generic mounting hardware, which may not match the exact specifications of the original parts. Low-quality screws, clips, or brackets can prevent proper alignment, causing gaps or misfits.
If the original rubber grommets or metal clips aren’t included in the kit, it’s a good idea to reuse your OEM hardware to ensure a snug and secure fit.
4. Warping Due to Shipping and Storage Conditions
Plastic fairings can warp due to:
- Exposure to heat or cold during shipping.
- Pressure from improper packaging distorts the shape.
- Long-term storage in a bent position before installation.
Warped fairings may appear to be misaligned when installed, but with a few simple adjustments, they can often be reshaped for a better fit.
5. Model Compatibility Issues
Some aftermarket fairings are marketed as “universal fit” but may not precisely match your motorcycle’s year and model. Even if the fairing kit is labeled for your specific bike, slight variations in manufacturing may require trimming or drilling for proper fitment.
How to Adjust Aftermarket Fairings for a Perfect Fit
If your new fairings don’t fit properly out of the box, don’t panic. Here are several proven techniques for adjusting them and achieving a secure and flush fit.
1. Pre-Fit All Fairings Before Installation
One of the biggest mistakes riders make is immediately bolting on the fairings without test-fitting them first. Instead, follow these steps:
- Loosely position all fairing pieces on your bike without fully tightening the bolts.
- Check for misalignment and mark areas that need adjusting.
- Make adjustments before permanently securing the panels to avoid forcing them into place.
2. Use a Heat Gun to Reshape Warped Panels
If your fairings are slightly warped due to shipping or storage, applying gentle heat can help restore their shape:
- Use a heat gun or hairdryer to warm the affected area.
- Apply even heat and avoid overheating, which can cause damage.
- Once the plastic becomes pliable, gently bend or mold it into the correct shape.
- Hold it in place until it cools and hardens.
This method is particularly useful for tight-fitting areas like the front cowl or side fairings.
3. Upgrade Your Mounting Hardware
Low-quality hardware can make installation more difficult. Consider upgrading to:
- OEM fasteners, clips, and grommets for a more secure fit.
- Well-threaded stainless-steel bolts that won’t strip or loosen easily.
- Rubber washers to reduce vibrations and help align fairings better.
Using high-quality hardware can significantly improve the final fit and finish.
4. Modify Mounting Holes for Better Alignment
If the pre-drilled holes don’t align properly, you can make minor adjustments:
- Use a rotary tool or small drill bit to widen the hole slightly.
- Carefully file edges to improve alignment without over-enlarging the hole.
- Always make small modifications and test-fit before making larger changes.
Avoid drilling unnecessary holes, as this can weaken the fairing’s structure.
5. Adjust Frame Brackets and Alignment
Sometimes, poor fitment isn’t caused by the fairings themselves but rather frame misalignment due to:
- Previous crashes or drops that slightly bent the mounting points.
- Improper installation of existing fairings is causing mounting brackets to shift.
If the frame is off by even a few millimeters, fairings may not align correctly. Have a professional mechanic inspect and realign the frame if necessary.
6. Use Double-Sided Foam Tape for Minor Gaps
If small gaps remain between fairing panels, double-sided foam tape can help create a flush fit by:
- Filling minor spaces while keeping panels in place.
- Reducing vibrations and rattling at high speeds.
- Preventing water and dirt from entering small openings.
This is a simple and inexpensive way to enhance fitment without modifying the fairings.

Conclusion
Installing aftermarket fairings can be an affordable way to customize your motorcycle, but poor fitment is a common challenge. Understanding the manufacturing differences, material limitations, and hardware issues can help you anticipate and solve these problems.
By pre-fitting your motorcycle fairings, using heat adjustments, upgrading hardware, making minor modifications, and ensuring frame alignment, you can achieve a perfect fit and a professional installation.
If you’re looking for more motorcycle tips and high-quality accessories, contact us at AliWheels!