The fairings of your motorcycle are not simply its body panels, but very important components of its design, aerodynamics and brand. You may want to give your bike the perkiness of a different fairing kit after a full season of bike riding. In any case, swapping a motorcycle fairings kit is a satisfying assignment to undertake right in your own garage.
In this blog, we will take you step-by-step through the process, with a special emphasis on being accurate.
Step 1: Prepare the Tools and Materials.
The first step to an effective installation is being prepared. You would not want to consider halfway through the process and then think that you forgot a very important tool.
Here’s what to get ready:
- Screwdrivers: Flathead and Phillips.
- Allen keys or hex bits: needed with most fairing bolts.
- Ratchet set: To cut and fasten nuts.
- Soft cloths or towels: To prevent scratches on the surfaces of a painting.
- Containers or zip bags: These items will be used to store and process all the bolts that you take off.
Step 2: Remove the Old Fairings
It is a sensitive process that is done over time. Begin by finding all the bolts and screws that are visible on the fairing panels you are replacing.
- Record the details: Before you begin, and after each piece of your bike is removed, snap photos of your bike in various positions. This is a priceless visual record so that there is no confusion about where each part is.
- Sort your hardware: When you freakin’ take off every bolt, bag it in a labelled bag. This makes things nice so that you never lose any parts.
- Stay careful: A great deal of fairings have clips or interlocked tabs. Avoid pulling or yanking. With a light, wiggling movement, in most cases, it is necessary to get a panel free.
Step 3: Look Behind the Curtain
Depending on how old the fairings are, a user goes off with a faulty frame and components without the old fairings being in place, leaving the opportunity to examine your motorcycle a perfect chance.
- Finger examination: Inspect occasionally broken mounting tabs, loose wires or brackets that are aged. It is hard to say how much easier it is to repair these blunders despicably easily today when the new fairings are in place.
- Clean the surface: Wipe the frame to clear it of any accumulating dust, oil and a dirty appearance. By providing a clean surface, it also fits a lot better and leaves a more professional surface.
- Check frame bolts: Check exposed frame bolts to ensure they are firmly attached.
Step 4: Test Fit the New Kit
Do not go directly to the ultimate installation. A test fit is important in ensuring that there is no problem with the new fairings.
Flatten the panels: Up to this point, all the panels must be carefully placed against the frame to ensure that the mounting holes are in place and that the edges of the panels lie flat with the rest of the areas.
Minor modifications: Sometimes, fairing kits need small modifications. Some might require that all you do is cut a little tab or lightly sand an edge in order to fit in perfectly.
If you rush this step, it may result in a misaligned or even worse final product. Be very gentle when you have all the panels in place.
Step 5: Screw in the New Fairings
Now for the transformation. Begin with the biggest and most central of the panels, and go outward at both ends.
- Install the screws and bolts first: Attach all screws and bolts with your hands before applying your tools. It eliminates cross-threading and allows you to fit the fit.
- Sectional work: When all the panels are called in, start tightening the bolts evenly. Reverse and repeat work on the various bolts, so that they seem to have the same pressure throughout and take a smooth fit.
- Keep centred: Make sure, as you lay each panel in place, that it fits into place with the old ones. When you have attached the last bolt, the new appearance of your motorcycle will be complete.
Step 6: FINAL inspection and test ride
Check as you work is the final guideline, since you need to scrutinise your work and ensure all is right before you get to the road.
Cleaning: Wipe the new fairings with a microfiber cloth, removing any physical evidence on it.
Tap on the stability: Tapping is necessary to ensure that there are no loose factions or attacks.
Clearance: Swivel the handlebars on their side and test the suspension to confirm that the new fairings are not in touch with it.
After every piece is in place, you can try a little short ride on the bike to ensure that the new fairings are in place, given the road conditions.
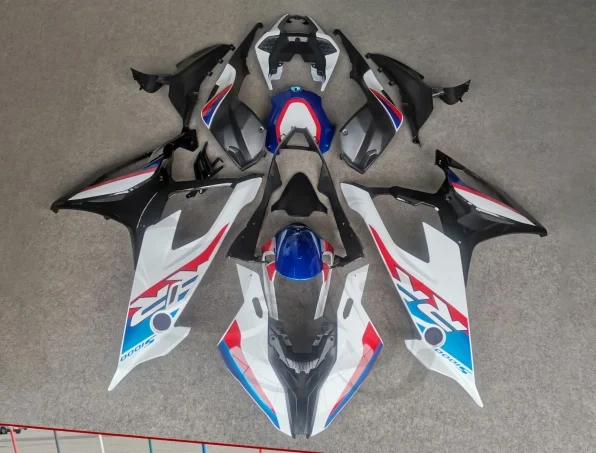
Locating the Perfect Fairing Kit
Here, dozens of riders need guidance. Your fairing kit design will determine the way the whole job is done as well as the outcome. The substandard kit may be attractive in the photo; however, it would turn into a nightmare to assemble, and it would not last a long time on the road.
The trick is having a credible source. We have witnessed the constant plethora of choices on the internet, and sometimes it is difficult to be polite about whom you talk to. Find out sites specialising in motorcycle clothing that are reliable. The online stores, such as Aliwheels, enter here. We do the vetting of suppliers and remove the guesswork from the equation, allowing you to work on the enjoyable part, which is assigning your bike a new identity.

Conclusion
Replacing the fairing kit on your motorcycle is a satisfying exercise which puts the entire power of aesthetic choice at your disposal. A quality kit will give a hassle-free installation and a long life expectancy.
This is the only way to make your projects work out: get your tools ready, record your disassembling process and test-fit all the components first, then install everything on the final. After a little bit of patience, you will be able to upgrade your motorbike to a professional level and make an impression on the road.